Mail: [email protected]
Phone: +1(424)231-4091
Everything you need to know about NexoPOS.
CRUD is a software architectural style regarding the four basic operations of persistent storage (Create, Read, Update, Delete). This is a shortcut for being able to manipulate data. NexoPOS comes with built-in functionalities that help you create CRUD components.
Before proceeding with this guide, we believe you already know how to :
These are required to understand what will follow throughout this guide.
While creating a Crud component, NexoPOS will create a class that extends a base Crud service. This latest is responsible for creating Raw SQL queries to the database and sometimes uses the provided model when it's necessary. While generating, NexoPOS will parse the table (if that exists) and create the columns for the table and the forms. Later after the generation, you can customize your Crud component by restricting certain features, changing the column labels, mutating post and put data, and many more.
To generate a Crud component, we need to use the CLI. NexoPOS has a command that helps to generate a Crud component for a module in no time. We'll use the following command :
php artisan make:crud {identifier}Where {identifier} is replaced by your actual module identifier (namespace). If the identifier is omitted, the Crud component will be created for NexoPOS so within the "app/Crud" folder.
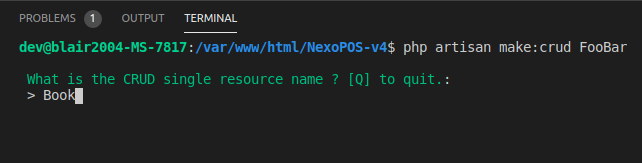
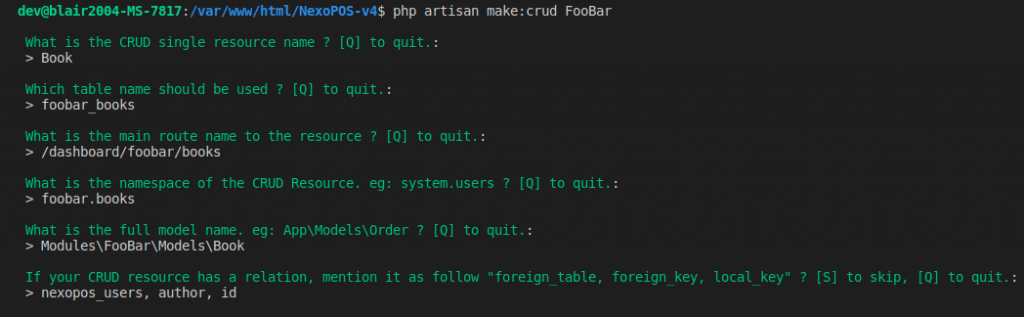
Once the process launched, you'll be asked some questions to craft your Crud component :
The single resource name describes how a single entity of your crud component is called. For example, if you create a Crud component for Books, the single resource name will be "Book".
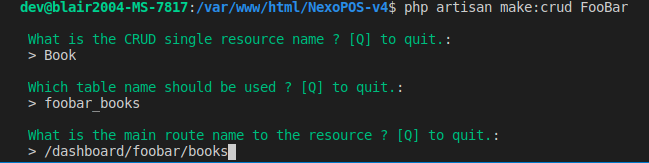
Every crud component needs a table where it operates. Here you're asked to provide a name for your table. You should have created that table using the migration guide.
This is the relative path that takes to the tables. It should be relative to the domain root. In our case, we would like our Books to be accessible at /dashboard/foobar/books. So that's the main route we'll use.
We should also make sure to have created such routes within our module routes.
Crud identifier helps NexoPOS to be aware of the resource and to know how to make it available when it's requested. While creating the Crud component, you'll be asked to provide a unique identifier name. Note that all NexoPOS are prefixed with "ns." so this is a reserved prefix. For our current example, our Crud component identifier can be :
foobar.books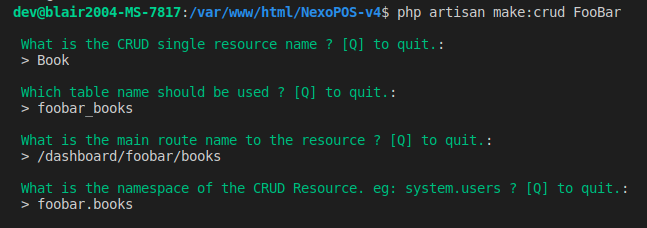
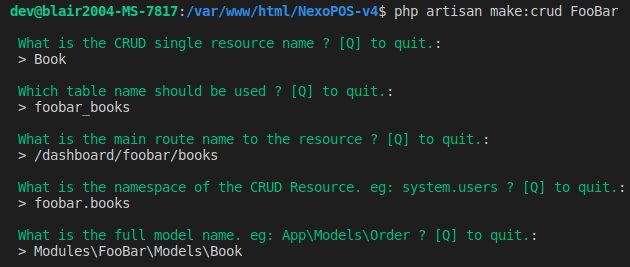
You should create a model for your module within the "Models" folder. That model name (including namespace) should be provided as a value for the model. Assuming our model "Book" is available under the following namespace "Modules\FooBar\Models\Book", that's the value we'll provide.
While creating a model, please make sure it extends the class NsModel instead of the default Laravel model. The reason for this is to ensure your module is compatible with the multistore module. If that's not something you plan, you can use the default Laravel model.
If your module has a relationship with an external module, you can define that relationship while generating your Crud component. The relations require you to provide (in this order separated with coma) :
You can define further relations, once you're done type "S" to skip that section.
While inserting or updating an entry, these columns will explicitly only be filled and the other will be ignored. Here you can define the columns separated with a comma. If you don't want to add that restriction, you can type "S" to skip.
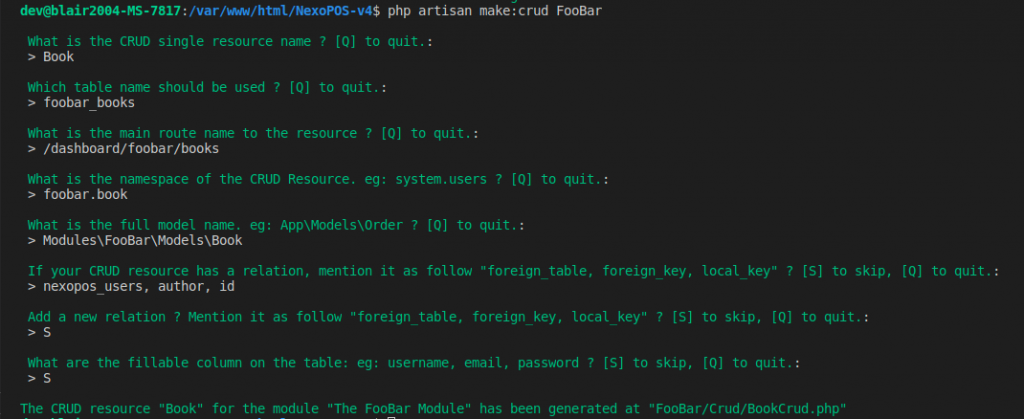
After this, the file will be generated within your module.
For NexoPOS to be aware of the crud component that has just been created, we need to register it. Register crud implies adding your Crud to the stack of registered crud. That will be made using the hook within your service provider's "register" method, with the following identifier :
The callback that we can use can point to a separate file or to the same class. Let's use a method of the same class to register our Crud component.
While checking if our crud identifier is provided, if there is not a march it's required to return the identifier as it was provided on a parameter. This might be the identifier of another Crud created by another module and not returning the identifier will break the Crud stack.
Note that what is performed is mainly for the frontend library (Vue). Now we need to create a route and render either the table or the form.
We first need to create a route and use a controller (or create a new one) for our crud instance. In our example, we'll create a route that looks like this.
Now we need to update the method "bookList" on the controller we've selected for this route. Within the method, we'll just return the output of the static method table like this.
The method "table" accepts an array that lets you customize the table. For example, here is the list of supported indexes for your array :
You can render 2 types of form: a form used while creating a new entry and a form used while editing an existing entry. This section focuses on how to create a form that is used to create an entry. Same as displaying a table, here you'll need to create a route that takes to the form. We'll use the following route configuration :
Here, we'll use the slug: /dashboard/foobar/books/create, but it can end with whatever you want (new, add, etc.). On the createBook method, we'll use the Crud instance and use his static method "form" to return a form like this :
A form for performing a modifying entry is a little bit different than the form used for creating an entry. Here, while creating a route to the controller method that will handle that we'll pass a route parameter that is the identifier of the entry or it can also be a model binding. Now while using the "form" method, we need to pass the model that is the entry itself. Here is how we'll proceed first regarding the route.
Now within the "editBook" method, we'll bind the book and pass that to the "form" method of BookCrud like so :
When an is not provided the "form" method assigns "null" by default for the first parameter. On the second parameter, an array to configure the form. Here are the supported indexes for the configuration array.
These parameters are also effective while using the "form" method without an entry provided, but there you'll need to pass as value for the first parameter "null".
return BookCrud::form( null, $config );Or you can use named parameters like this:
return BookCrud::form(
    config: $config
);