Mail: [email protected]
Phone: +1(424)231-4091
Deploy NexoPOS in 1 minute for free. No credit card required. Deploy Now
Deploy Now
Everything you need to know about NexoPOS.
NexoPOS 4.x aims to be as extendable as NexoPOS 3.x was. Built using Laravel, the module system has been taken a step further. Modules don't only provide new features, but can completely change the entire system behavior. There are few locations where to download NexoPOS 4.x modules, you should always be sure you're downloading from a safe location.
A Special note needs to be reminded, regarding NexoPOS 3.x modules. While NexoPOS 4.x and 3.x modules have the same signature, they aren't compatible. Gastro 2.x from NexoPOS 3.x won't work on NexoPOS 4.x, that's the case for all the NexoPOS 3.x modules available on CodeCanyon.
NexoPOS 4.x modules are available as a .zip file. Usually, the name of the zip includes the version, but not necessarily. Once you got the module to upload, head to the modules. Note that only a user with sufficient permissions can install a module.
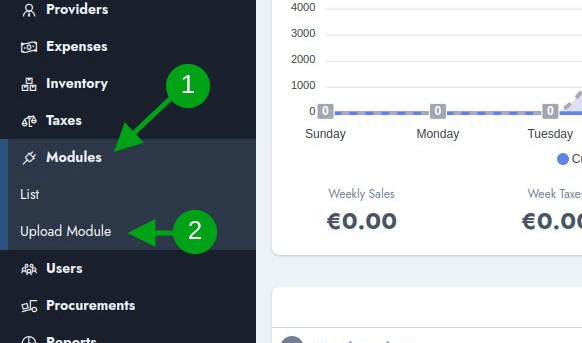
Right from the dashboard, you can access the "Upload Module" section where you'll be invited to provide your zip file.
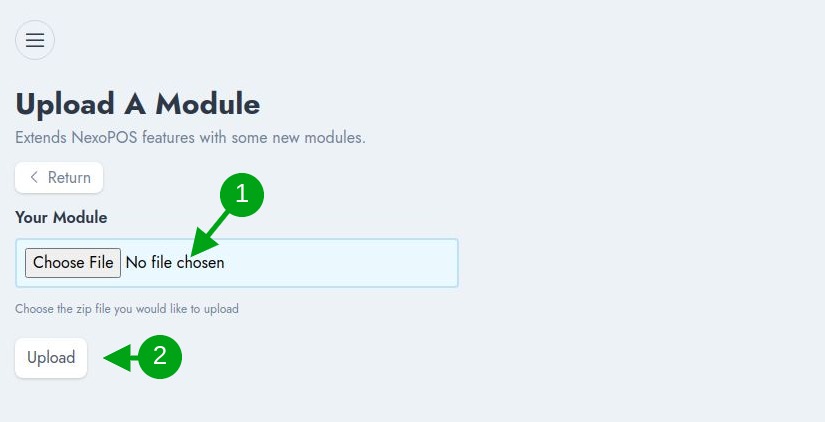
First, select the file then click on "Upload". If the module is compatible and supported, you'll be redirected to the module list.
From the modules list, you can "Enable" a module (2). This usually turns into "Disable" when a module is already enabled. The second section (1) contains buttons that let you :

From there, the module should be successfully installed.