Documentation
Everything you need to know about NexoPOS.

Using Accounting
A business is not only made of sales but also expenses. To be able to find out if your business is profitable, you need to know if based on your income and expenses, you're head is above the water. This guide will describe everything you need to understand to use the accounting on NexoPOS.
Requirements
The accounting feature requires having NexoPOS properly configured. If you have set "supervisor" as a manager for asynchronous operations, you need to keep it running. This means, that if you're having the following notification, you should make sure to fix that beforehand.

Working Principle
To use accounting properly, you need to understand how every aspect works. We've made the UI straightforward for anyone to use, so the complicated accounting becomes uncomplicated. For that, NexoPOS comes with a default chart of accounts that can be adjusted as per your needs.
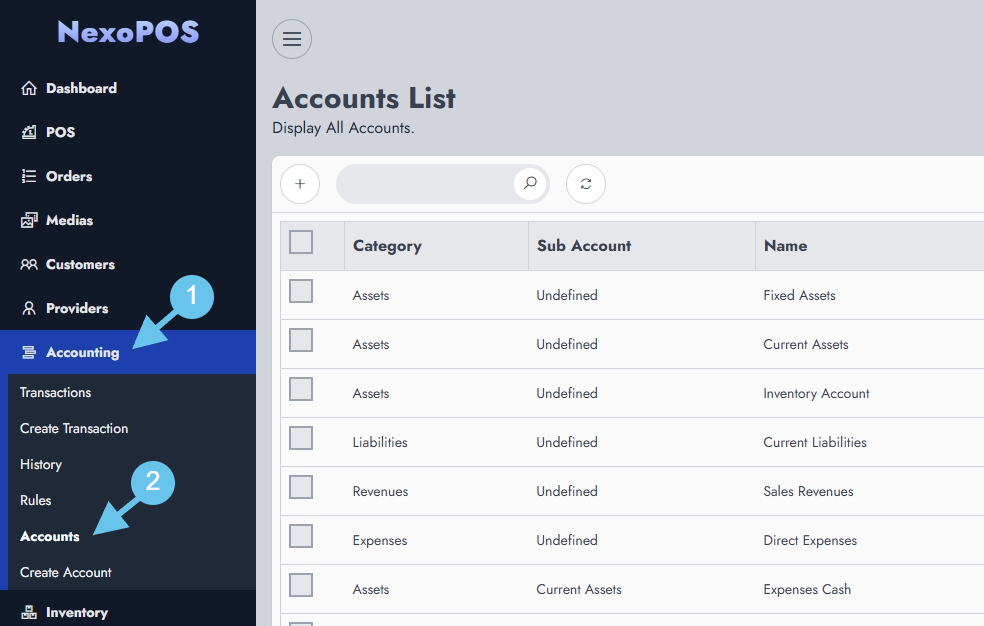
The accounts are organized in top categories such as Assets, Liability, Equity, Expenses, and Revenues. These top categories can't be changed and are configured by default on the system. Each top category has subcategories which are listed on the accounts menu.

Those top categories also have subcategories. We have here a 3-level hierarchy. Those accounts here can be adjusted as per the user's needs.
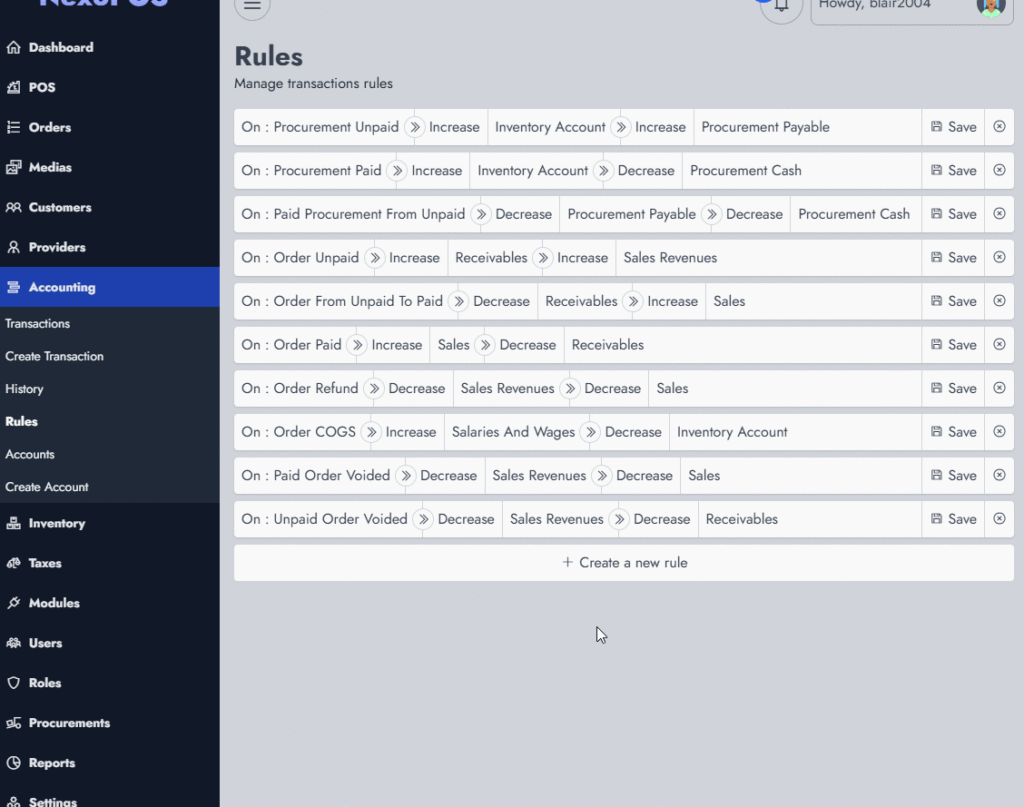
For NexoPOS to interact with these accounts, we have a set of rules. Which links an action (e.g. a sale) to either a credit or debit transaction of the account defined on the ruleset. The accounting rules define which account is credited and which offset account is debited (or vice-versa) to ensure a good double-bookkeeping record.

For a better illustration, when you have an unpaid procurement, that will increase both the Inventory Account and the Payable Account. Remember that in accounting, an increase of Asset causes a debit transaction and an increase of Liability causes a credit transaction.
To make things easier for you, you won't have to worry about that as it's configured by default. And if you misconfigure anything, you can revert the default configuration by heading to the accounting settings.

Beware, that this will erase every transaction and account. You might consider performing a backup before doing this.
Supported Actions For Rules
Here is a list of actions that are likely going to generate accounting records.

Here is how a typical rule registration works. By the end, to make it effective, you'll need to click on "Save". Additionally, you should carefully check you don't have a duplicate rule, as this will cause duplicate records on the transactions.

Transaction History
The transaction history keeps a log of transactions that have occurred after rule conditions have been met and triggered. From here, you'll see the double bookkeeping in action, the main account, subaccount, and operation involved.

Manual Expenses
The manual transaction or more accurately expenses are those not resulting from a core action (e.g. procurement), but as defined by the user either directly or indirectly (scheduled, recurring, direct). NexoPOS gives you a way to create therefore expenses that can either be:
- direct (applies directly and is available in the transaction history)
- scheduled (will be triggered at a specific date/time)
- salary (can be linked to the users' group and is multiplied by the users available on the group and it's recurring)
- recurring fixed expenses (that occur based on a specific condition repeatedly)
These transactions need you to define under which account it's registered. You might learn here how to work with expenses.
