Mail: [email protected]
Phone: +1(424)231-4091
Deploy NexoPOS in 1 minute for free. No credit card required. Deploy Now
Deploy Now
Everything you need to know about NexoPOS.
While configuring a plugin on NexoPOS 4.x it might happen that a misconfiguration looks you out from accessing the dashboard. When this happen, using the login page is no use to access the dashboard, that's why you might need to disable the module that locked you out in order to login to perform a better configuration.
This situation might happen if you're using the Google reCaptcha module and don't provide valid client key and secret to use the reCaptcha service.
This guide will then explain how you can disable a module on NexoPOS 4.x without having access to the dashboard.
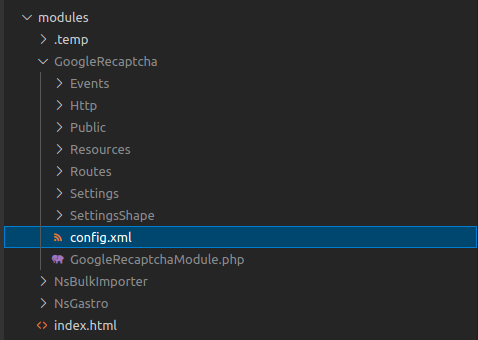
The first thing to do is to retreive the "namespace" or unique identifier of the module in order to disable that. We'll then open the config.xml of the module by browsing all the folders available within the "modules" directory.

In our current situation, we would like to disable the module "GoogleRecaptcha" so we'll open the config.xml within that folder, to make sure that's the module we want to disable.
The config.xml file is the identification file for the module. This is internally used by NexoPOS 4.x to be aware of the module. Within that file we can find a XML document that describe the module by defining :
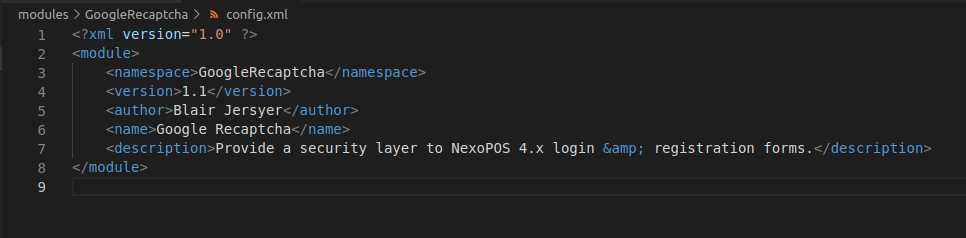
In our situation, when we're sure the module is Google ReCaptcha, we can copy the value of the "namespace" tag. In our case, it's "GoogleRecaptcha". Now, we'll log in to PhpMyAdmin.
For disabling a module, we need to access the database manager. We've mentioned PhpMyAdmin here, but it can by any database manager. The following screenshot will apply to PhpMyAdmin.
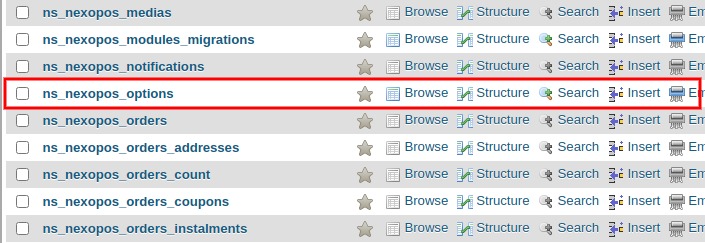
The first thing is to open the database (you can retrieve the database name using the .env file). Once we've opened the database, we'll then access the "nexopos_options" table. Usually, you need to prefix the term "nexopos_options" with your actual table prefix (by default it's "ns_"). So in our case, we'll be looking for a file with the name "ns_nexopos_options".
The options have a key-value pair organization. The "key" column stands for an option "key" while the "value" stands for the option "value". We'll be looking for a key having "enabled_modules".
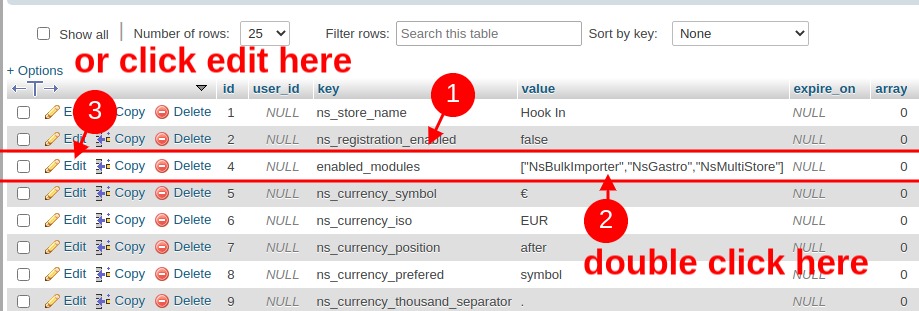
The value of that key is a javascript array (sometimes it might be an object). In case it's an array, we need to search for a value that matches the module namespace we've copied earlier. For instance, if the value looks like this.
[ "NsGastro", "NsMutiStore", "GoogleReCaptcha" ]Then we need to delete the value "GoogleRecaptcha" as that matches the module namespace we're looking for. We should also delete the trailing comma so that we have the following value.
[ "NsGastro", "NsMultiStore" ]You should note that if instead, you want to disable all the modules, you can delete the entry having for key "enabled_modules".
It should be all, you've successfully disabled a module on NexoPOS 4.x without having access to the dashboard.