Mail: [email protected]
Phone: +1(424)231-4091
Deploy NexoPOS in 1 minute for free. No credit card required. Deploy Now
Deploy Now
Everything you need to know about NexoPOS.
Laragon creates a virtual server on Windows 10. What makes this application special is the support of the Laravel application and virtual domain. Since NexoPOS 4.x is based on Laravel, it's, therefore, one of the best ways to use NexoPOS on Windows. This tutorial will therefore cover everything you need to know to install NexoPOS 4.x on Windows 10 using Laragon.
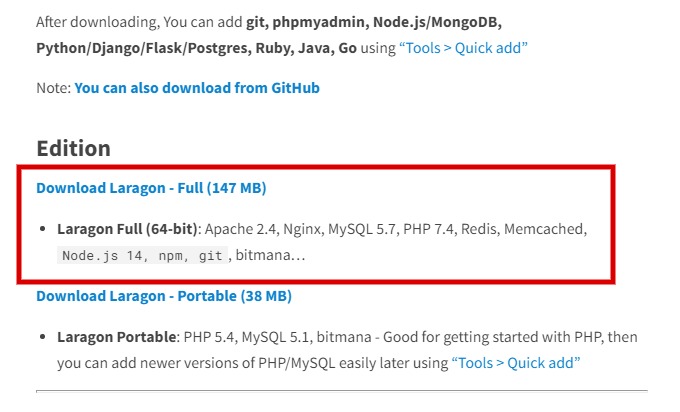
The installation of Laragon is pretty simple. You need to head to their website and get the binary to install. You're invited to download the full installer having at least PHP 7.4. But in our case, we need to make sure to install PHP 8.0 as it's a requirement for NexoPOS 4.7.x. Learn here how to add PHP 8.0 to Laragon.
Once you've downloaded, the setup process is common to any windows application.
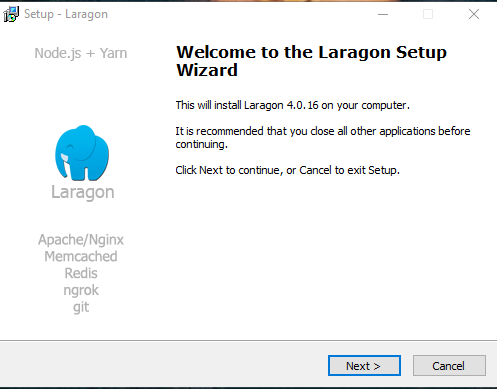
You just have to follow the steps to completely install the application. Once the application is installed, we'll now proceed by downloading NexoPOS. Make sure to remember the folder where you've installed Laragon.
If you want to know how to download NexoPOS, please refer to the guide we've written about. Make sure however to skip the part of installing NodeJS modules and building assets.
Now that we've downloaded the project, we'll copy the project to the folder "www" within the folder where Laragon is installed. Make sure to unzip the zip file and you should have a folder having a name like "NexoPOS-4x-4.7.x" or "NexoPOS-4x-4.7.3" (if you downloaded a specific version). You should rename to have a unique name with no dots preferably as that name will be used for the virtual domain.
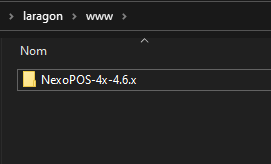
For this tutorial, we'll rename that folder "nexopos" and so, using Laragon virtual domain, we should be able to access our installation from https://nexopos.test, because "test" is the default domain extension on Laragon.
As you might have seen on the guide that shows how to download NexoPOS 4.x, we need to download and install Composer Packages. You'll need to open the terminal at the root of NexoPOS and run the following command :
composer install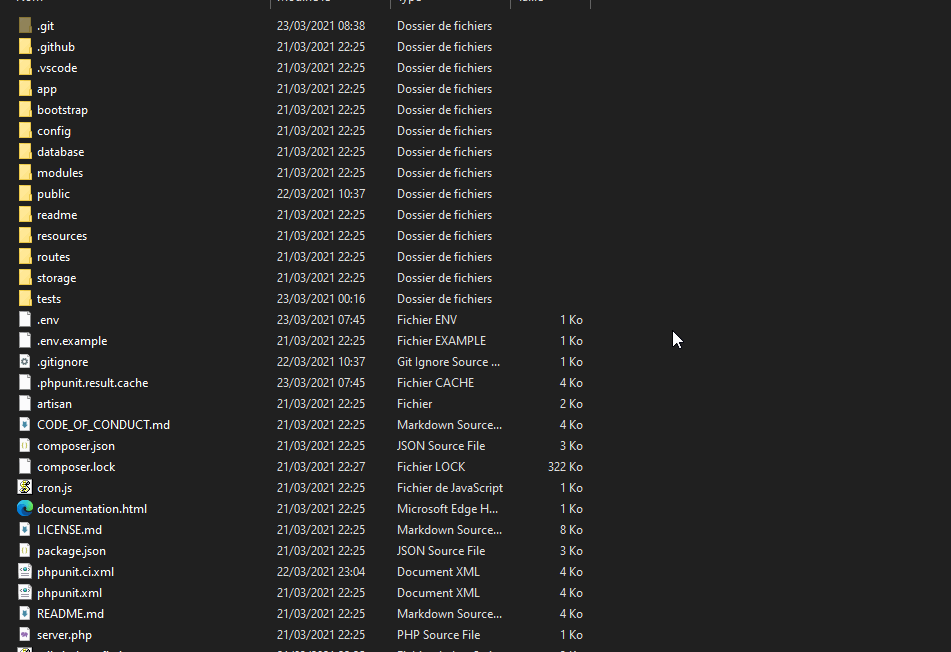
Once the packages are installed, you need to run the following commands.
If the .env file is missing, you need to create a file based on the existing .env.example.
cp .env.example .envNow, let's generate an application key :
php artisan key:generateThen, let's create a symlink to the storage directory :
php artisan storage:linkWe're now ready to install NexoPOS 4.x on the database. But before, let's make sure to reload Laragon configuration so that the virtual domain is updated.
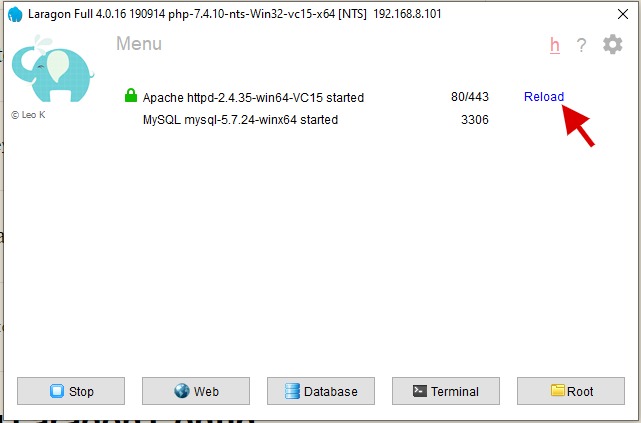
Now, from Laragon menu, we should be able to access to our project "nexopos.test".
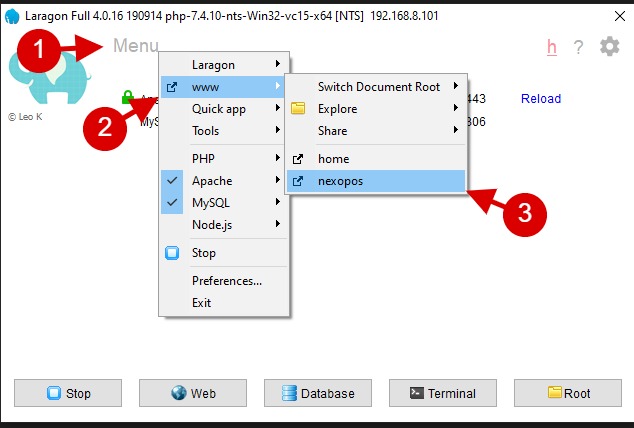
We're clicking on "nexopos" because that's the name of the folder where we've installed NexoPOS 4.x. This should open the default browser at the welcome page of NexoPOS 4.x.
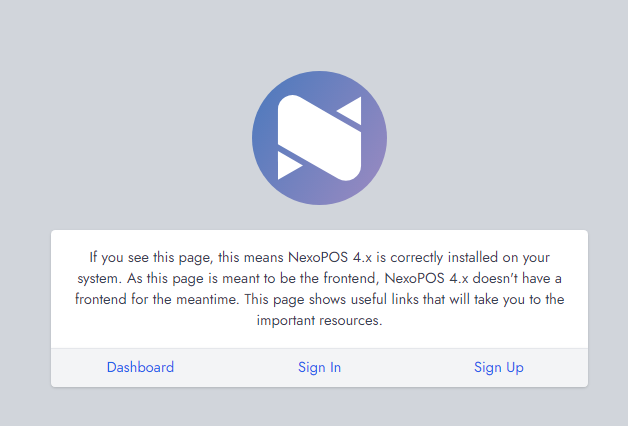
From here, whatever the link you click on, you'll head to the installation page.
Before proceeding to the installation, you'll need to create a database on Laragon. From Laragon dashboard, click on "Database".

This will open "HeidiSQL" which is the database manager provided by Laragon. For some installation, it can also open PHPMyAdmin instead depending on your configuration.
We'll assume you have HeidiSQL opened on your end. Now, we'll create a session and then open the session.
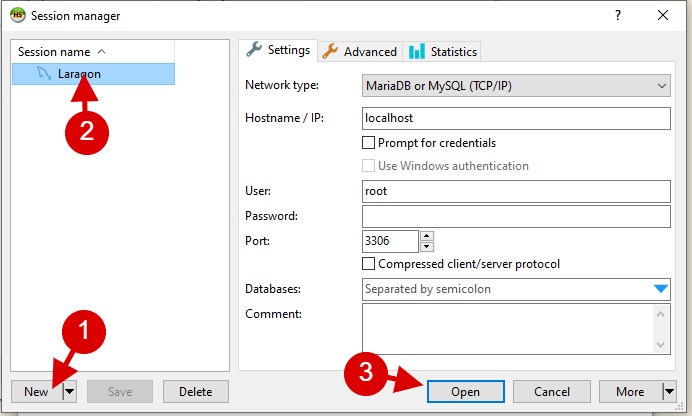
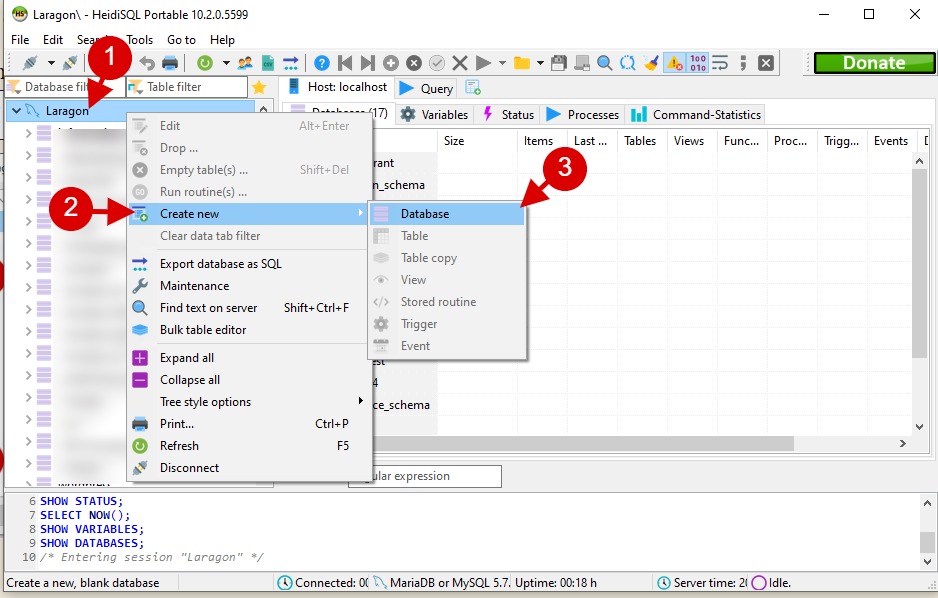
Now, we need to click on the name of the session "Laragon > Create New > Database".
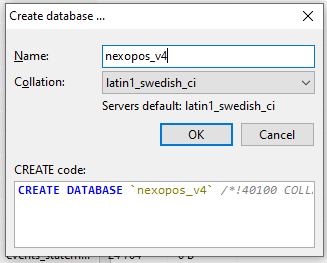
Provide whatever name you want. In our case, we'll create the database "nexopos_v4" and that's what we'll use during the installation.
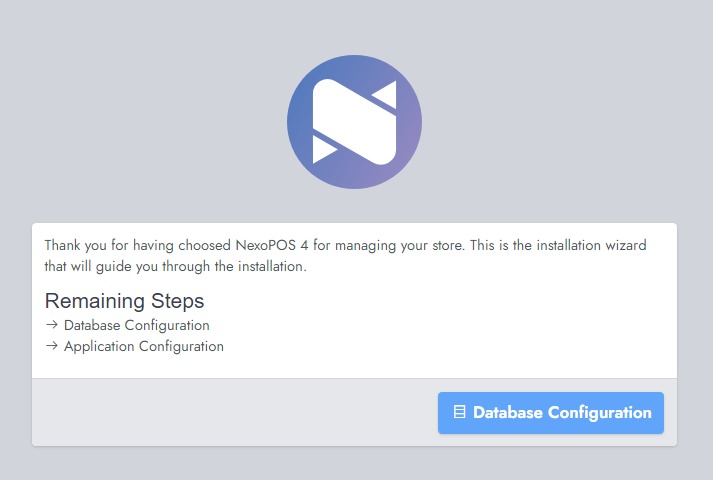
Let's now head back to the installation wizard where we'll have to provide the database credentials. You should click on the "Database Configuration".
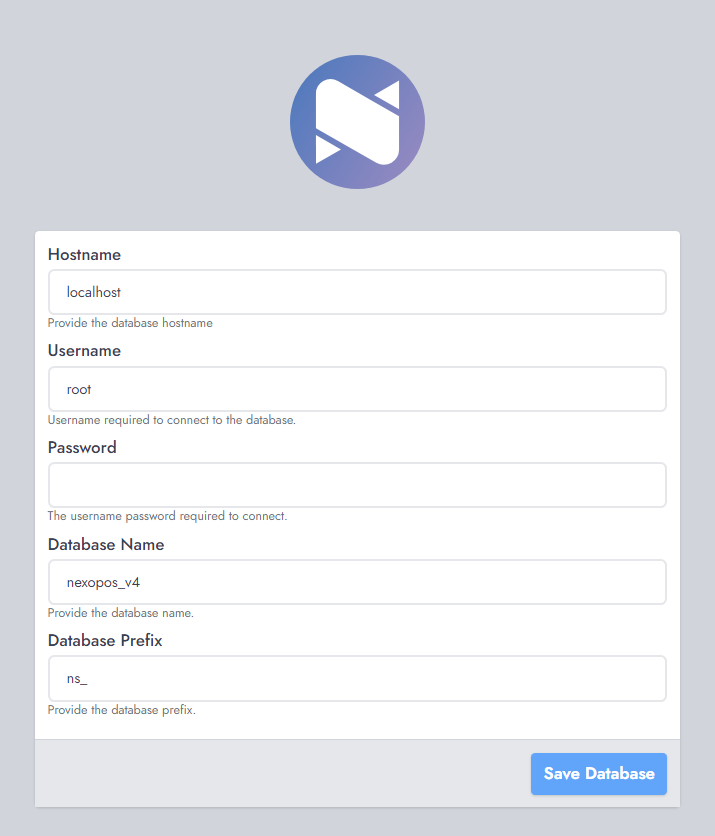
By default, only the database name will have to be changed if you don't use "nexopos_v4". The username and the password are usually: "root" and nothing for the password. But if you have set different credentials, you should replace the default values on that form.
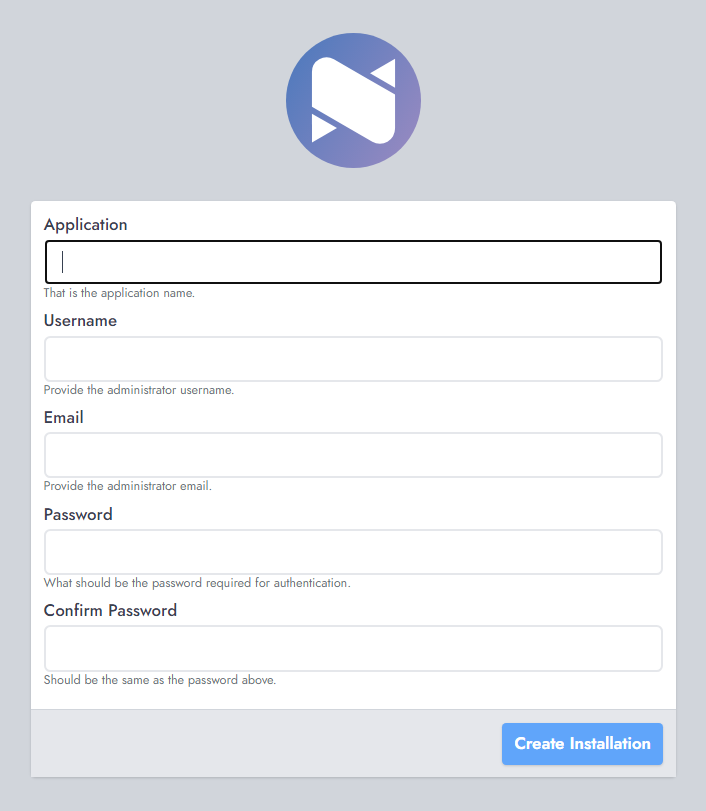
After the database configuration, if everything is valid, you should land on the application configuration. This is where you define the application name and the administrator username and password.
Once you've set all the fields, click on "Create Installation". The installation process should take some time as it's from here the table will be created on the database. If you have a slow PC, you might consider increasing PHP execution time from the php.ini file within /laragon/bin/php/php.ini.
Normally it should be okay and you'll land on the login page.
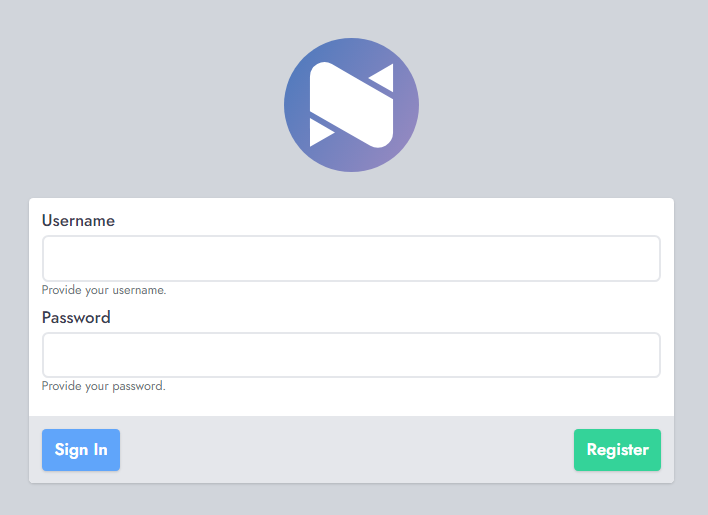
If you see this that means you've successfully installed NexoPOS 4.x. You might now need to know how to download extensions for NexoPOS to enhance your experience with NexoPOS.
For some reason, according to your environment, you might face some issues logging in. Here is the list of topics you might explore to solve those problems:
If none of the above points doesn't help, you can post your issue on Github or if you have a valid NexoPOS 4.x license, let us know for VIP support at [email protected].