Mail: [email protected]
Phone: +1(424)231-4091
Deploy NexoPOS in 1 minute for free. No credit card required. Deploy Now
Deploy Now
Everything you need to know about NexoPOS.
If you reached this page, it means you've successfully installed NexoPOS on your environment. Now we'll guide you through the installation page and cover the basic troubleshooting.
The welcome page is the main page you access once NexoPOS is accessible. The address that takes you to this page depends on the configuration you had while creating the environment. This page just shows the different steps you can go through in order to install NexoPOS.
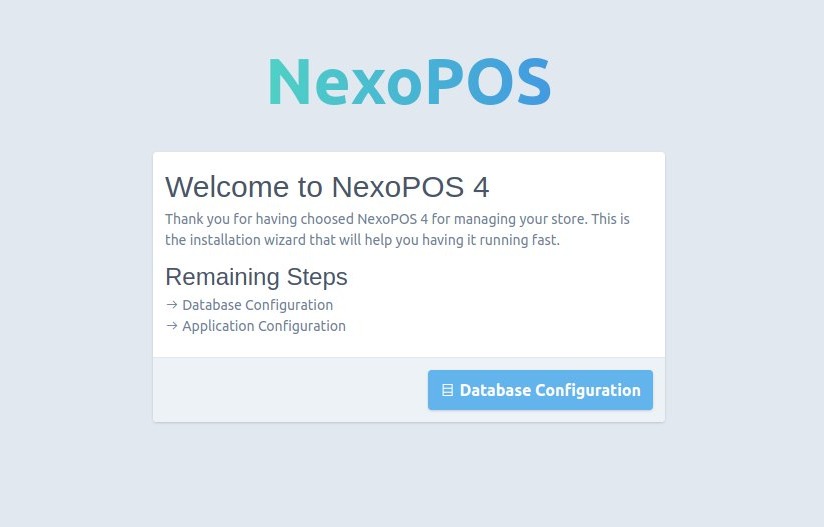
The only significant action to perform is to click on Database Configuration, which is the next step.
Before defining the database configuration, the database must exist and the user assigned to that database must be able to create, and drop tables along with manipulate data (select, update, delete). The .env file available on the project (or created while installing NexoPOS), should be writable by the PHP process. Typically, you'll need to use 640 as file permission. The storage folder (storage/logs) should also be writable by the PHP process.
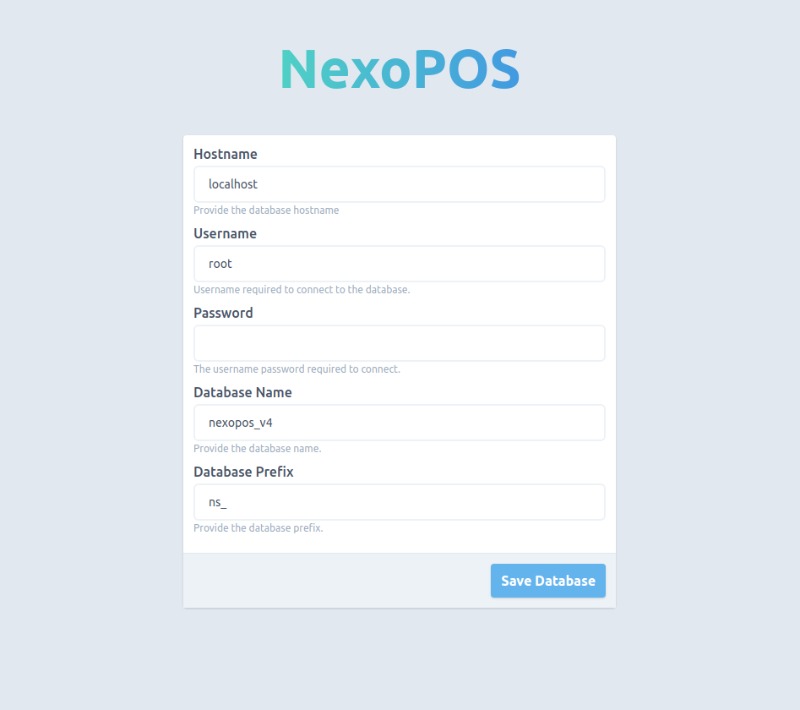
Here, the database configuration consists of providing all the required information to ensure NexoPOS can connect to your database. Once set, you need to click on "Save Database".
This is the last step of this installation wizard. It's the place where must be set the application's name and the master account credentials. Once the step is processed, the .env file will change in a way to prevent this wizard to run once again.
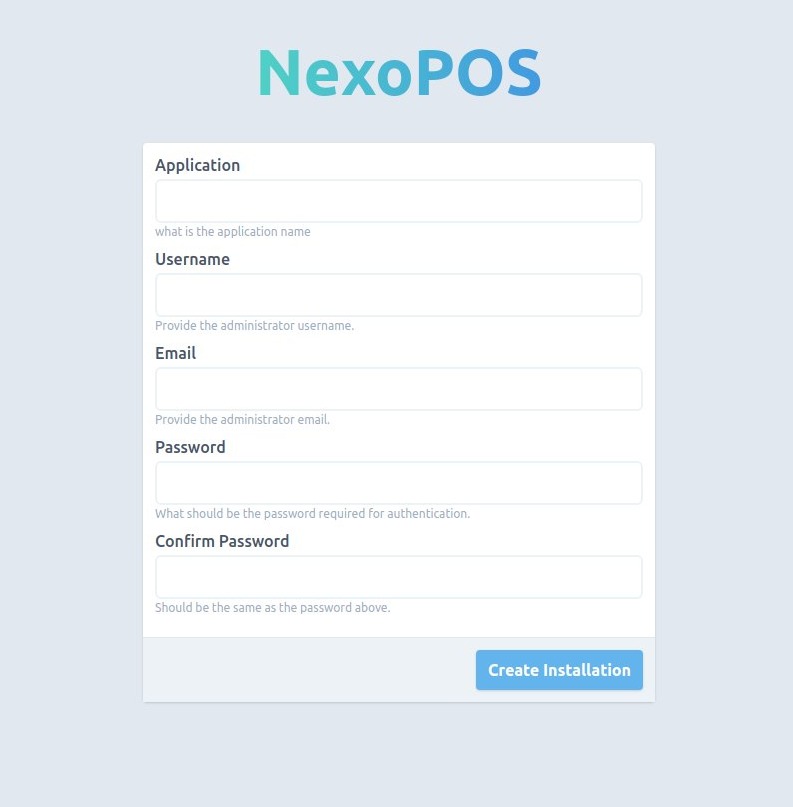
Once filled, click on "Create Installation" to complete the installation. This should take you to the login page once it's installed.
The database migration ensures the database schema is up to date with the application's files. It's an automated page that doesn't require user action (the process shouldn\'t be stopped, however).
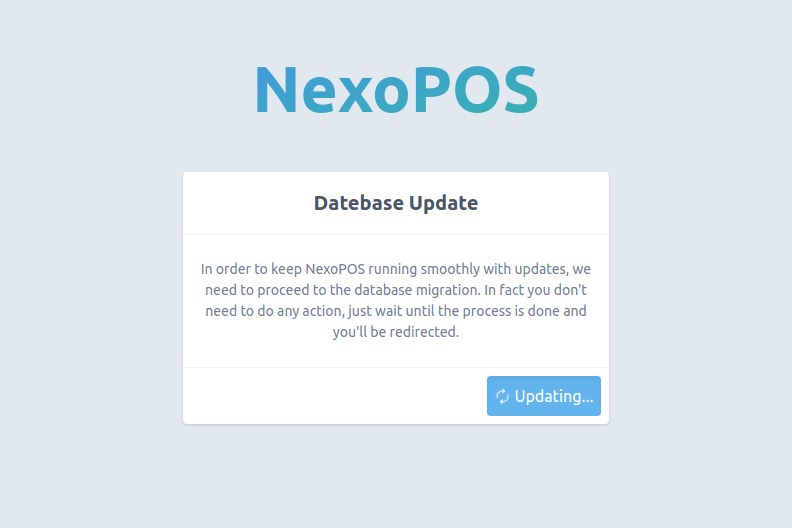
As this page is automated, you'll be redirected to the page you intended to reach or the previous page you was.
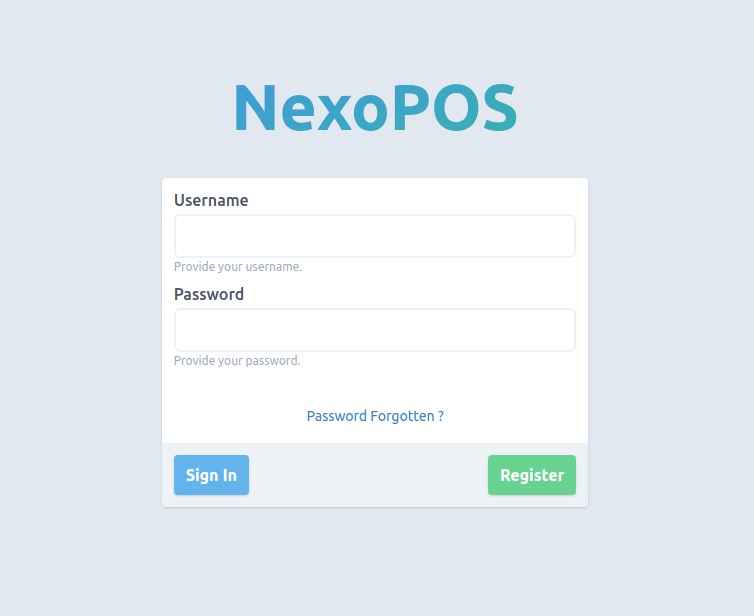
When you access the login page, you've successfully installed NexoPOS. You can now log in using the credentials you've provided during the installation.
Here is the issue that might occur while you're doing or after the installation.
It looks like this issue occurs when the user (in the case of Linux) that runs run the server (either apache or Laravel built-in server), doesn't have enough permission over the project. In fact, if you're using Ubuntu (or any other Linux distro), you'll need to give the right to the current logged user if you're using "php artisan serve" or to the user that executes apache (or Nginx).
sudo chown user:root . -RThis happens when the system is unable to decrypt encrypted information. The quick workaround for this is to run :
php artisan key:generateIf the issue persists, consider clearing your cookies.
If this error occurs, it might be related to your domain not matching the information provided on the .env file. Once again, please make sure the "SESSION_DOMAIN" and "APP_URL" match your actual domain name. If you have installed NexoPOS locally, make sure it matches the local name (either 127.0.0.1, localhost, ::1).
APP_URL=http://127.0.0.1
SESSION_DOMAIN=127.0.0.1
As not all environments are similar, you might face an issue during the process. You're invited to let us know via the repository.