Documentation
Everything you need to know about NexoPOS.

Role & Permissions
A role allows to group users sharing the same attributes. This is frequently used for granting certain permission to users who can perform the same task or permissions. While it's possible to create roles from NexoPOS 4.x dashboard, it's still possible to create Role programmatically.
Creating A New Role
In order to create a new role, we'll use the App\Models\Role model that is available on NexoPOS 4.x. Typically we'll proceed that way :
One created, the "$role" variable is an instance of the "Role" class so it can be used to update or delete the role.
Get A Role By Namespace
The namespace attribute helps to fetch a role using a defined expression. Note that namespaces are mean to not have special characters or spaces to ease recognition by other developers (that's a convention). On the previous example, we've created a role with "super-agent" as the name space. Here is how we'll retrieve that role.
Create A Permission
Permission gives a special capability to the role on which it's attached. Permission might then be attached to many roles at the same time. Concretely, Permission should be used to allow or not access to a feature. It can be used to restrict users from deleting an order or accessing sensitive information. Unlike Roles, Permission isn't created from NexoPOS 4.x dashboard, but instead programmatically.
Sa as any Laravel Model, it can be deleted using the "delete" method (once retrieved).
Give/Remove Permission To A Role
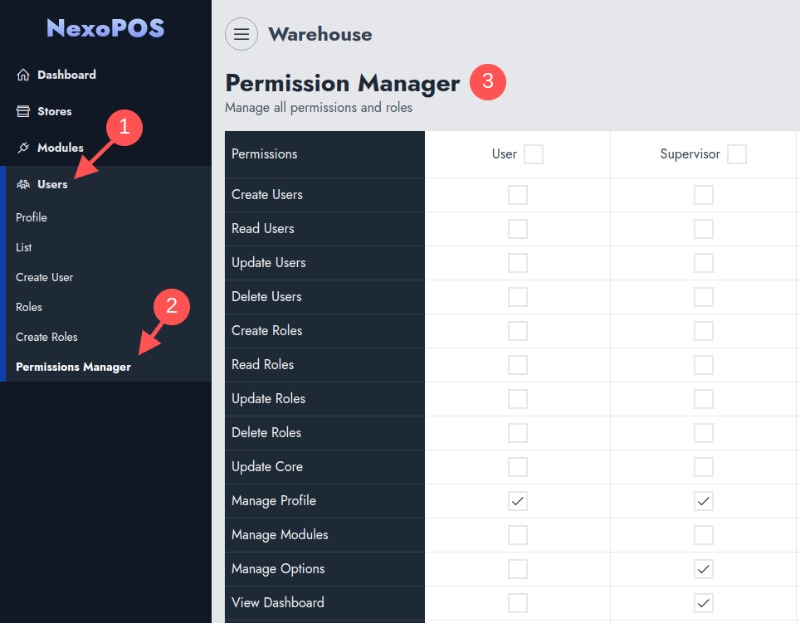
A role without permission cannot do anything. We, therefore, need to give permission to a role so that I can perform the specific action we've explicitly granted. It's also possible to give permission to a role from NexoPOS 4.x dashboard.

Programmatically, you'll proceed like so :
The "addPermissions" methods accept String (permission namespace), Array, and Collection of "Permission" instances. For removing permission you'll use the "removePermissions" method that accepts the same parameters.
