Mail: [email protected]
Phone: +1(424)231-4091
Deploy NexoPOS in 1 minute for free. No credit card required. Deploy Now
Deploy Now
Everything you need to know about NexoPOS.
Every application that needs to use My NexoPOS API, needs to priorly create a "client". Here a client stands for an application that communicates with My NexoPOS using the REST API. The process of creating a client is required for everyone that is using our solutions (NexoPOS 4.x with his modules & NexoPOS 3.x with his modules).
This guide will show you how to create a client how to save his private key.
First of all, head to your account and then click on "Clients" tab.
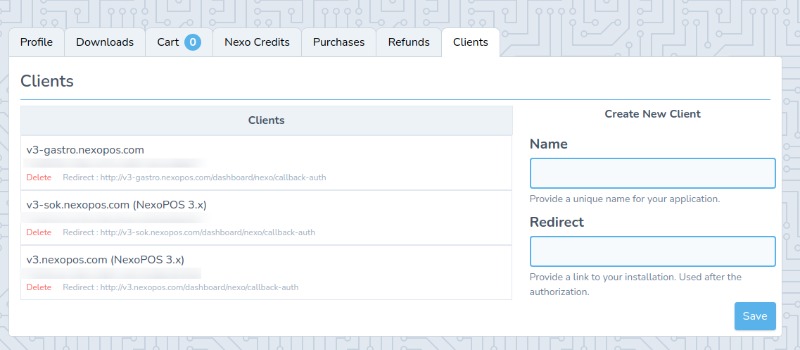
This is a screen that shows all the clients available and a form to create new clients.
On the "Create New Client" form, you need to provide a unique name that helps you to identify the application that uses those keys. You also need to mention the "Redirect" URL which is the URL used by My NexoPOS to send a confirmation to your application every time to approve the access to your My NexoPOS account. The Redirect URL might be different considering the application that needs to use it :
For NexoPOS 3.x, your redirect URL should be : Your URL to the root + "/dashboard/nexo/callback-auth". Assuming the URL to access NexoPOS 3.x is "http://yourwebsite.com/pos", then the final URL will be http://yourwebsite.com/pos/dashboard/nexo/callback-auth". This step is important and required to validate your installation.
Once you're done, click on "Save". This will create your client and a new section will appear on top, showing your client ID and client secret. You can choose to download that key using the "Download" button.

Once saved, you'll need to upload the exact same file (without changing anything including the file name) to the root of your application (NexoPOS 4.x or NexoPOS 3.x).
That's all you need to do to create a client on My NexoPOS.