Mail: [email protected]
Phone: +1(424)231-4091
Deploy NexoPOS in 1 minute for free. No credit card required. Deploy Now
Deploy Now
Everything you need to know about NexoPOS.
Many servers out there are using the cPanel to host and manage their application. It's therefore normal some of you need to know how to install NexoPOS 4.x from the cPanel. The Good news is, that it's actually possible however, you'll still need to deal with the terminal.
This tutorial will cover how you can install NexoPOS 4.x from the cPanel, but before we'll consider what are the requirements.
One of the first requirements is to be able to execute commands from the terminal option which must be available on your system. We should also remind you that NexoPOS 4.x is not recommended for shared hosting. While you no longer need to build the assets as it's already included, to install PHP dependencies using composer, you should have at least a VPS with 1GB of Ram. Additionally, you should also be comfortable using the terminal. By default, Composer is already installed on your cPanel, but if it's not, you won't be able to proceed.
Regarding your environment, you must be running PHP 8.0 either as the version attached to the domain where NexoPOS 4.x will be executed and also as the default version of the CLI (unless you use the path to PHP 8.0 to execute composer with).
Unless you would like to edit the source code of NexoPOS 4.x it's not recommended to install NexoPOS on a subdirectory. The reason for this is because the root folder of NexoPOS is not used to deploy the project, however, your Document Root should point to the folder "public" within NexoPOS 4.x.
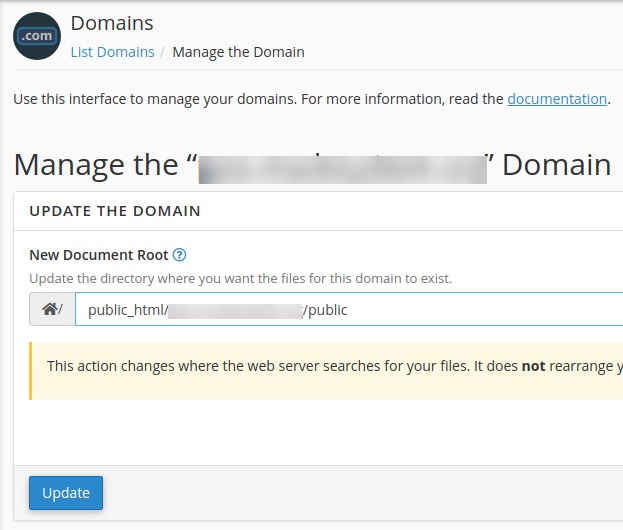
This means that if NexoPOS is installed on a subdirectory, by default your .env file might be exposed (a file that contains sensitive information). You're therefore invited to install NexoPOS on a subdomain or a domain instead. So, before proceeding, make sure you've created a domain and set the "Document Root" to the folder "public". The final path of the Document Root might look like this :
"public_html/yoursubdomain/public"
There are two places where you can download NexoPOS 4.x :
While both versions are pretty much the same, there is a huge difference with the services that are offered with one or another. Also make sure to read our terms of use to understand better how it works.
If you purchase a license of NexoPOS on CodeCanyon, you're eligible to download extensions here on our marketplace, you'll also receive $40 as a credit bonus to spend on our marketplace and our team is available to help you out no matter the issue you're facing using NexoPOS 4.x.
Those downloading NexoPOS 4.x can't purchase extensions and cannot receive support from us. These users are likely to be developers or comfortable with Laravel development.
In both cases, you'll have a zip file that you'll need to upload on the directory where NexoPOS should be installed. In this tutorial, we'll be using Github as a source, and download a specific version from the terminal.
We'll convert both situations either by downloading on CodeCanyon or on Github using the terminal.
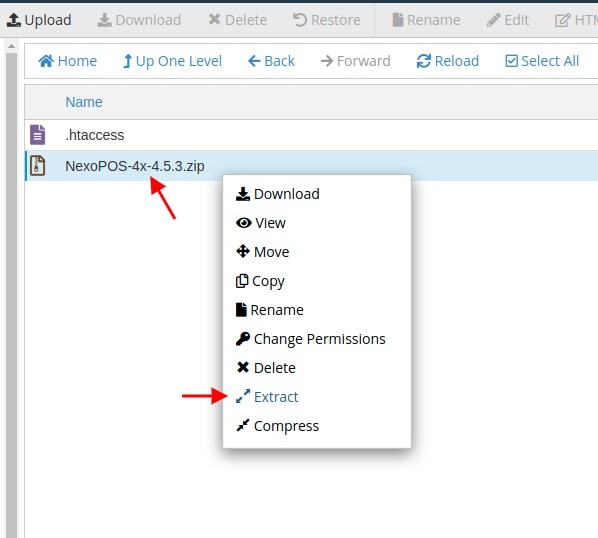
If you've downloaded from CodeCanyon, you need to upload and unzip the file on the directory where it should be installed from the file manager.
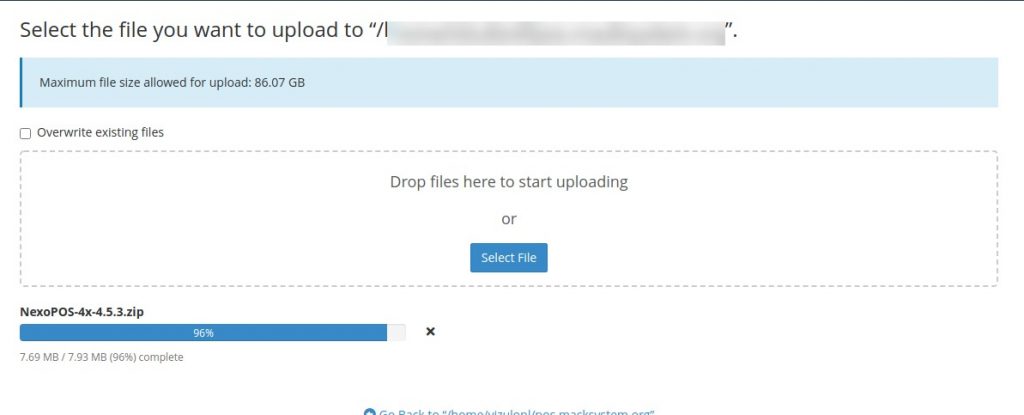
And from the directory, you'll need to extract the files. That will create a folder "NexoPOS-4x-4.5.3".
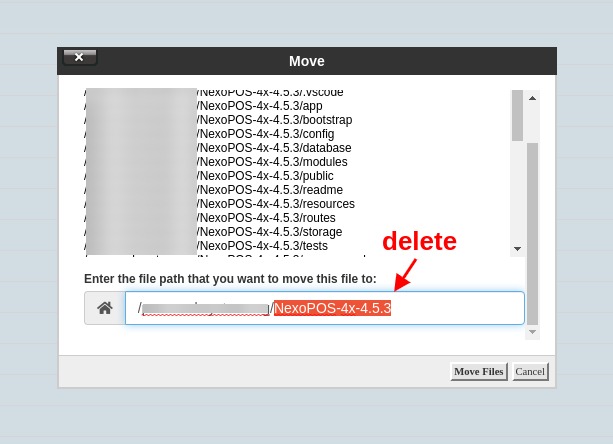
Now we need to move the content of that folder to the actual document. If we have to type instructions on the terminal, that will be :
But you can also proceed from the cPanel by moving the file like so.
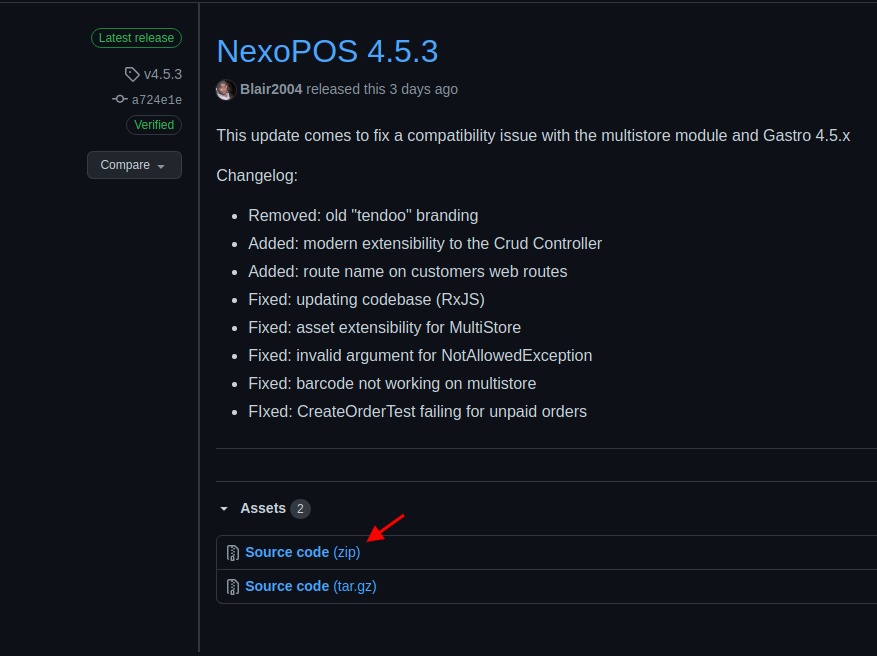
You'll need to head to the release and target the version you would like to download. Then copy the download link.
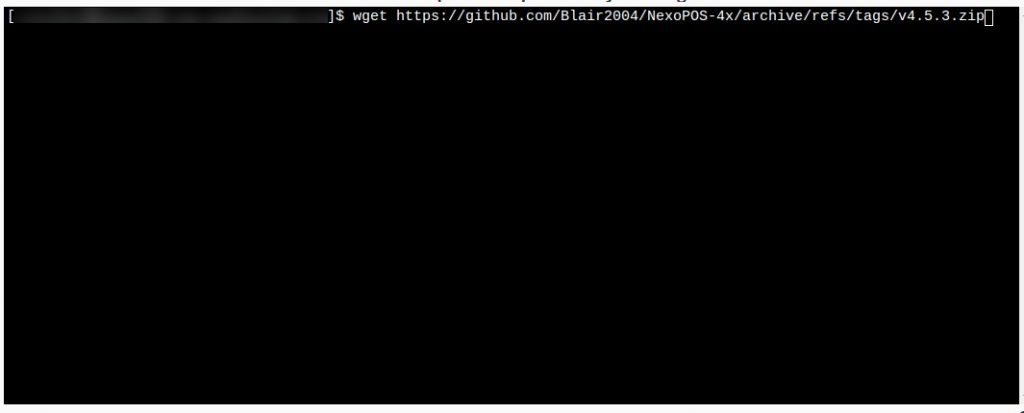
We'll now proceed from the terminal by opening the directory where you want to install and run the following command :
wget https://github.com/Blair2004/NexoPOS-4x/archive/refs/tags/v4.7.3.zipNote that here, we're downloading version 4.7.3 from Github.
Now we'll need to unzip the file by running the command
unzip v4.7.3.zipAfter unzipping, all the content will be within a folder "NexoPOS-4x-4.5.3", we'll then copy that content to the current directory.
cp NexoPOS-4x-4.7.3/* . -rRegardless of what you choose to download NexoPOS, you'll need to use the terminal to download the dependencies.
We'll start by creating a .env file based on the .env.example file that already exists. You can then create a copy of that .env.example from the file manager or use the command :
cp .env.example .envThen we'll install Laravel packages using the command "composer install".
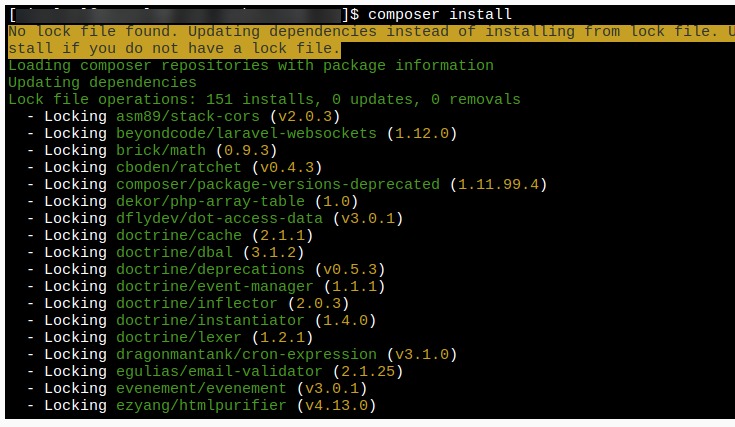
Right after, we need to create a link with the store like that.
php artisan storage:linkAnd we need to generate a key using the command:
php artisan key:generate
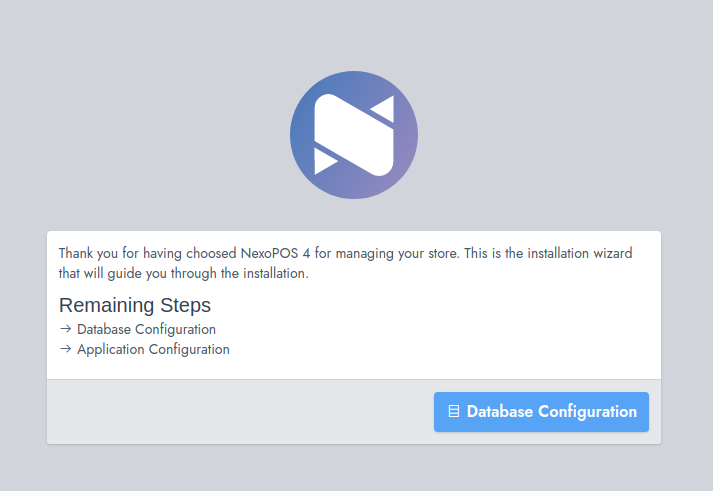
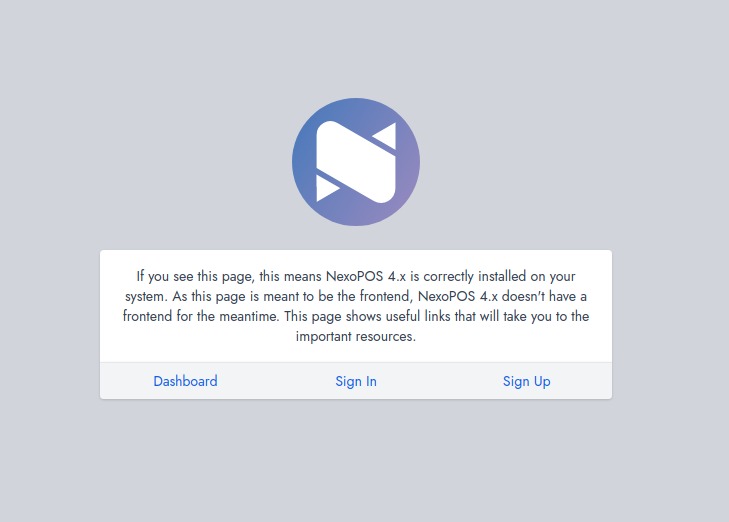
From now, when we access our subdomain online, we should see the welcome page.
We now need to create a database on the cPanel to proceed. If you don't know how to do that, you'll need to read this guide.
Now, you can proceed to install NexoPOS as we've shared that explains the steps of the installation wizard.