Documentation
Everything you need to know about NexoPOS.

Expenses
Expenses are part of business life. As it's true these expenses can be categorized, it's truer that these need to be recorded. NexoPOS offers a way to create expenses that might be adjusted in various ways to ease their management. There are many types of expenses on NexoPOS :
- Direct Expenses
- Recurring Expenses
- Entity Expenses
- Scheduled Expenses
We'll elaborate on each different type.
Where To Create Expenses
Like any accounting component, expenses are available under the menu "Accounting." To create a new expense, click on "Create Expense."

By clicking on this, you should head to a new page where you can select your expense type.

We'll try to convert each expense type and explain how it works.
Direct Expense
A direct expense takes effect immediately, as soon as I've enabled the switch "Active" to "Yes". This type of expense is useful for unexpected and random expenses.

Recurring Expense
A recurring expense is likely to be reproduced continuously based on your configuration. To avoid entering known and predictable expenses every time, you'll use it to ease things up.

Now this expense comes with a new tab named "Condition". On this, you'll define how frequently the expense will be triggered. Here are the options you have:
- First and Last day of the month
- By Minutes (every 60 minutes)
- By Hours (each 6hours)
- By Days (each 2 days)
- Start of Month
- Mid of Month
- End of Month
- Specific day of the month (each 10th of the month)
- X Days after the month starts
- X Days before the month ends

Entity Expenses (formerly Salary Expenses)
A recurring expense is a perfect match to apply on salary however, salary might vary according to the number of employees a store has. Setting a fixed value doesn't apply as it will force updates for a new employee or those leaving. With the Entity Expense, you'll have the expense value multiplied by the total users assigned to the user role you select.

Let's consider that we have users in the "Waiter" role, and each waiter's monthly salary is $1,500 (for example). If that group has 10 users, the total value of the expense will be 1500 x 10 = $15,000. Note that Entity Expenses are also recurring.
Scheduled Expenses
These are direct expenses that will be triggered at a specific later date. It works as direct expenses, except that you'll need to specify when it will trigger.

Working With Accounting
While creating the expense, you can choose which account will be used to classify the expense. That will be very useful to have a better overview of your activity.

Before you create an expense, you might be redirected to the settings page where you'll have to define the allowed accounts and the offset account for each expense.

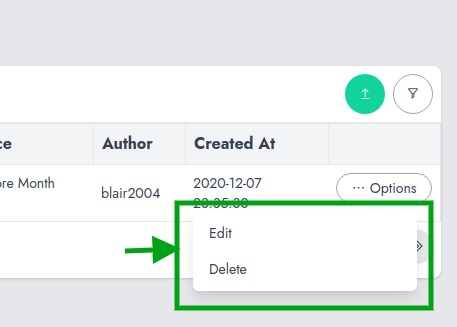
Once created, you're redirected to the expenses list, where you can see all expenses that have been created so far. As this table is an abstract table component, every entry provides action for Editing and deleting.

The Expenses created aren't what is used to compute the monthly expenses. Editing an expense cannot change the amount of the expenses that have already been computed, but upcoming expenses (in the case of recurring expenses).
