Documentation
Everything you need to know about NexoPOS.

Orders With Instalments
Not all your customers will pay for your orders at once. To ease everything for them, you need to offer a solution that allows an order to be paid on installment. On NexoPOS 4.x, that feature is also named "layaway". This tutorial will then focus on how to create an order paid on installment on NexoPOS 4.x.
Configuring Installment Settings
One of the first things that we need to verify is whether or not NexoPOS 4.x allows installment orders. To verify that, we need to head to the orders settings.
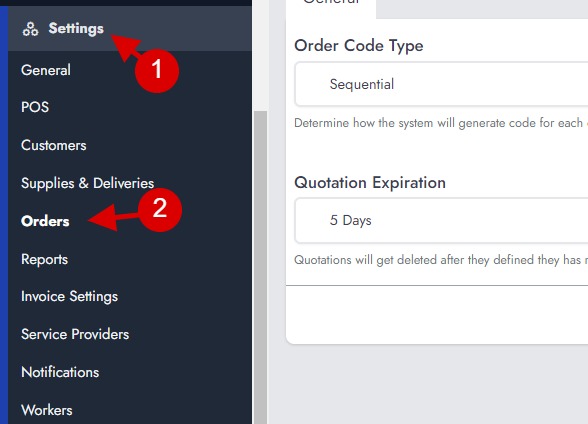
Once there, you'll make sure to enable the "Partially paid orders" and "Unpaid Orders". Then right after make sure to save your settings.
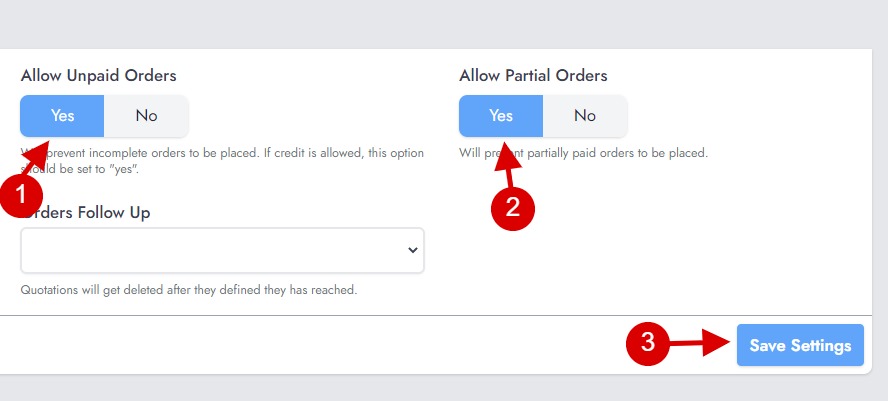
Once we're done here, we need to define what should be the threshold for every customer group.
Configuring Threshold For Customer Groups
The threshold will determine what can be the minimum amount that needs to be paid for the first installment. To set up this, we need to open the customer group for which we want to define this specific configuration.
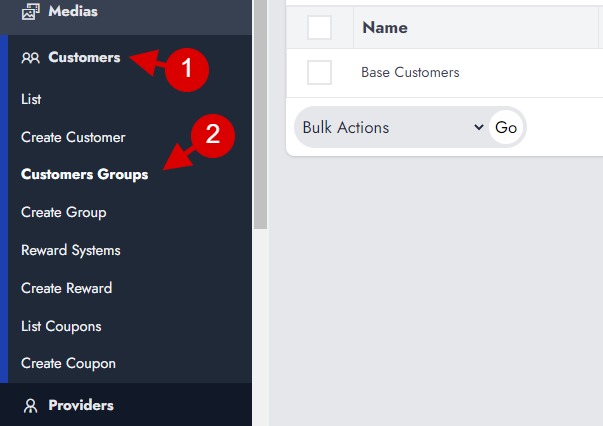
Then now, we need to open the group (or create a new group to which we want to apply the threshold).
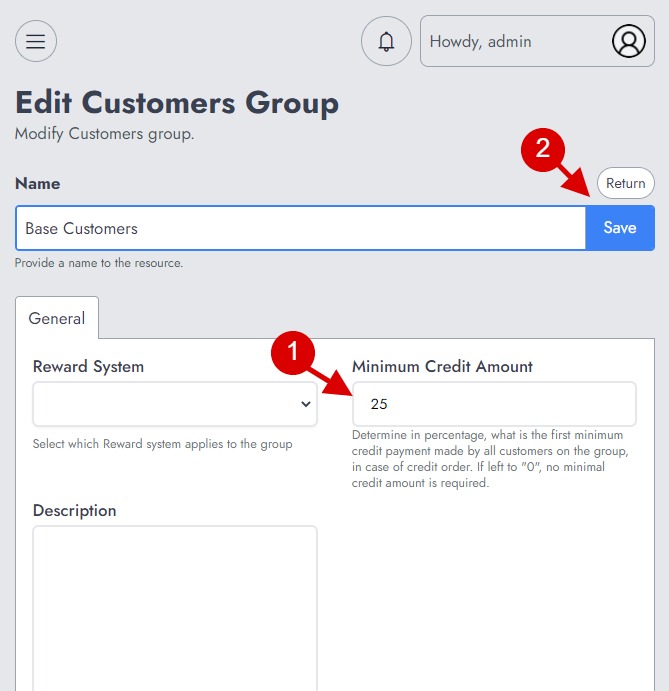
In this example, we have defined 25 as the minimum that needs to be paid for the first slice. If the value is empty or 0, this means there is no minimum define for the first slice.
Creating Layaway Order
Once you've configured the necessary options, we need to place an order. For example, we'll place an order which total is $5.70, as we have set a threshold of 25%, for the first slice the customer will need to pay $1.43
After having selected the items and while processing to the payment, the "Submit" button should be "Layaway" with the amount that needs to be paid. Make sure to add the required payment before opening the popup.
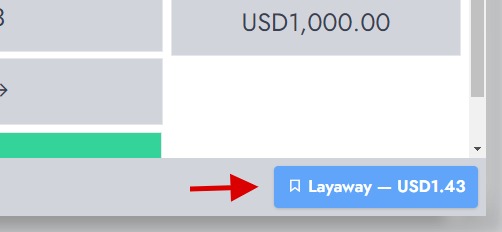
By clicking that button, a popup will show up where you can configure the installments, the date, and the amount that will be paid.

For example, let's assume the customer wants to pay in 3 slices, we'll then define as total installments : 3.
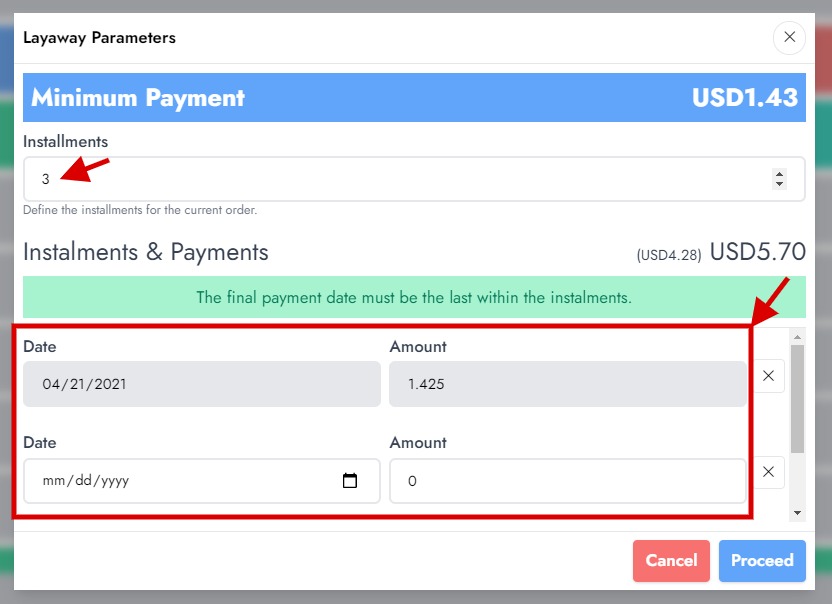
NexoPOS 4.x will create as many installment fields as you have set the total installments. For each field pair, you'll have to define the date of payment and the amount that will be paid. If a threshold is defined, that field will automatically be filled for you and should be paid for the first installment.
Every time a field is filled, you have an overview of the remaining amount that needs to be defined. Obviously, the amount mentioned there must be equal to zero, which means you have defined all installment payments.
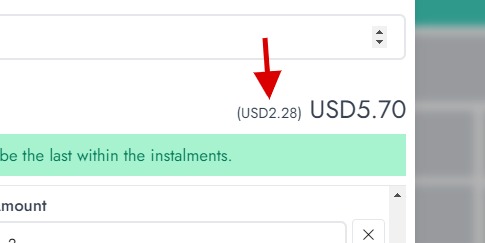
Once you're set, click on "Continue". If the initial payment has been made, the order will be submitted otherwise, you'll be invited to provide an initial payment as requested by the settings.
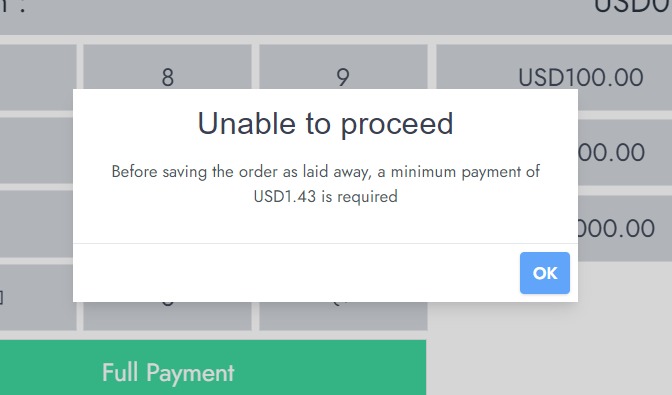
Once everything is correctly defined, the order will be saved as layaway with defined installments.
How To Make A Payment For Installments
Once an order has been saved with installments, you'll be able to control the orders from the order list. There you can search and pull a specific order in order to adjust the payments.
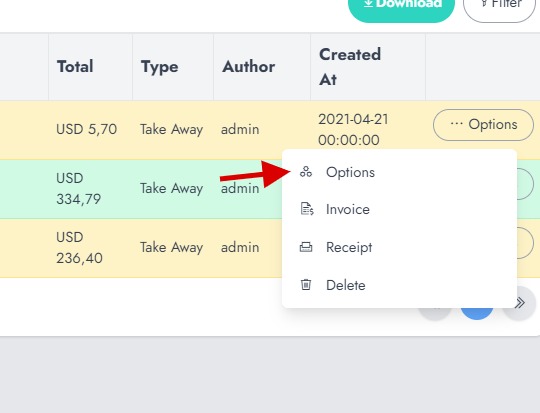
That will open a popup with multiple tabs. We now need to toggle the Payment tab and make a payment.
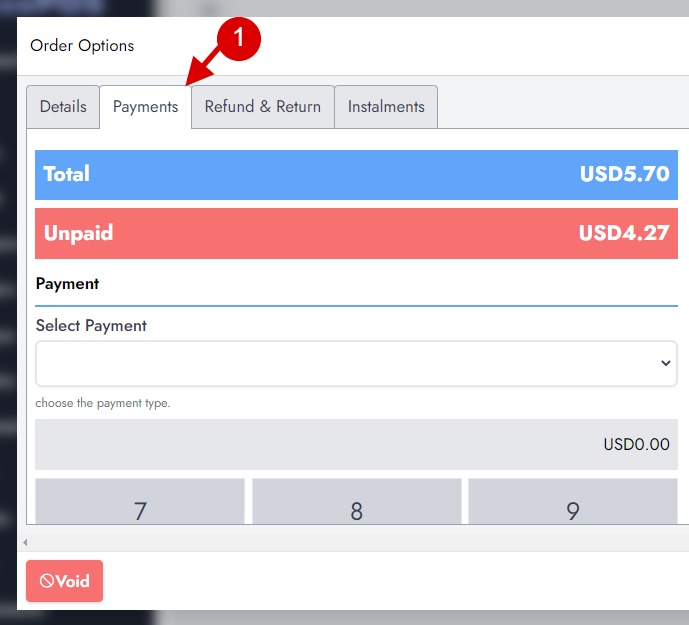
On that section, you can see what left to be paid and then proceed with the payment. First of all, select the payment method on the "Select Payment" field, then input the amount paid on the Numpad.
When making the payment, the amount should be equal to the amount expected. If the customer would like to pay more than was is expected, you'll need to adjust the installment for the current day.

Otherwise, if everything is correctly set, the payment should be saved.
Adjusting Installments
It might happen that a customer needs to adjust an installment that has previously been saved to the system. Such modification can be performed from the order popup then "installments".
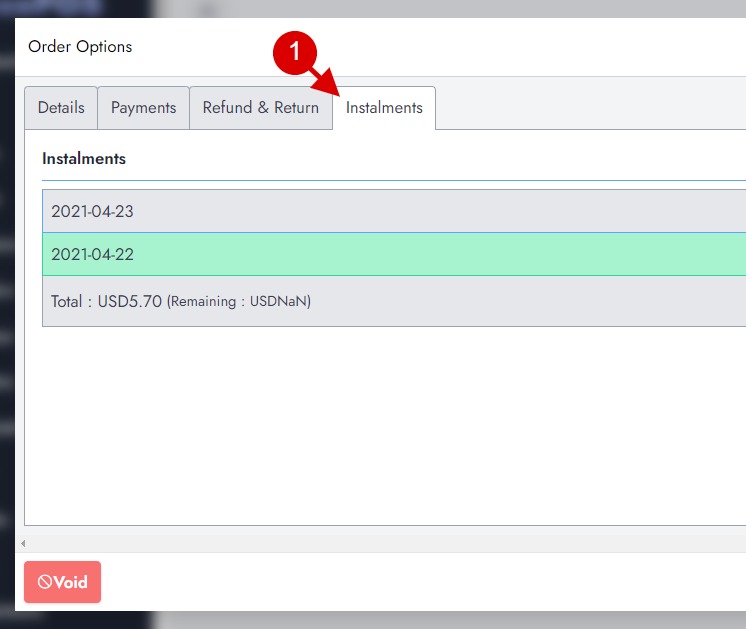
This shows all the installments for the current order. From there you can:
Mark as paid : that is the recommended way to make a payment for orders with installment.
Edit installment: if the customer would like to change the amount paid for a specific day. Here if you would like to edit the installment day or amount, you need to click on both date and amount.

Then once you're done with your modification, click on the middle blue button, to submit your modifications.
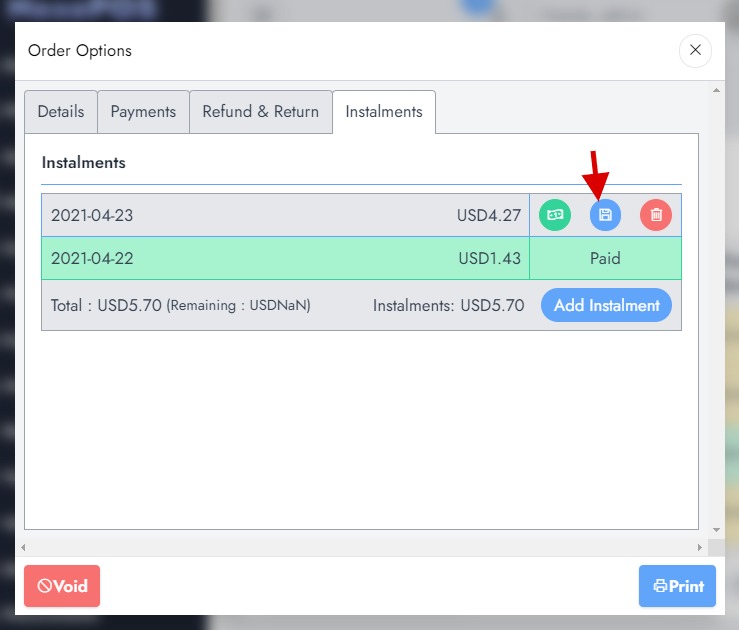
Delete Installment: this will allow you to delete an unpaid installment.
Add New Installment To An Order
In case a new installment needs to be added for a specific order, you need to click on the "Add installment" button from the "installments" tabs within the order popup.
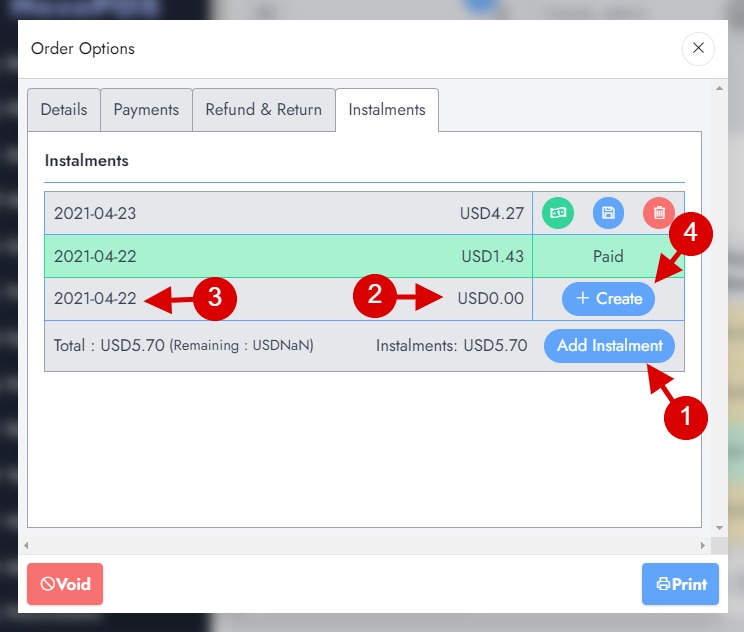
That will create a new field where you can define a new date and the amount that needs to be paid. Once you're done, click on "Create".
Installments Overview
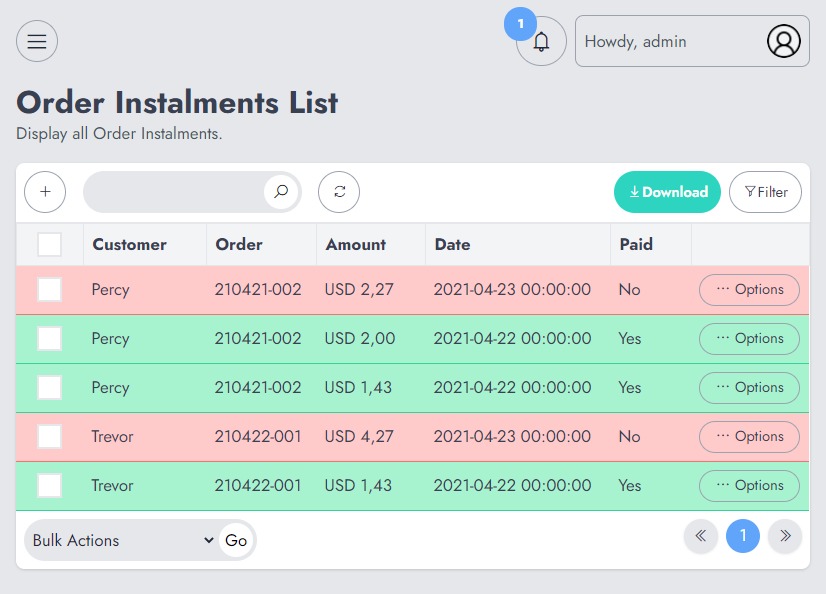
Once the installments are enabled, a new section is added to the "Orders" menu. That section is named "Installments". This section displays all installments that are created (including paid and unpaid installments).
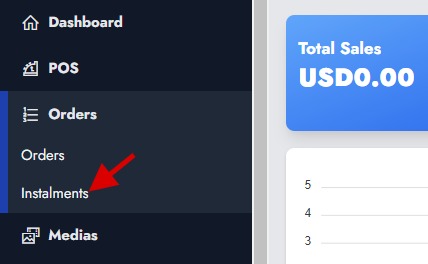
This only serves as an overview for the entire installments, it cannot be used for editing or deleting installments.
