Mail: [email protected]
Phone: +1(424)231-4091
Deploy NexoPOS in 1 minute for free. No credit card required. Deploy Now
Deploy Now
Everything you need to know about NexoPOS.
A refund is a process by which a customer returns a product in exchange for the money that has been paid. Usually, that means the customer is not satisfied with the product and would like to give it back.
In this guide, you'll learn how to manage sales refunds on NexoPOS 4.x.
Before being able to make a refund, you need to understand the requirements. Not every order is likely to be refunded. Here is a list of orders that can be refunded (by status) :
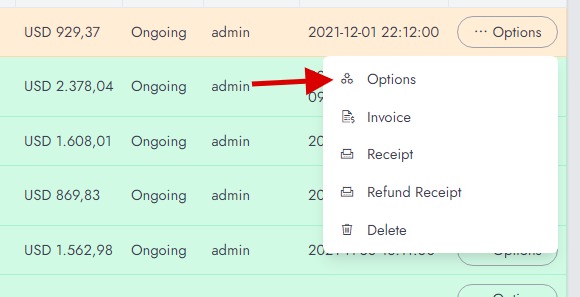
A refund can be made from the orders list. From there, you'll need to open the order options.
While opening the order options, you'll have access to various details of the order on a popup through various tabs. The first tab of this popup is "Details" which lists all the details of the order such as the payment, the customer, etc. To refund that order, we need to click on "Refund & Refund".
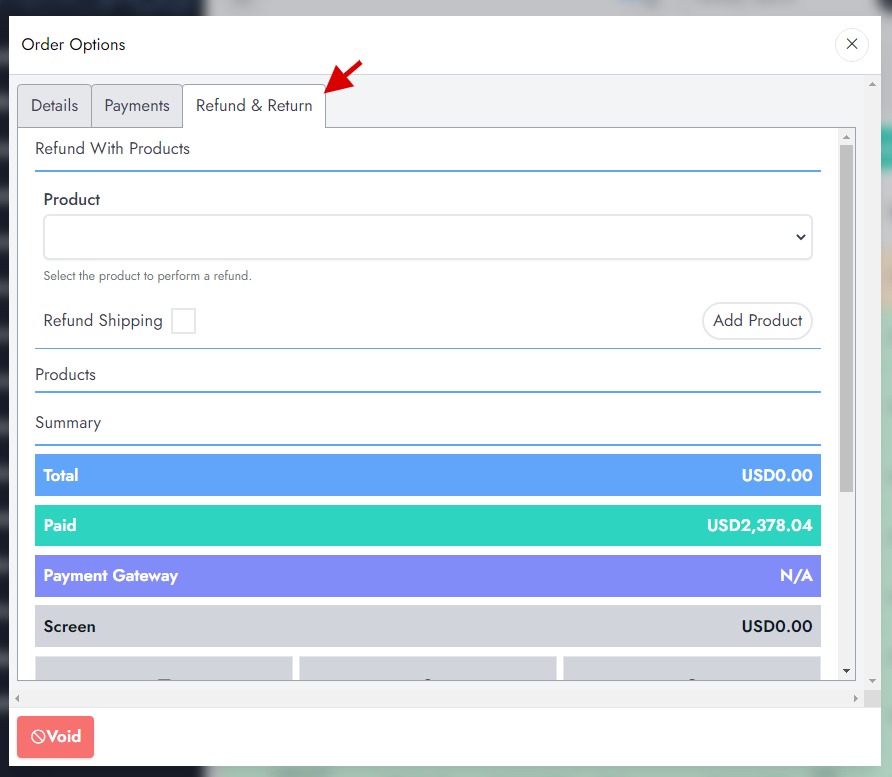
From here, we'll be able to select the product that we want to refund. The first step is to choose the product and click on "Add Product". By clicking on the button "Add Product", we'll be asked to provide further details about the status of the product. You can either choose if the product returns damaged or not.
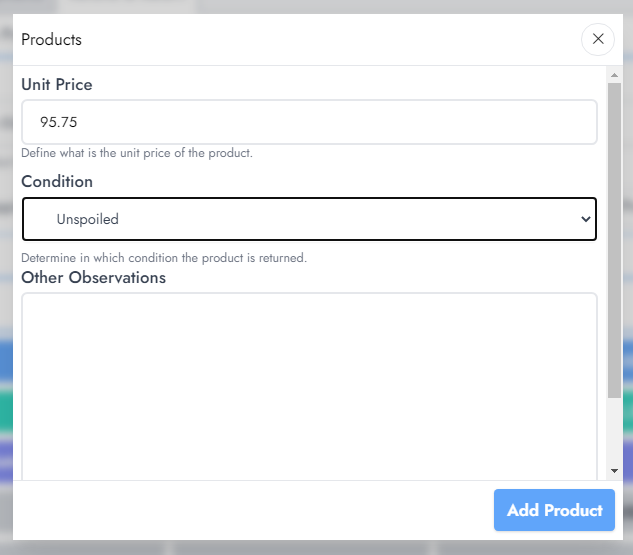
In case it's needed, you'll provide further observations of the status of the product. That popup is also used to define the refund price for the item. Once you're set, click on "Add Product".
The product will be added to a table where you'll be able to either adjust the quantity or edit the previous details of the product you've set while adding it.
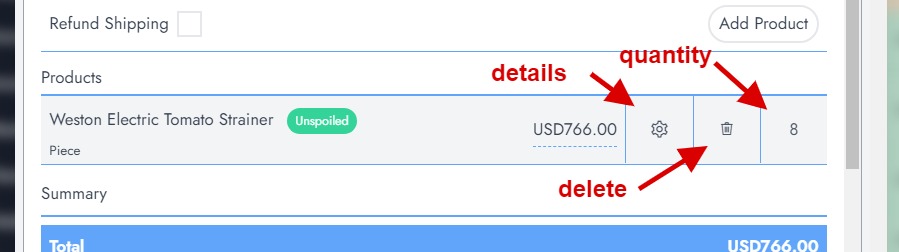
If the refund also includes refunding the shipping, you can check the "Refund Shipping" checkbox.
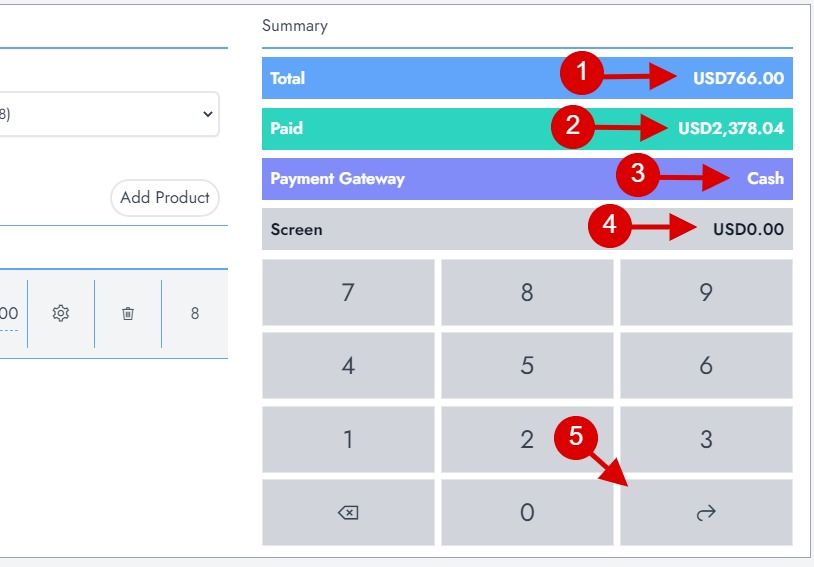
Now that we've prepared the refund, we need to submit it. On the right side (if you're on a desktop) or below (if you're on mobile) the first section, there is a keyboard that has some buttons and visuals on the top. Let's explain what is the purpose of each one :
After having submitted a refund, the refund receipt should be printed.
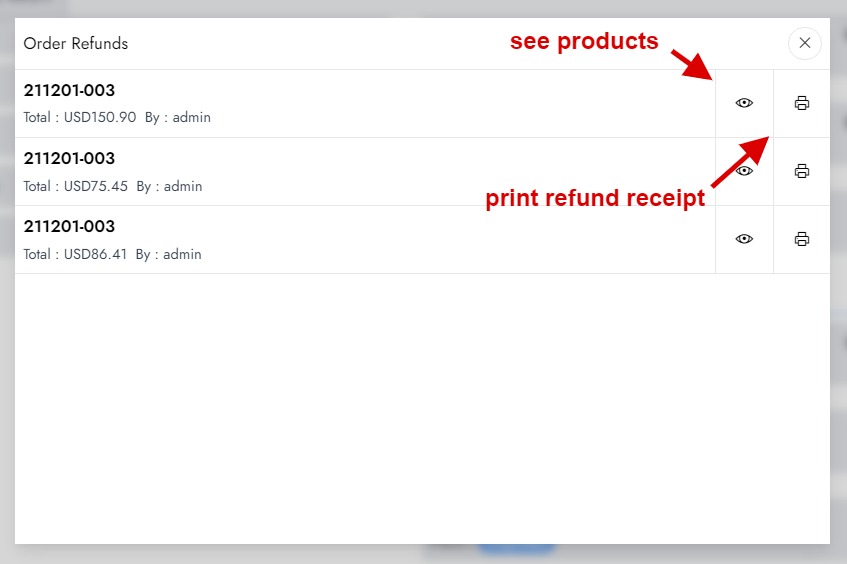
An order might have more than one refund. Every refund can consist of multiple products. To be able to see all the refunds made on an order and eventually print it, you need to head to the order details. Now, scroll down to "Refunded Products".
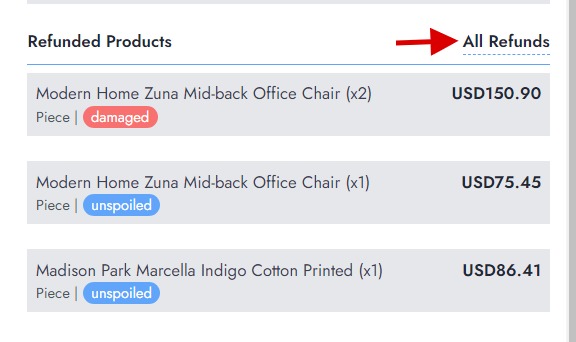
By Clicking on "All refunds", a new popup will appear and there you'll see all the refunds made on that specific order. You can also see the products refunded by clicking the button with an eye icon.