Mail: [email protected]
Phone: +1(424)231-4091
Everything you need to know about NexoPOS.
Products are the main reason that brings customers to a store. As products can have various attributes, This will guide you throughout the creation and management of the products.
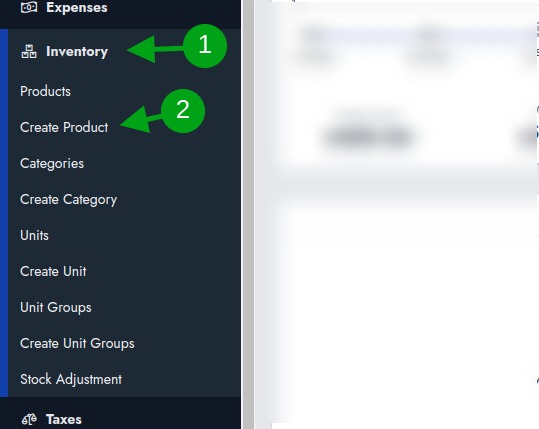
Products are available within the "Inventory" menu which contains other menus as well. To create a product, you need to click on "Create Product".
This should take you to a new UI that contains a form with tabs.
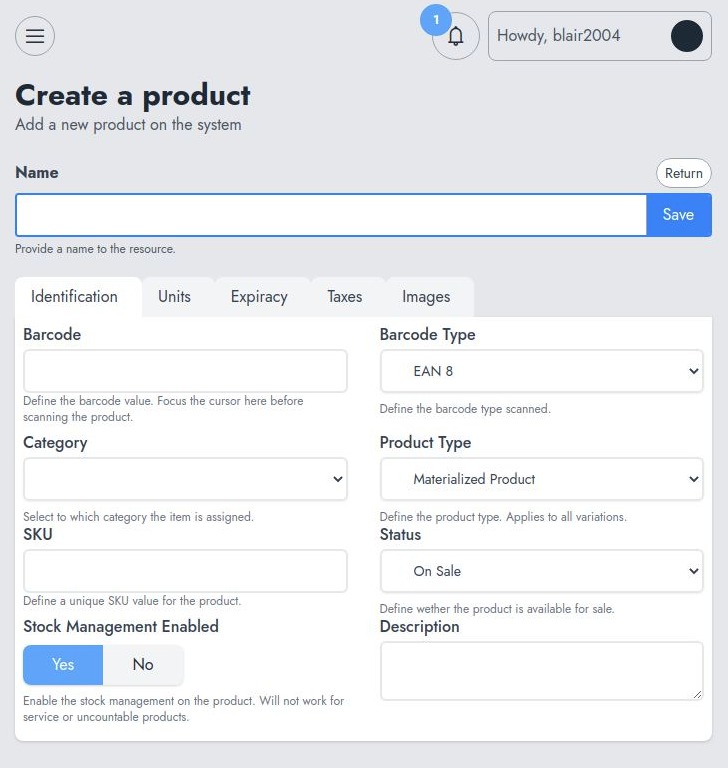
The first field is the product name. Here are the details of the other tabs.
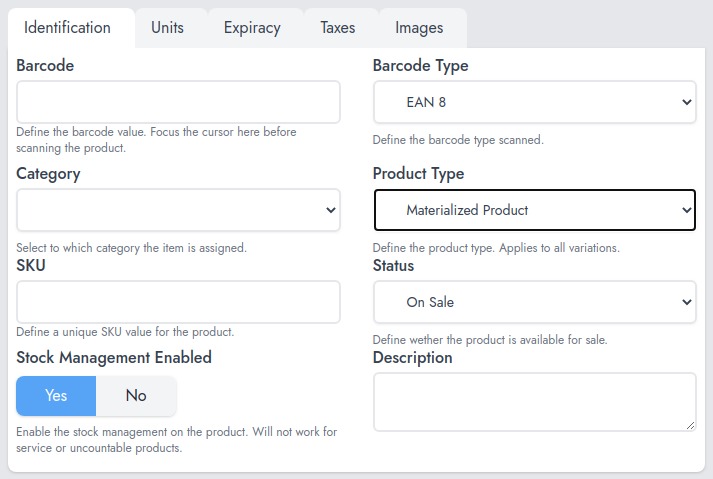
This tab contains all the fields that are used to identify the product. That's the field where you'll define :
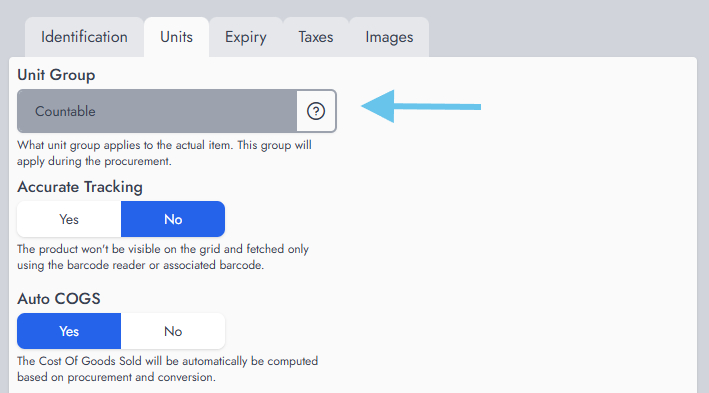
Special consideration needs to be taken here. Out of the box, NexoPOS supports units of measure. This means, that while creating a product, you need to select which unit group needs to be selected for that specific product.
Note that, once the unit group is selected, and a selling unit defined, you must delete that first if you want to change the unit group.
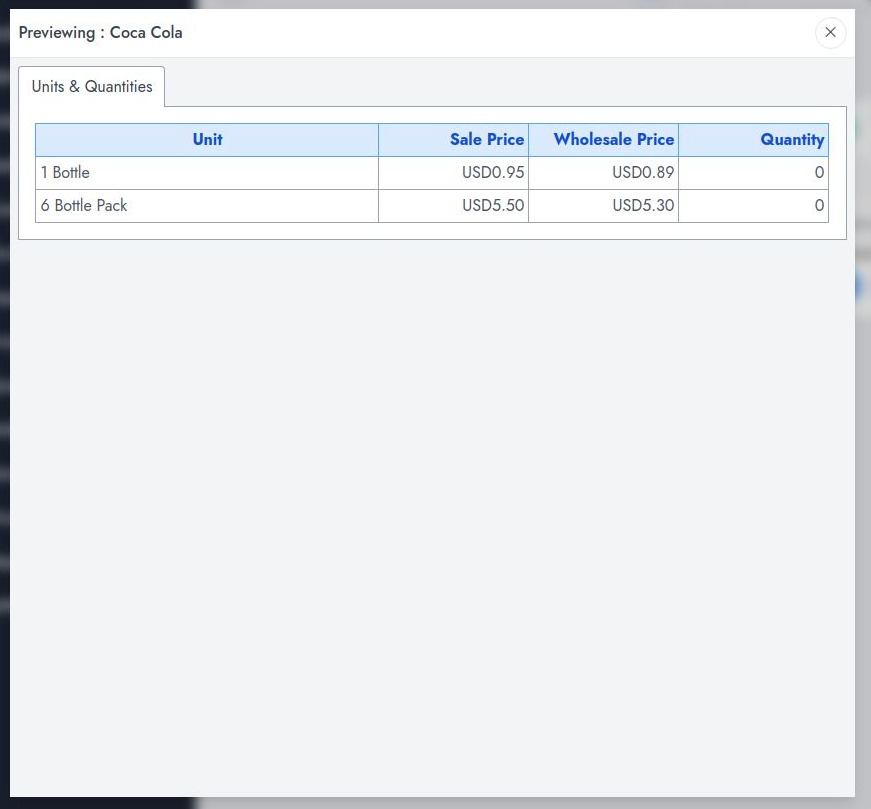
As every product unit might not be sold at the same price, you'll then be able (after having selected the unit group), to add a unit with the sale price and wholesale price, the unit, and preview.
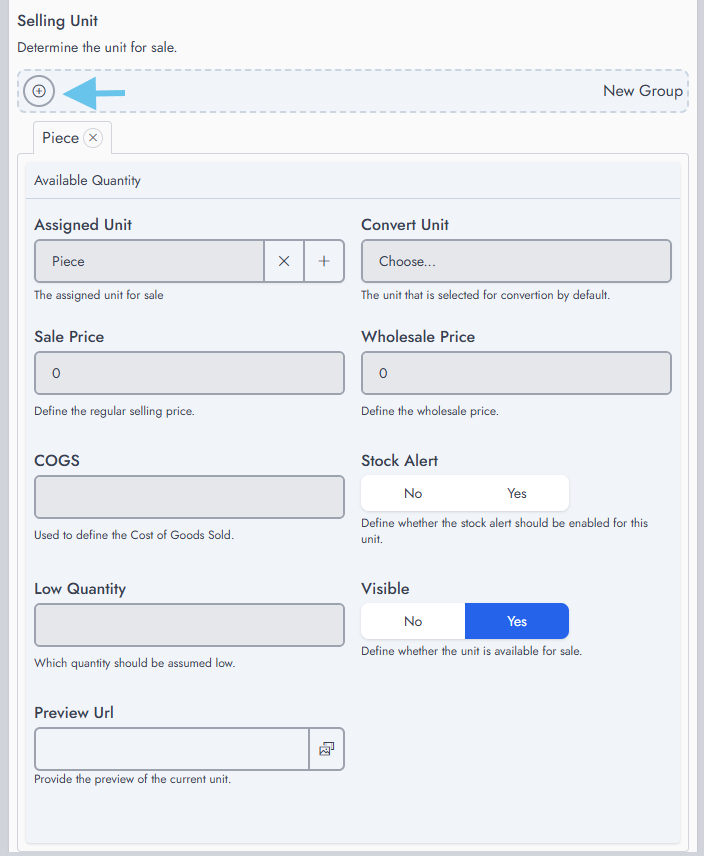
You can only create as many selling units as the Unit Group has units. In our case, we have created a unit group that has 2 units within 1 Bottle, 6 bottle pack. The purchase price is not set here, but during the procurement, since on each procurement, a product might have a different purchase price. We'll now go over each field to explain their purpose:
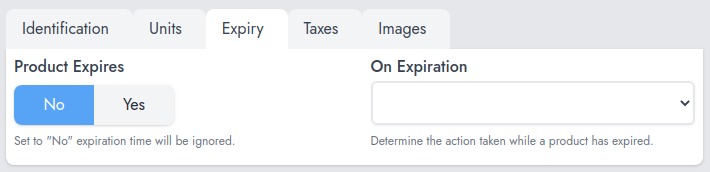
This section helps to configure certain aspects of the expiration. However, regarding the expiry for the product, this should be defined while procuring the product.
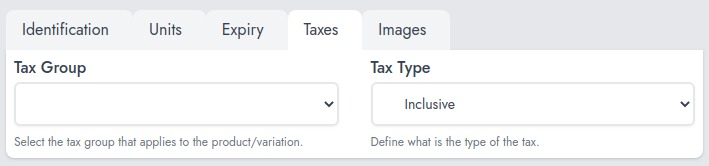
This section helps to assign the tax group that applies to the current product (units). You can also determine the type of tax (inclusive or exclusive).
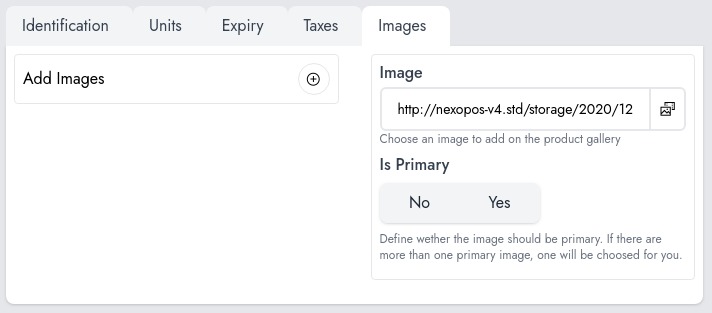
This section helps you to create a gallery for the product that is being sold.
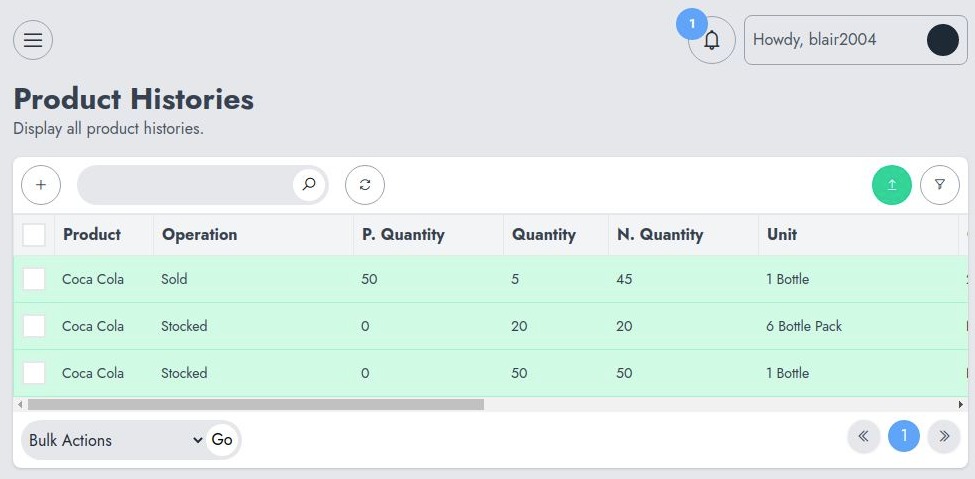
Once you've created a product, you'll be redirected to the products list, which shows all the products created so far. These products are displayed on an abstract table component.
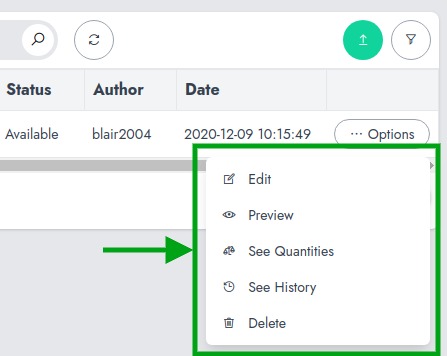
This tables provides various options such as :