Mail: [email protected]
Phone: +1(424)231-4091
Deploy NexoPOS in 1 minute for free. No credit card required. Deploy Now
Deploy Now
Everything you need to know about NexoPOS.
By default, NexoPOS supports various fixed fields. Among those fields you can use :
While those fields are most of the time enough for creating a valid form, sometimes you might need to create a completely different field. Your field might be a complex Vue component that performs asynchronous requests to the server. Let's now see how you can register a field as a Vue component.
One of the first things you need to perform is to inject a Vue component on the dashboard. You can learn more about this here. So we'll here make sure to register our field as a Vue component. Be careful about the name you give while attaching the Vue component to the "nsExtraComponents", as that value will be used for registering the field.
Same as other fields, you need to register the field while defining the form (or fields) shape. Assuming you're creating a settings page, then you'll define the custom field while creating the settings fields.
If you don't know how to create a settings page, consider checking this guide.
<?php
namespace Modules\NsPrintAdapter\Settings;

use App\Services\SettingsPage;

class PrintAdapterSettings extends SettingsPage
{
    protected $form        =   [];
    protected $identifier  =   'custom-settings-identifier';
    protected $labels      =   [];

    public function __construct()
    {
        $this->form   = [
            'tabs'    =>  [
                'general'   =>  [
                     'label'    =>  __( 'General settings' ),
                     'fields'  =>  [
                        [
                            'type'    =>  'custom',
                            'component'   =>  'yourComponentName' // <= Here is the component name as injected on the dashboard.
                        ]
                     ]
                ]
            ]
        ];
    }
}
On the previous gist, we've used "yourComponentName" as the name of the custom Vue component. Note that this name should be what is assigned while injecting the component on the dashboard.
Here is how it should look like:

Now while rendering the settings page or crud component that uses the custom field, you should have this output.
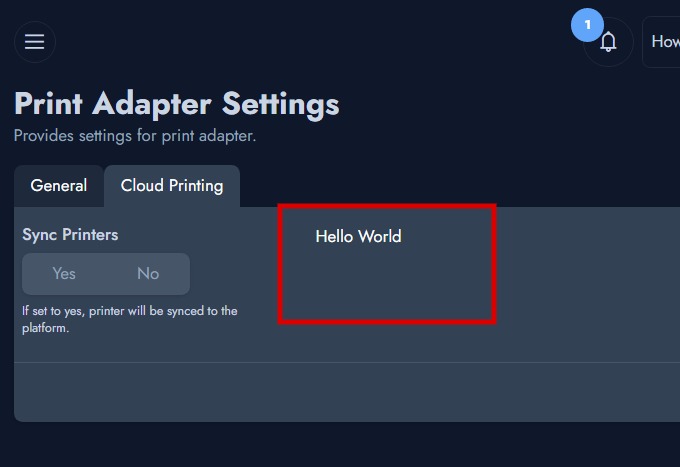
This screenshot is made from NexoPOS 4.7.x with the dark mode enabled.