Documentation
Everything you need to know about NexoPOS.

Nexo Print Server 2.6.x License Validation
Deprecated Tutorial
Nexo Print Server 2.6 is no longer supported. We trully appreciate your interest on that legacy software. We however recommend you using Nexo Print Server >5x.
Nexo Print Server has been updated to be working with My NexoPOS. This tutorial will explain how to can validate your license on Nexo Print Server.
Creating a client
In order to validate your license of Nexo Print Server 2.6, you need to create a client. However, it's very important that the redirection URL has as a value what follows :
https://my.nexopos.com/oauth/authorize/nps
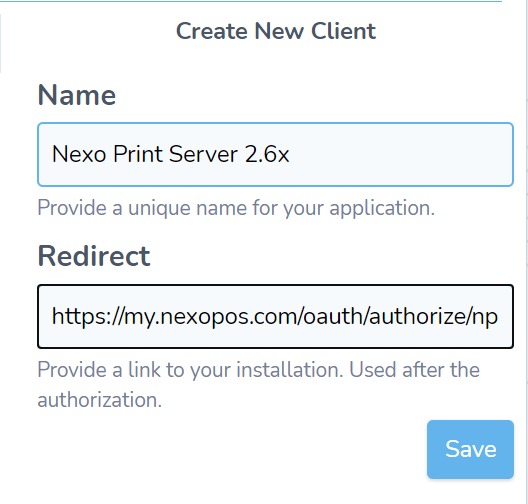
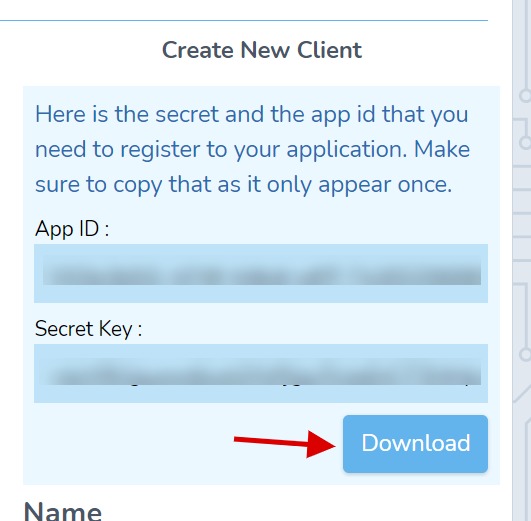
Make sure to give a unique name to the client. After saving the client, download the client id. We'll use that to validate the license on Nexo Print Server 2.6.
Validating the license
You need to use the client id file you've downloaded to upload on the Nexo Print Server interface.
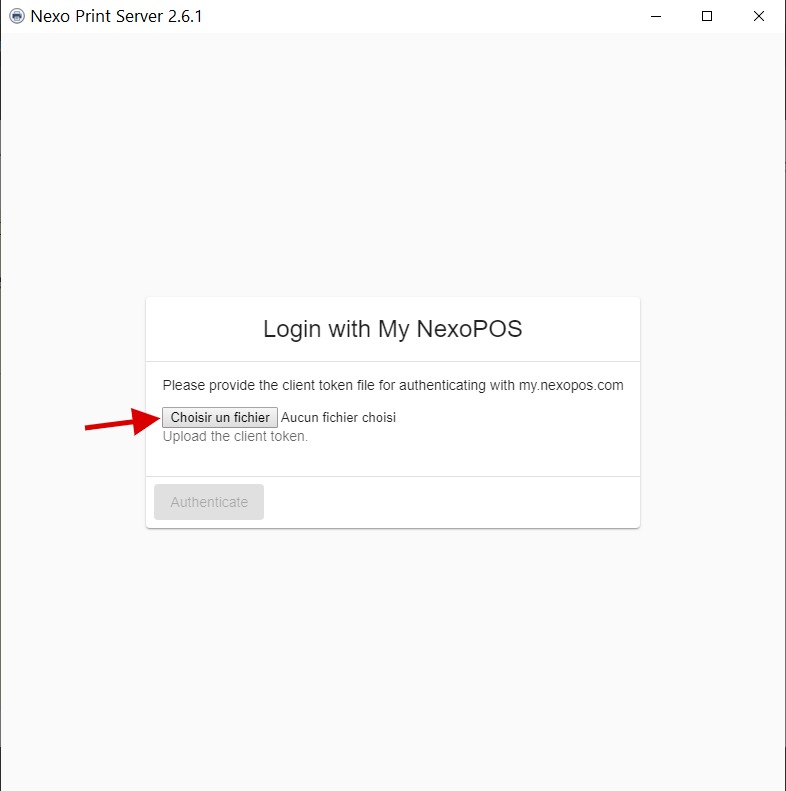
Once selected, you'll need to click on "Authenticate".
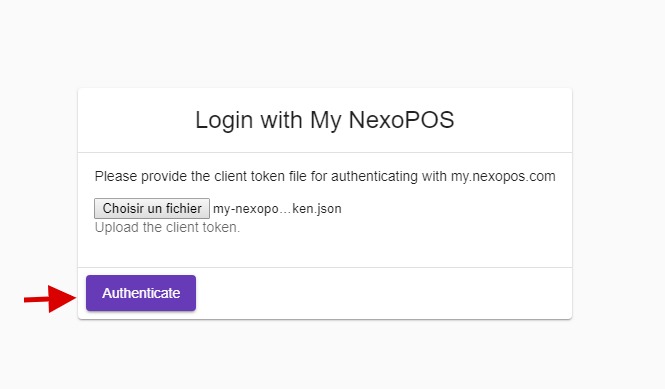
You now need to click on "Authenticate" and Nexo Print Server will open the default browser to request authentication. If you're not logged you should see the login page.

Then, after a successful login, you'll be redirected to the authorization page.

Now, you have to approve the request in order to receive the authorization code that will be used on Nexo Print Server 2.6.x.
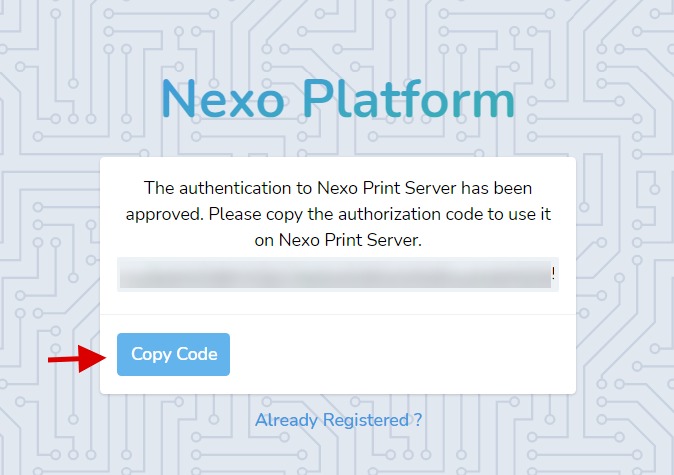
The code you'll copy there is what you'll paste on Nexo Print Server 2.6. Then you'll need to click on "Save Code" to proceed.
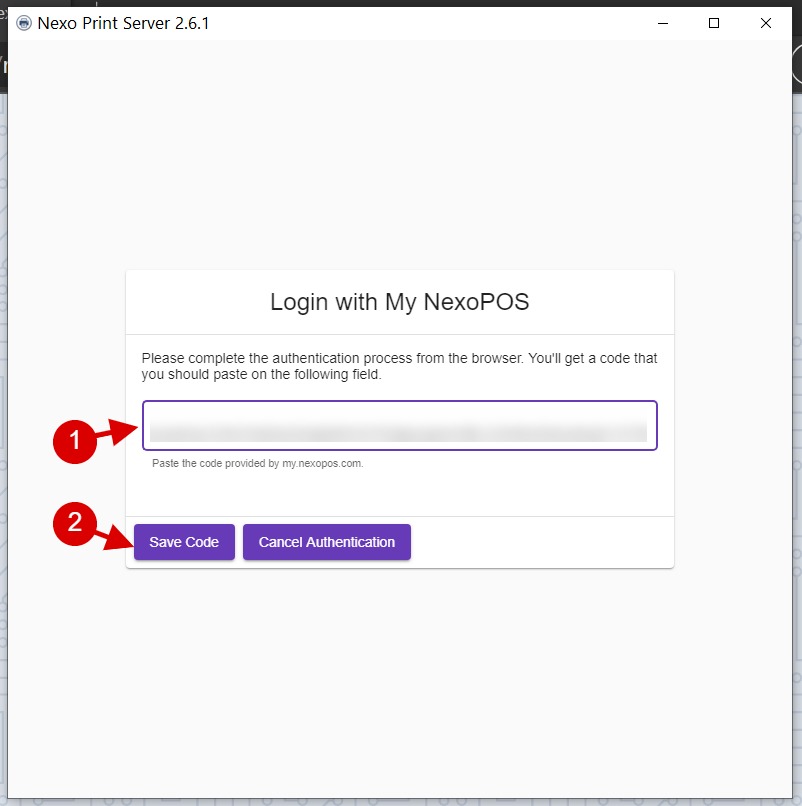
After having clicked, you should be able to see the license that are added to your account. Note that my.nexopos.com will automatically fetch all your licenses from CodeCanyon.
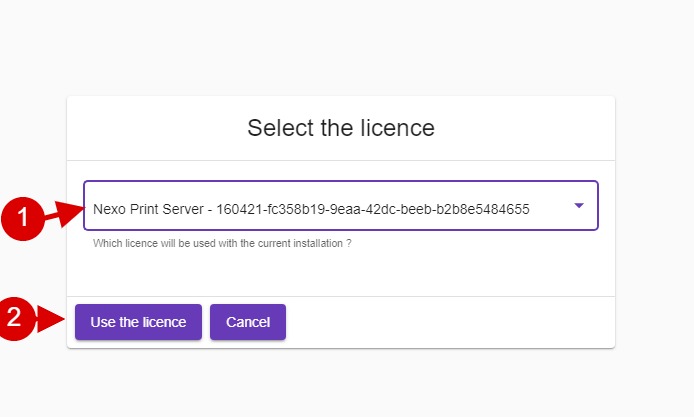
Now you just have to select the license and "Use the license". If everything happens correctly, you should land on the dashboard page.

