Documentation
Everything you need to know about NexoPOS.

Local Network Configuration
After having installed NexoPOS, you might need to make it accessible on the local network. Out of the box, it's possible to use the computer IP + the path to NexoPOS + the folder "public" to access to the login page (example: 192.168.1.1/nexopos/public).
However, for some restrictions added within a library used on NexoPOS, you cannot log in or perform any asynchronous operation (placing an order).
This guide will then explain everything you need to know in order to make NexoPOS available on a local network.
On Windows 10
Before proceeding, we believe you've installed NexoPOS using Laragon. Once you've done that, we need to edit the configuration of Laragon so that the root document points to the public directory of NexoPOS.
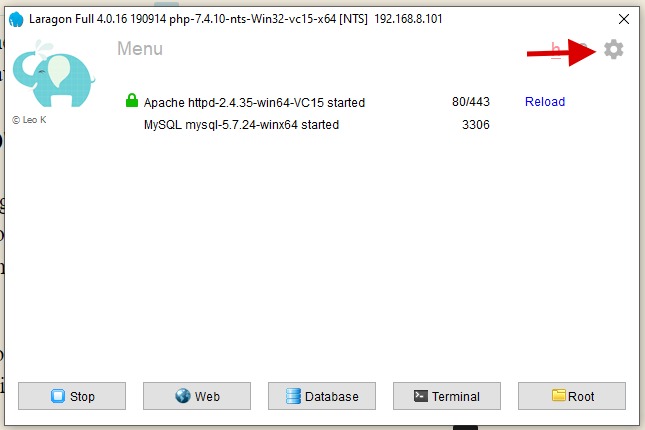
We'll then head to the Laragon dashboard and click on the cogs for accessing the settings.

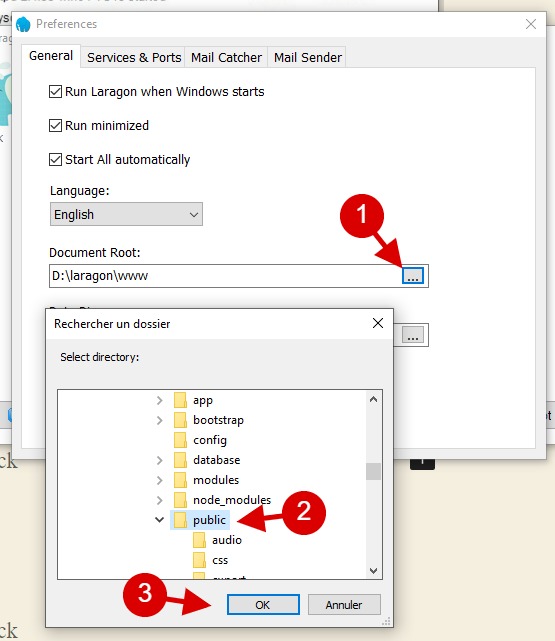
From the settings, we'll need to change the Document Root and make it point to the public folder on our NexoPOS installation.

Once you're done, you just need to click on OK. You might be access to approve a command-line operation. Finally, you need to restart your server (Laragon).
You might wonder, from now how will this help me access NexoPOS. In fact, from now, when you'll type "localhost" on the browser, you should be able to see NexoPOS welcome page.

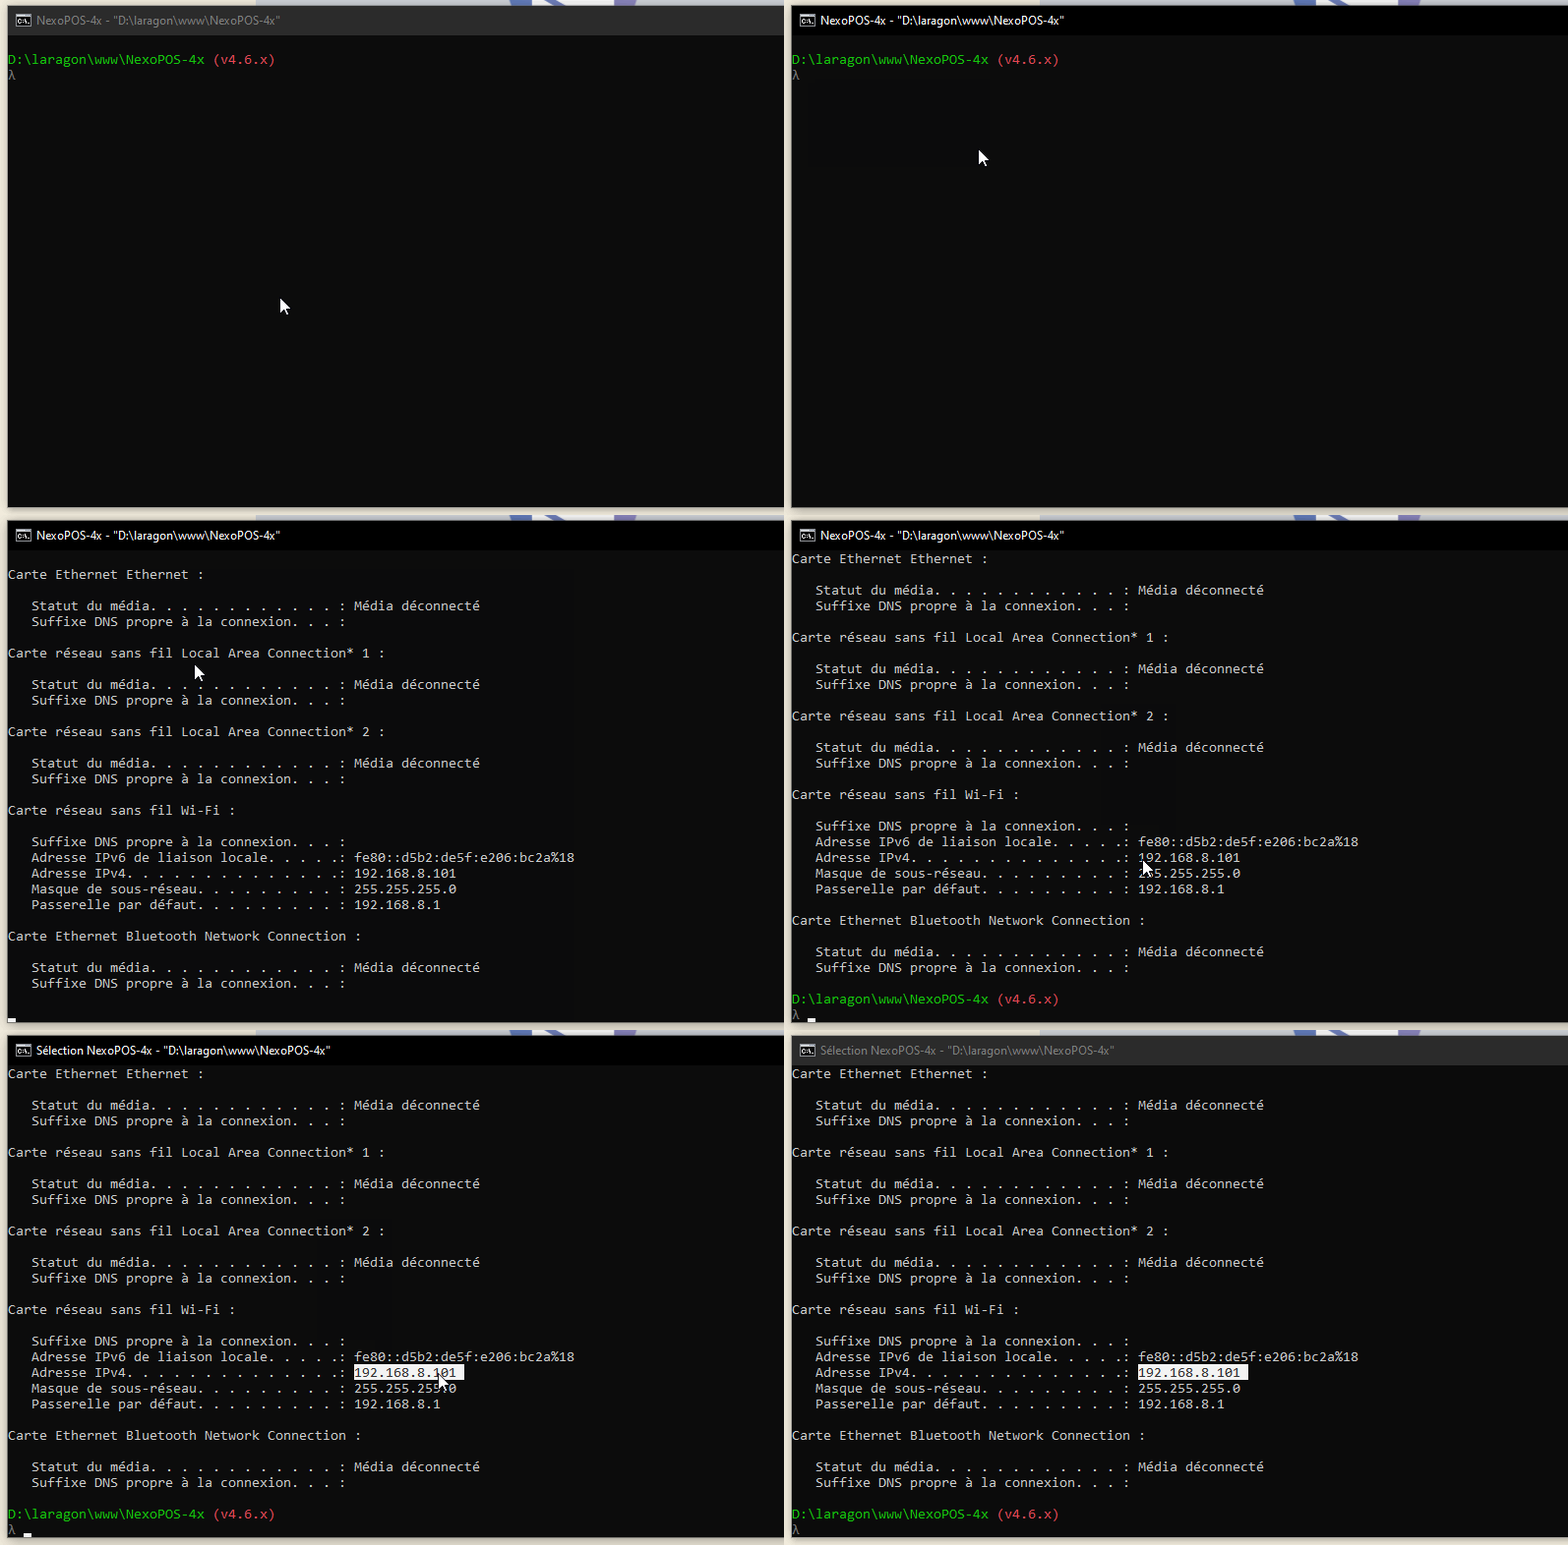
This also means, if you would like other devices to access NexoPOS on a local network, you'll need to get the network IP of the computer where it's installed. For that, you just need to open the command line and type the following command :
ipconfig
Now, using that IP address on all devices connected to the same network will have access to NexoPOS 4.x.

Troubleshooting
After having performed this, you might need to update your "APP_URL", "SESSION_DOMAIN", and "SANCTUM_STATEFUL_DOMAINS" from the .env file. As of now the domain from accessing NexoPOS is no more localhost but the IP address (192.168.8.101).
please make sure to follow the instructions shared here.
