Mail: [email protected]
Phone: +1(424)231-4091
Everything you need to know about NexoPOS.
If you would like to create a dynamic page, you'll need to know how to create a custom page. A custom page is an empty page that has no component on it. Obviously, you can thereafter load any component you want (settings, crud, etc.) or bind your own component to it.
Before knowing how to create a custom page, you must know how to create a module on NexoPOS 4.x. You must also understand how to create a menu and register routes.
Before starting, you can generate a controller for your module using the command :
php artisan modules:controller [moduleNamespace] [controllerName]A concrete example will produce the following output if we would like to create a controller "MainController" for our module named "MyModule"
php artisan modules:controller MyModule MainControllerOnce you've created your controller, you should load the view file that will be rendered. Now that all blade files are must be saved within /resources/Views (relative path from the module root).
The path /dashboard/mymodule is pointing at the controller method "mysettings". Here is how our controller should look like.
Here the method "mysettings" use the internal method "view" to load module views. The parameter provided as a view path is using the module namespace as the view namespace. We can additionally pass an array as a second parameter with the following supported indexes :
The reason why we're using the method "view" it's because that injects the dashboard menu into our view. This is therefore useful only if we want to display the dashboard side menu. On the other hand, this means that if you would like to create a page that uses all the screen width and doesn't need the dashboard side menu, you can directly use the facade "View".
View::make( 'MyModule::settings', ... );This section shows how you can extend the dashboard layout and inject your content. Here we would like to use the dashboard side menu and header but change the content within. We'll start by defining the layout we would like to extend :
@extends( 'layout.dashboard' )The dashboard layout has 3 sections :
You can also customize all these sections like so :
@section( 'layout.dashboard.header' )
<!-- Your Content Here -->
@endsection

@section( 'layout.dashboard.body' )
<!-- Your Content Here -->
@endsection

@section( 'layout.dashboard.footer' )
<!-- Your Content Here -->
@endsection
From here, you'll need to read more about using the Blade engine of Laravel.
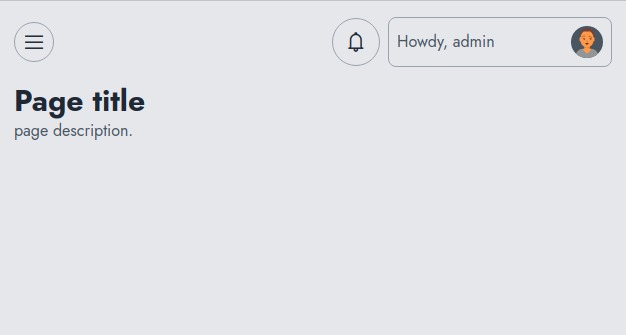
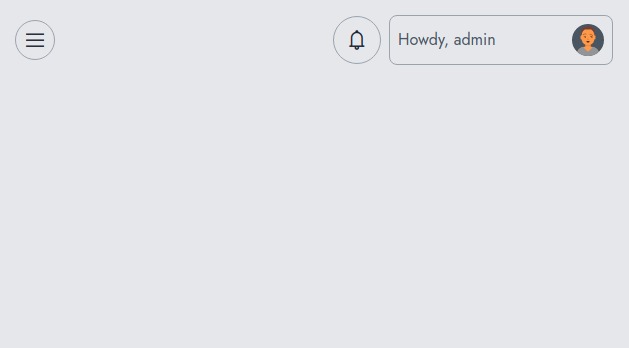
Let's assume you would like to display the header panel that includes the menu toggler, notification section, and user section.
This is what will be rendered :
However, as you see this doesn't include the page title and description. If we would like to load this along with the page title and description, we'll change our code on the settings.blade.php like so.
To have the following output.