
Configuring Stock Conversion
NexoPOS provides a flexible way to manage products that can be sold or purchased in different units. A single product can be available as a unit, a box, a dozen, or any other defined measure, each with its own price. Since businesses often purchase inventory in a unit that differs from the one they sell, NexoPOS includes a stock conversion mechanism that automatically adjusts quantities between units. This guide explains how to configure stock conversion at the product level.
Understanding Unit Groups
Before diving into product configuration, it?s important to understand the concept of unit groups. A unit group defines a set of interchangeable units of measurement for a product. For example, if you create a unit group called Countable, it might include units such as piece, dozen, or pack of 6. The difference between these units lies in their scale: some units are greater than others.
Every product must be linked to a unit group, and only the units defined in that group will be available when configuring conversions. We already have a separate guide that covers how to create units and unit groups.
Configuring Units on a Product
To configure conversions, start by either editing an existing product or creating a new one. Once inside the product form, navigate to the Units tab. This section allows you to set up how the product interacts with the different units in its assigned unit group.
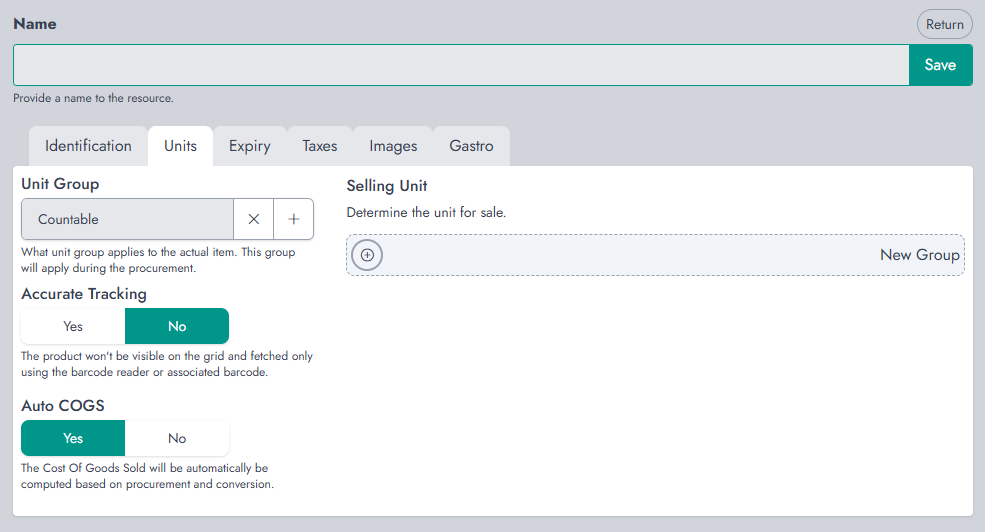
Make sure the assigned unit group has at least two units. For example, let?s consider bottled water that can be sold individually (piece) but purchased as a pack of 6. Because the product has been assigned to the Countable unit group, both piece and pack of 6 are available for configuration.
Within the Units tab, click the plus (+) button in the Selling Unit section. This action will create a new entry where you can configure the following fields:
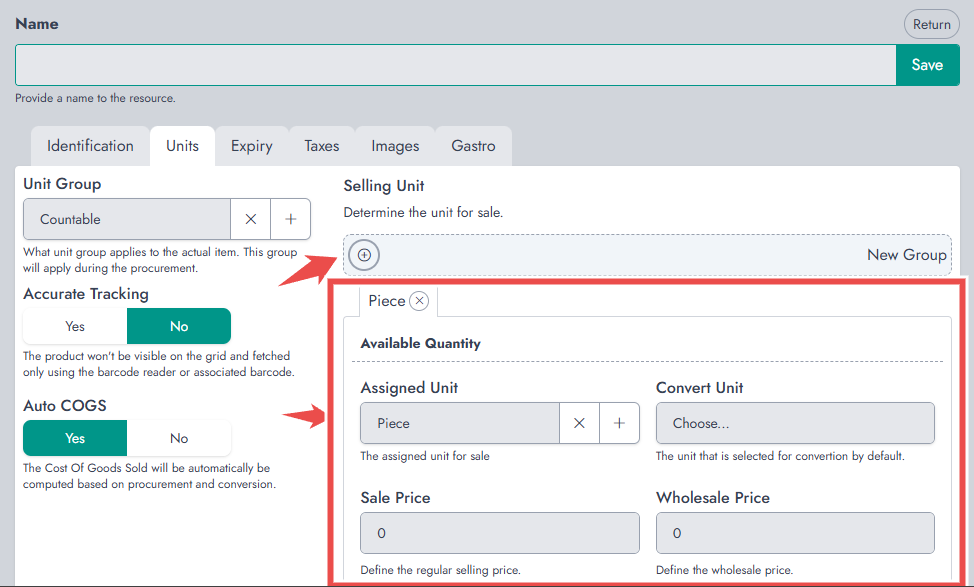
- Assigned Unit: the unit in which the product is sold at the POS.
- Convert Unit: the unit to which the assigned unit will automatically convert during procurement.
- Sale Price: the retail price shown at the POS for this unit.
- Wholesale Price: the wholesale price if wholesale mode is enabled at the POS.
- COGS (Cost of Goods Sold): the cost per unit. This can be left at 0 to let the system compute it automatically based on purchase prices, or set manually if you prefer.
- Stock Alert: enables or disables low-stock warnings for this unit.
- Low Quantity: the threshold that triggers a stock alert when inventory falls to this number or lower.
- Visible: determines whether this unit should appear on the POS screen.
For instance, if pack of 6 is mainly used for procurement and not meant to be sold directly at the POS, you might choose to keep it invisible.
Important Considerations
When setting up conversions, there are a few rules to keep in mind:
- The assigned unit and the convert unit cannot be the same. If you purchase in piece, you cannot also convert it into piece.
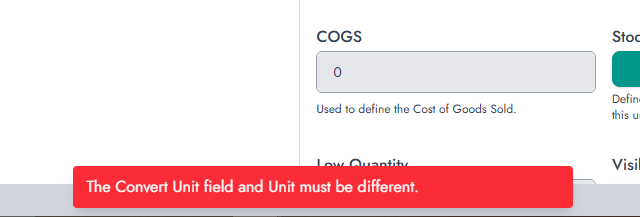
- Conversions usually flow from a greater unit into a smaller one. For example, if your product has piece as a selling unit, but you purchase in pack of 6, you?ll need to create another selling unit (pack of 6) and configure it to convert into piece.
- COGS is automatically computed unless you explicitly set a manual value.
Converting Existing Products
In addition to configuring conversions on new or edited products, NexoPOS also allows you to convert stock for existing products. This feature is useful when units previously purchased for direct sale now need to be broken down into smaller units. The conversion process ensures NexoPOS understands what happened to the inventory and updates stock accordingly.
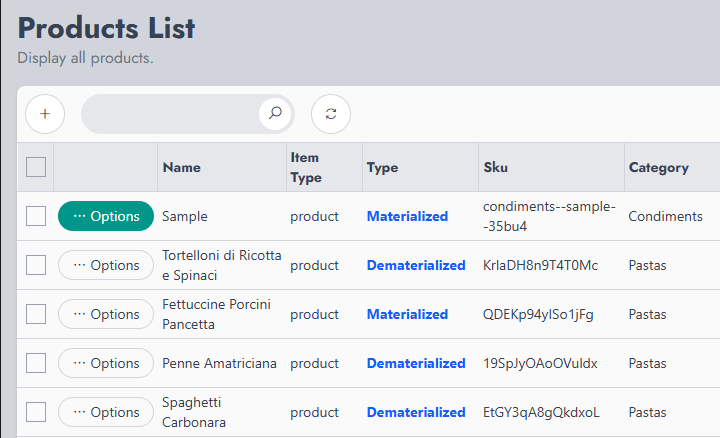
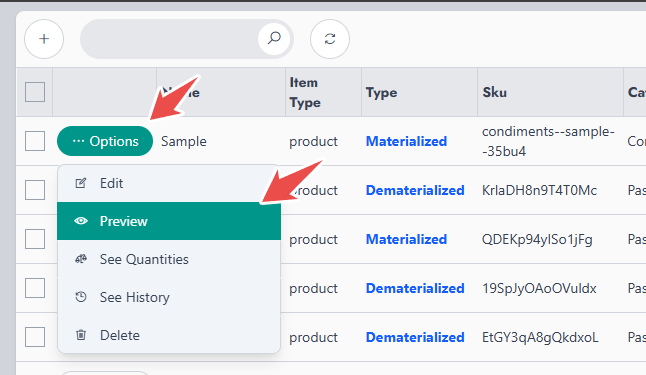
To begin, go to the Products List and click on Options for the product you want to convert, then choose Preview.
A popup will open showing all the assigned units and their current stock levels.
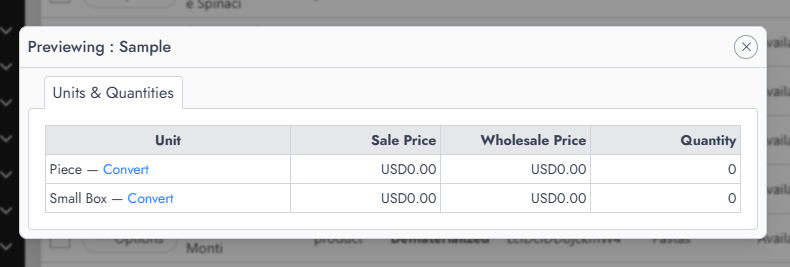
Next to each unit name, you will find a Convert link. Clicking on this link opens a new popup dedicated to conversions.
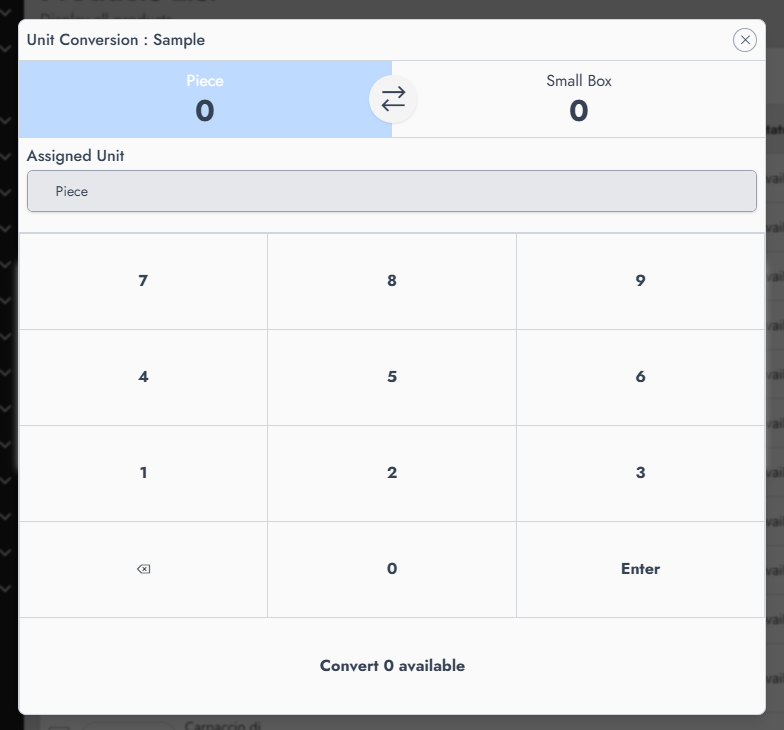
At the top of this popup, you?ll see two sections separated by an exchange arrow icon. Each section represents either the source unit or the destination unit. Select the unit you want to convert from, for example Small Box, and enter the quantity you want to transfer using the numeric keyboard (the current stock for that unit is displayed at the bottom). Then, select the destination unit, such as Piece, which is where the converted stock will go. Once everything is set, confirm the action by clicking Convert x available at the bottom (where x is the current stock available).
Troubleshooting
I Only See One Unit: If you only see one unit instead of all the units from the unit group, it means the missing units have not yet been assigned to the product. The conversion popup only lists units linked to the product itself. To fix this, edit the product and assign the required units. You can refer to the guide on creating a product for a detailed explanation.
I don't see the convert Link: If you can't see the link that trigger the conversion popup, that means most of the time that the product doesn't have the stock management enabled.