
Installing & Updating Modules
Modules are extensions that add new features or enhance existing functionalities in NexoPOS. Instead of modifying the core system, modules allow you to extend your POS safely and flexibly.
The recommended place to download modules is my.nexopos.com, where you’ll find official and compatible extensions maintained for NexoPOS.
Installing a Module
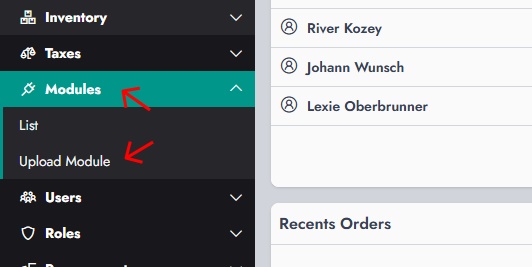
To install a module on NexoPOS, start by navigating to the Modules section from the sidebar, then click on Upload Module.
On the upload page, select the module file (usually provided as a .zip archive), then click Upload.
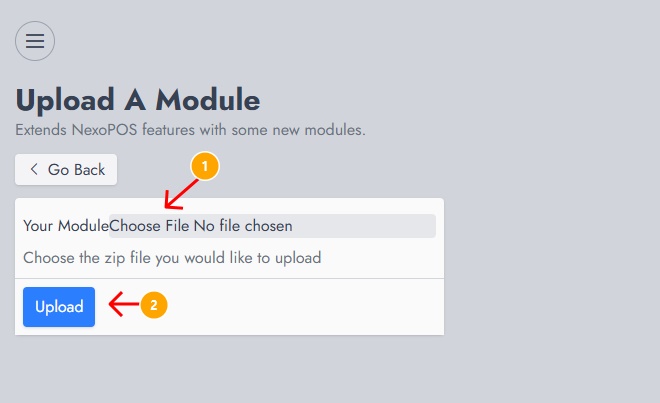
Once the upload is complete, the module will be added to your modules list.
Managing Modules
After installation, head over to the Modules List, where all available modules are displayed.
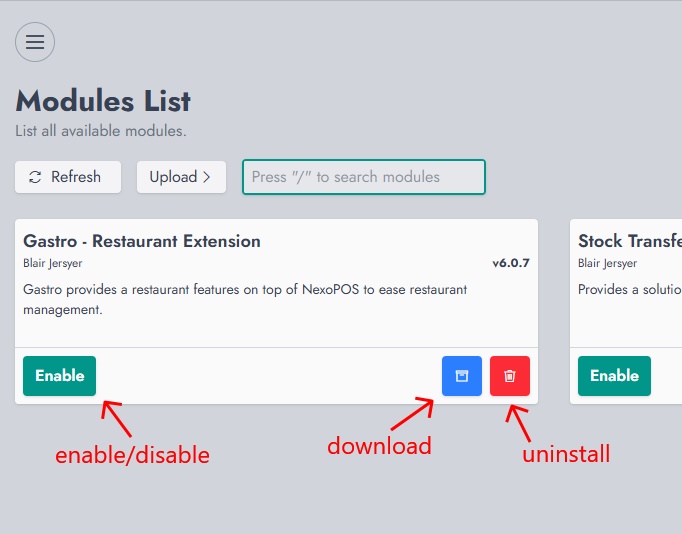
From there, you can:
- Enable / Disable a module depending on your needs
- Download the module archive
- Uninstall a module from your system
Enabling a module will immediately make its features available across NexoPOS, while disabling it will temporarily deactivate those features without removing the module.
Updating a Module
Updating a module follows the same process as installing one. Simply go to Modules > Upload Module, select the new version of the module (ZIP file), and upload it.
NexoPOS will automatically detect if the uploaded file is an update of an existing module and will replace the current version accordingly. Only valid updates of an already installed module can be uploaded, meaning the system will reject unrelated modules that share the same identity.
Notes
Make sure the module you upload is compatible with your current version of NexoPOS. It’s always recommended to download modules from trusted sources like my.nexopos.com to avoid compatibility or security issues.