
Create Product Categories
Product categories help you organize your products in a structured way. They can be multi-layered, meaning you can create parent categories and assign sub-categories to them. This is useful for grouping products logically (e.g., Beverages → Soft Drinks → Soda), and also for controlling how products appear on the POS.
Accessing Category Creation
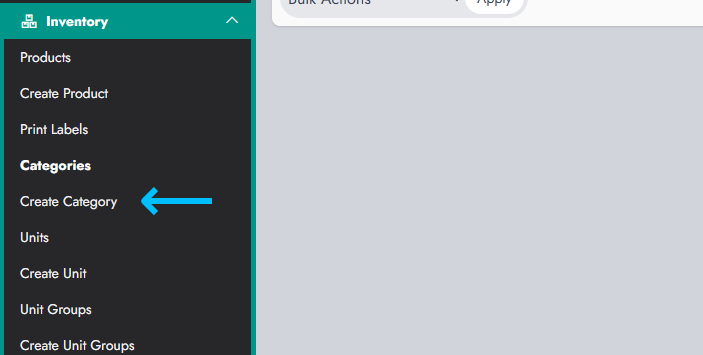
From the dashboard, navigate to Inventory → Create Category. This will open the category creation form.
Filling the Category Information
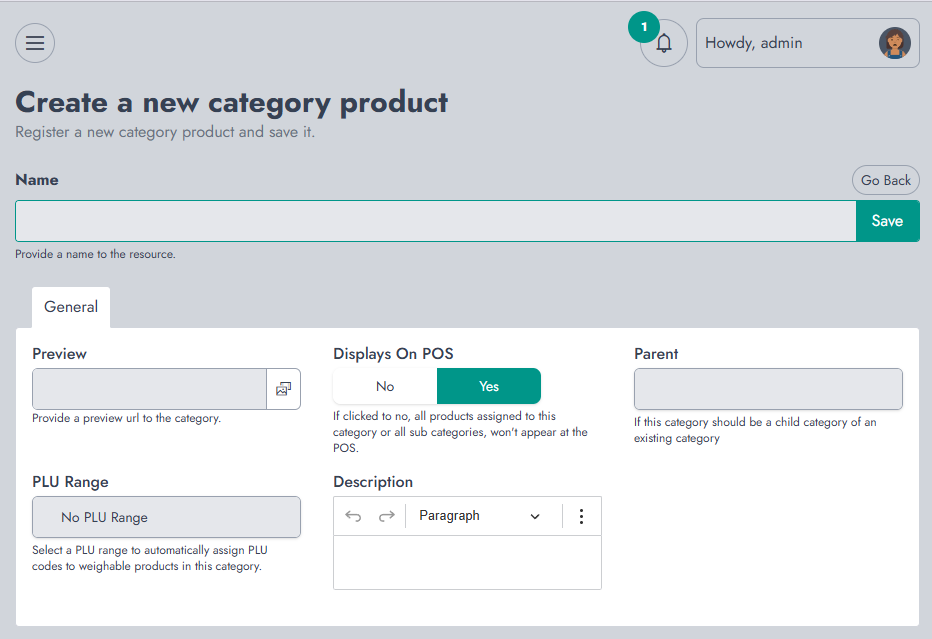
Start by providing the required information:
- Name This is the name of the category. It is required and will be used to identify the category across the system.
- Preview Allows you to define an image or visual preview for the category. This can help users quickly recognize it on the POS.
- Displays On POS Determines whether this category (and its products) will be visible on the POS interface. If set to No, products under this category won’t appear on the POS.
- Parent Allows you to assign this category under another one. This is how you create multi-layered categories (sub-categories). Leave empty if this is a top-level category.
- PLU Range Used to automatically assign PLU (Price Look-Up) codes, especially useful for weighable products (e.g., fruits, vegetables).
- Description A short description of the category. This is optional, but can be useful for documentation or internal understanding.
Once all required fields are filled, click Save.
After Saving
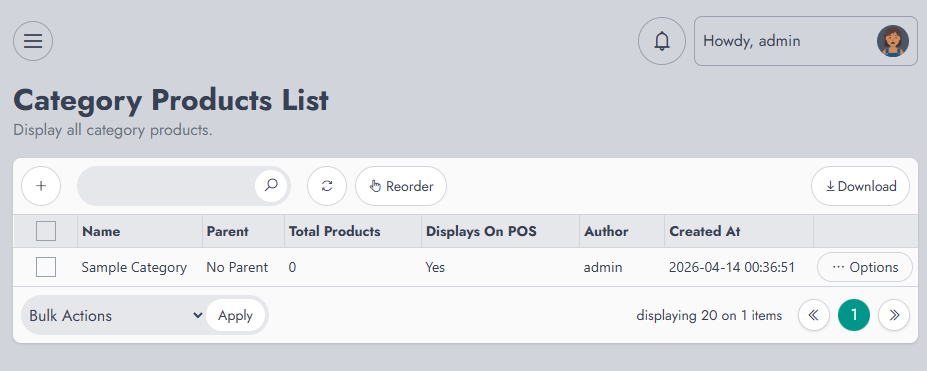
After saving, you’ll be redirected to the Category Products List, where all created categories are displayed.
From this page, you can:
- View existing categories
- See their hierarchy (via the Parent column)
- Check whether they are displayed on the POS
- Manage or reorder categories