
Managing Customers
Customers are one of the main resources that are useful for the system. They are mostly used to keep track of loyal customers and therefore provide better pricing or other advantages. The customers depend on the customer group, which is used for grouping customers to whom we might want to apply the same bonuses or services. Before creating a customer, it's therefore important to have a set of customer groups created.
Creating Customers
The menu that helps to create a customer is available on the sidebar of the dashboard.
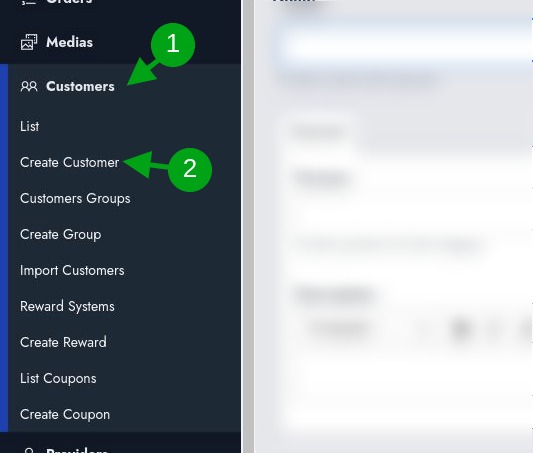
This takes you to a location where you can create a customer. The customer creation form includes the customer name input, followed by 3 tabs: General, Billing Address & Shipping Address.
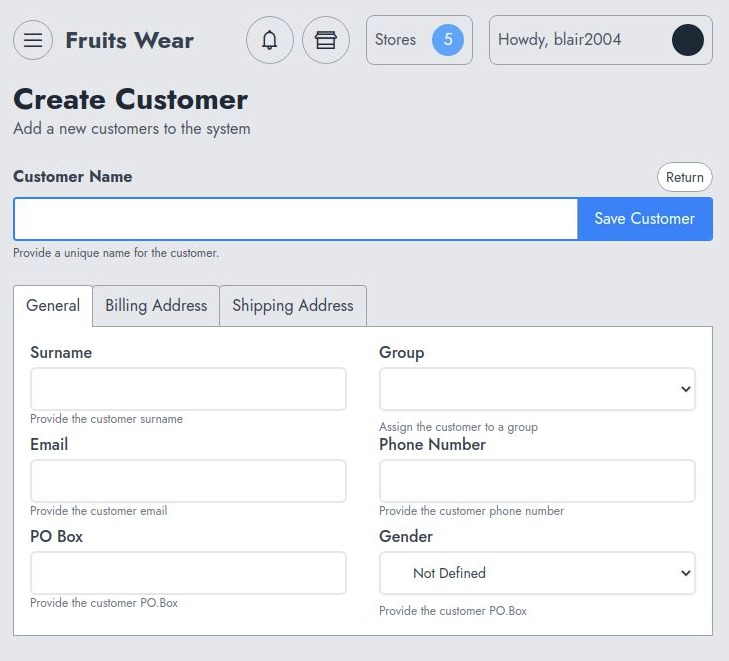
The General tab contains input for general customer information, such as the customer's gender and the customer group to which the customer is attached.
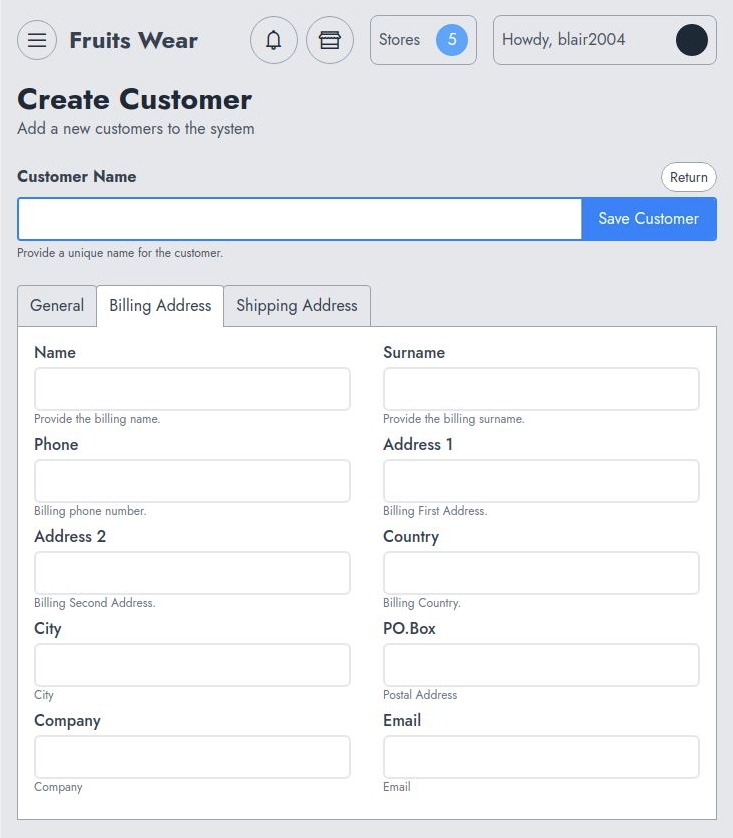
The billing address tab includes billing information for the customer. This information might be used on invoices, receipts, or email notifications.
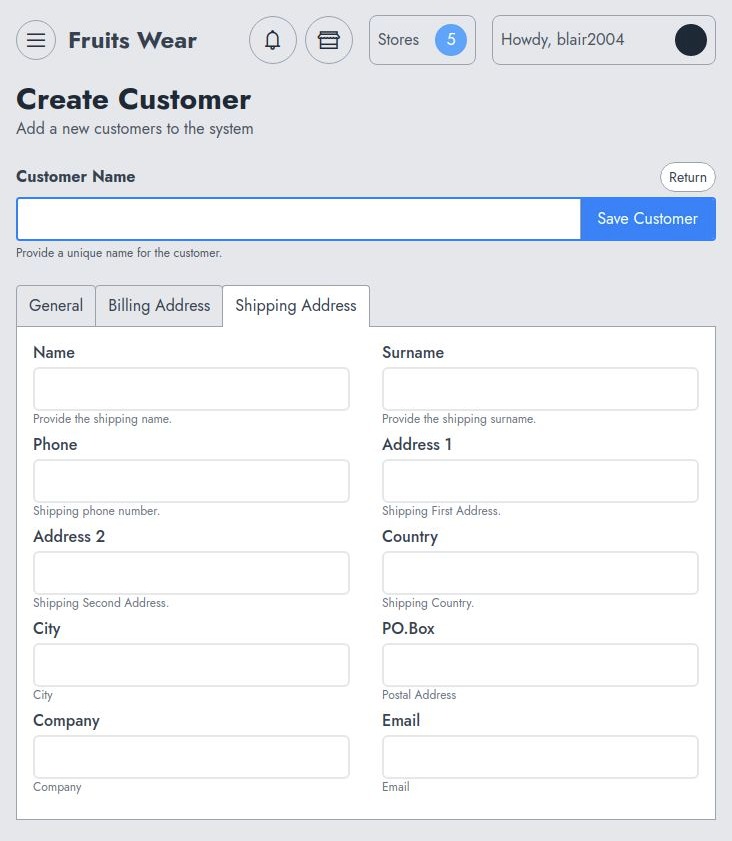
The shipping address tab includes shipping information for the customer. That information might be used on invoices, receipts, or email notifications.
Managing Customers
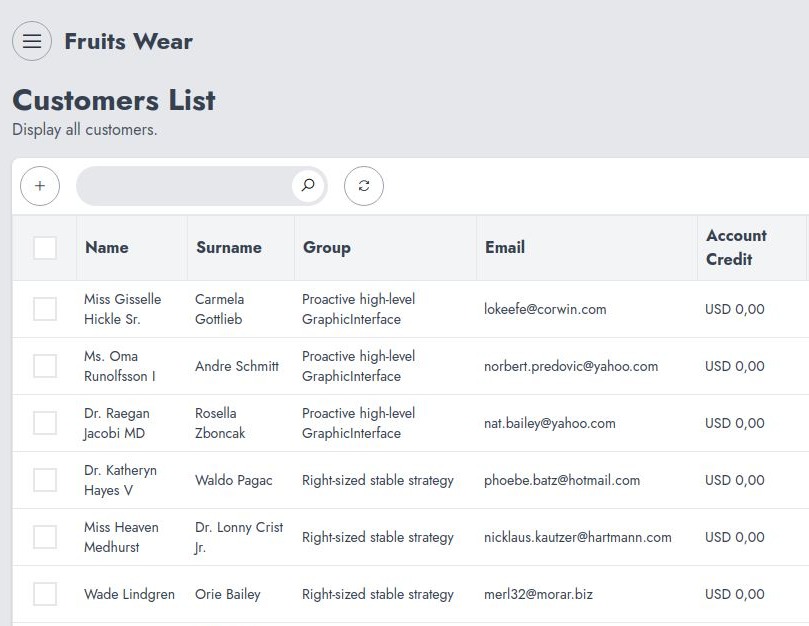
Once created, you're redirected to the customer list, which uses the table component.
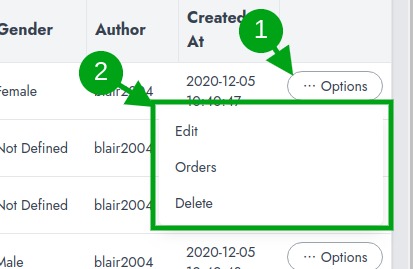
As part of the entry actions, you're able to :
- Edit a customer
- See the customer's orders
- Delete a customer
Customer Rewards
The customer rewards are available when you have correctly defined a reward system. In order to see all the rewards earned by a customer, you need to use the "Rewards" option available for each customer.
Coupons
Customers might earn " coupons " as a reward from the Reward System. Every coupon generated for a customer is available on the "Coupons" option.
Account History
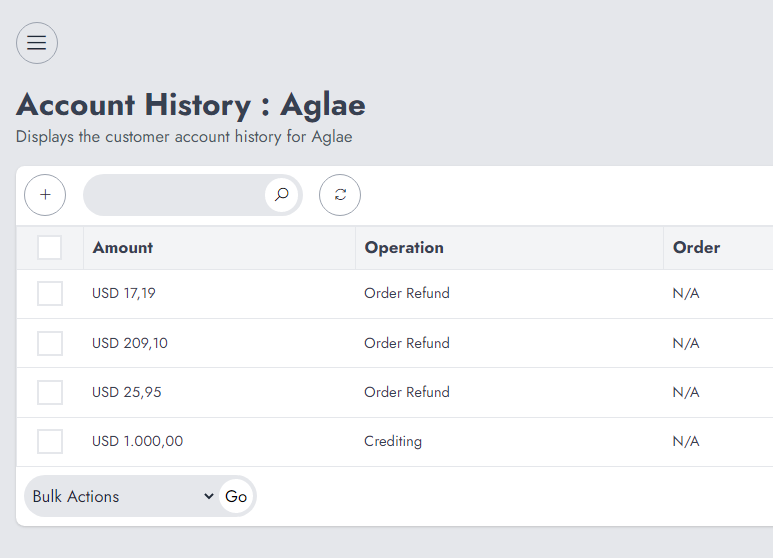
The account history lists all transaction that involves the customer. This includes:
- purchase
- refund
- account funding
- account unfunding
That section can also be used to add or remove credit on the customer account. Here is what it looks like.
Manage Customer Credit
In order to add customer credit, you need to click on the "+" sign, which will take you to a form where you'll update the customer credit.
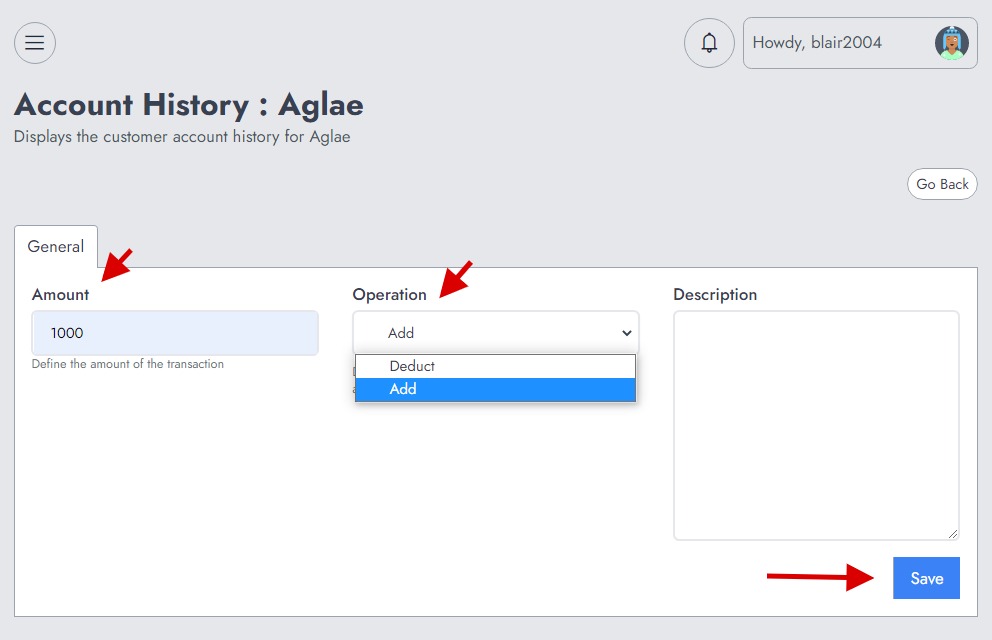
Note that you can either "Add" or "Deduct" funds from the customer account. While deducting funds, if the customer account is not enough, the process will be stopped with an error.table component