
Managing Payment Type
NexoPOS supports multiple payment methods during checkout. By default, the system includes common payment types such as Cash, Bank Payment, and Customer Account.
Administrators can also create custom payment types to match the payment methods accepted by their business. For example, a store may create payment types for Mobile Money, checks, vouchers, external card terminals, or another locally supported payment method.
This tutorial explains how payment types work and how to create a custom payment type in NexoPOS.
Understanding Payment Types
A payment type represents the method used by a customer to pay for an order.
When completing an order from the Point of Sale, the cashier can select one of the available payment types and enter the amount received.
NexoPOS includes the following payment types by default:
- Cash: Used when the customer pays with physical cash.
- Bank Payment: Used for bank transfers, card terminal payments, or payments processed outside NexoPOS.
- Customer Account: Used when the payment is charged to the customer’s account balance.
Custom payment types can be added when the default options do not cover the payment methods used by the business.
Creating a payment type does not automatically connect NexoPOS to an external payment provider. A custom payment type primarily records how the payment was received.
Accessing the Payment Types Page
From the NexoPOS dashboard, open the Orders menu and select Payment Types.
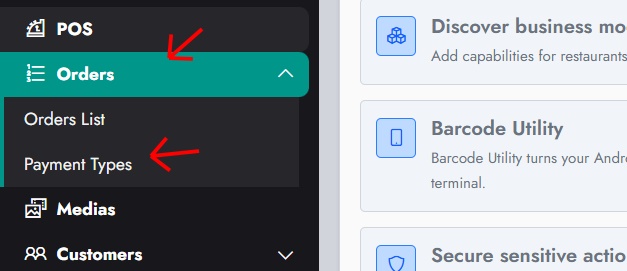
This opens the Payment Types List, where you can review all payment types currently registered on the system.
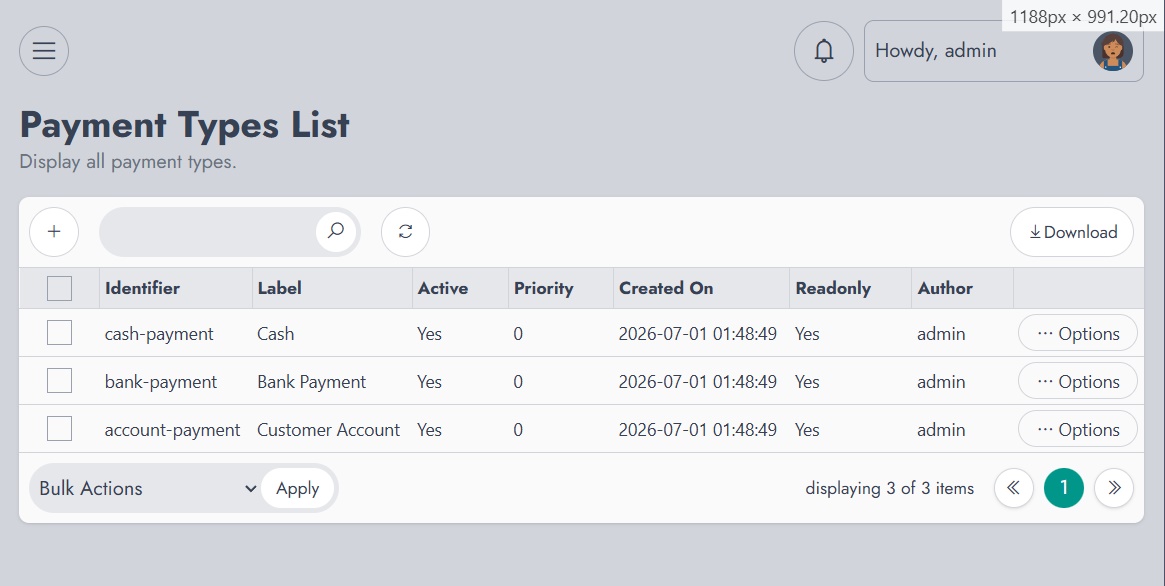
The table provides information about every payment type, including:
- Identifier: The unique internal name used by NexoPOS.
- Label: The name displayed to users and cashiers.
- Active: Indicates whether the payment type is available.
- Priority: Controls its position in the payment selection window.
- Read-only: Indicates whether the payment type can be modified or deleted.
- Author: Shows the user who created the payment type.
The default payment types are marked as read-only because they are part of the core NexoPOS configuration.
Creating a Custom Payment Type
From the Payment Types List, click the plus icon located above the table.
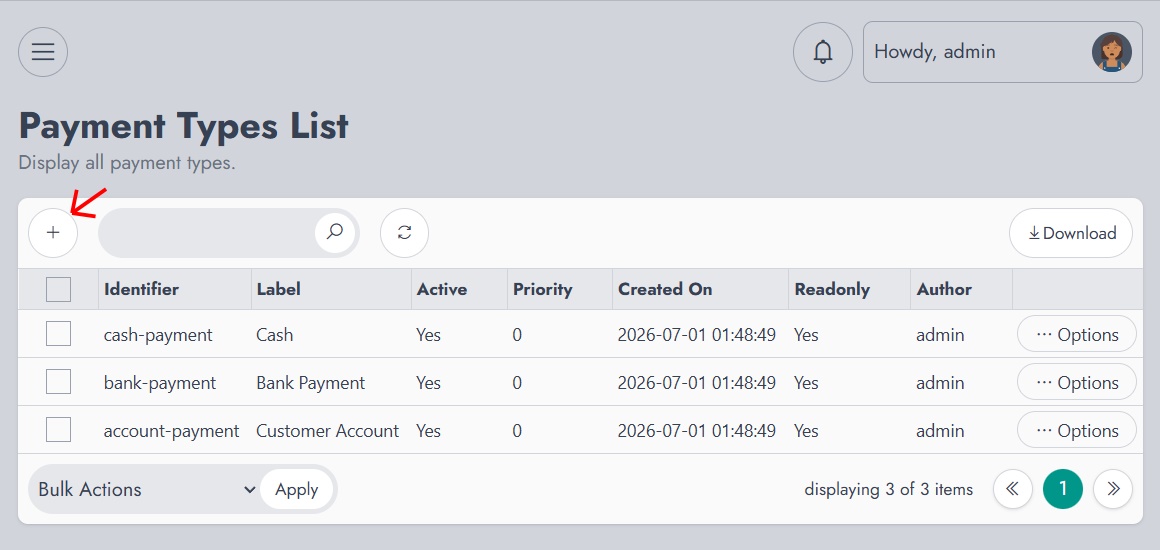
You will be redirected to the Create a new payment type page.
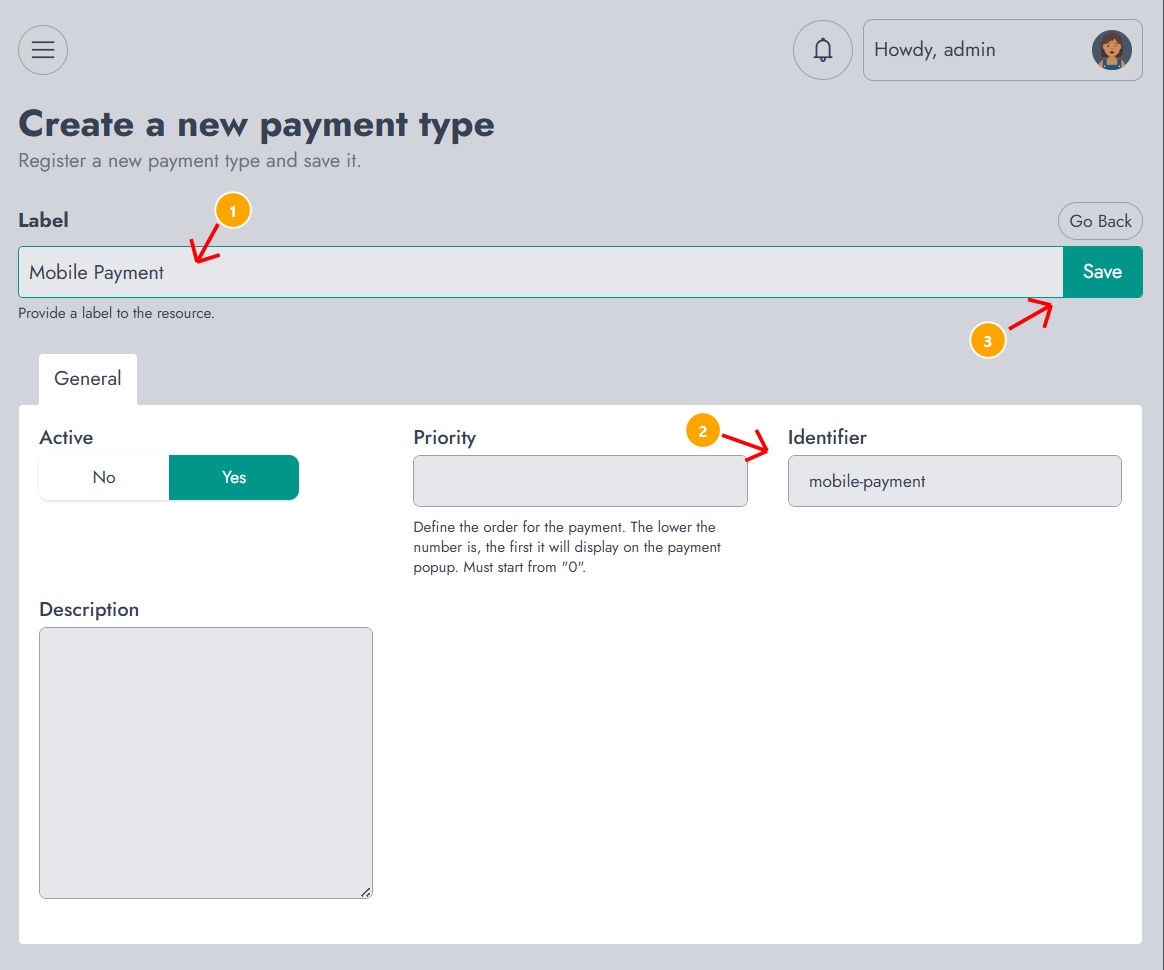
Complete the form using the following options.
1. Label
Enter the name that should be displayed to the cashier during checkout.
For example:
Mobile PaymentThe label should be clear enough for cashiers to immediately understand when the payment type should be used.
2. Active
Select Yes to make the payment type available on the Point of Sale.
When the payment type is inactive, it remains registered in NexoPOS but does not appear as an available payment option during checkout.
3. Priority
The priority determines the order in which payment types appear in the payment popup.
Lower numbers are displayed first.
For example:
0A payment type with priority 0 will appear before one with priority 10.
When multiple payment types use the same priority, their exact order may depend on how they were created or retrieved by the system.
4. Identifier
The identifier is generated automatically from the label.
For example, the label:
Mobile Paymentgenerates the following identifier:
mobile-paymentThe identifier is used internally by NexoPOS and should be unique.
5. Description
The description is optional. It can be used to explain when cashiers should select the payment type.
For example:
Use this payment type for payments received through supported mobile money services.Once the configuration is complete, click Save.
Using the Custom Payment Type at the Point of Sale
After saving the payment type, open the Point of Sale and create or load an order.
Proceed to the payment screen. The new payment type should appear with the other available payment methods.
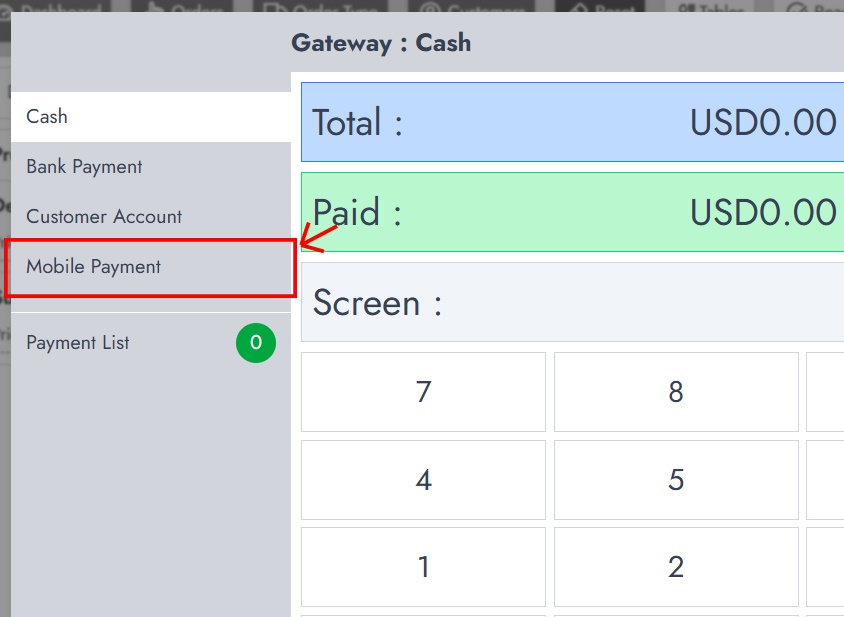
Select the custom payment type and enter the amount paid by the customer.
The payment will then be attached to the order using the selected payment type.
How Payments Are Recorded
An order can contain one or multiple payment entries.
Each payment entry generally records:
- The amount received
- The selected payment type
- The order associated with the payment
- The user who processed it
- The date and time of the payment
For example, an order worth $100 could be paid using:
Cash: $60
Mobile Payment: $40
This is commonly referred to as a split payment.
The sum of the payments should cover the amount required for the order, depending on the payment and order rules configured in NexoPOS.
Custom Payment Types and External Integrations
A custom payment type does not process the payment through an external service by itself.
For example, creating a payment type named Mobile Payment does not automatically communicate with a mobile money provider. The cashier must still confirm that the payment was successfully received before registering it in NexoPOS.
A dedicated module or custom integration would be required for features such as:
- Sending payment requests to a provider
- Checking the status of a transaction
- Automatically confirming payments
- Storing external transaction references
- Processing refunds through the provider
- Handling payment notifications or webhooks
Without such an integration, the custom payment type acts as a manual payment-recording option.
Managing Existing Payment Types
From the Payment Types List, custom payment types can be managed using the Options button displayed on their row.
Depending on the available actions and user permissions, an administrator may be able to:
- Edit the payment type
- Activate or deactivate it
- Change its priority
- Update its description
- Delete it
Core payment types marked as read-only cannot be deleted.
Troubleshooting
The payment type does not appear on the POS
Verify that the payment type is set to Active.
You may also need to refresh or reopen the Point of Sale after creating the payment type.
The payment type appears in the wrong position
Edit its priority. Lower-priority values are displayed before higher-priority values.
The payment type processes no external transaction
This is expected for standard custom payment types. A custom payment type records the selected method but does not automatically integrate with an external payment gateway.
The identifier cannot be changed
The identifier may be automatically generated or restricted after the payment type is saved. This protects references already associated with previous payments.