Mail: [email protected]
Phone: +1(424)231-4091
If you already have purchased the product, you can download it from your account downloads.

NPS Adapter for NexoPOS 4.x is a module that provides support for Nexo Print Server 2.x on NexoPOS 4.x. If you currently have a license of Nexo Print Server (NPS), you can now start using that with NexoPOS 4.x. This guide explains how the module works.
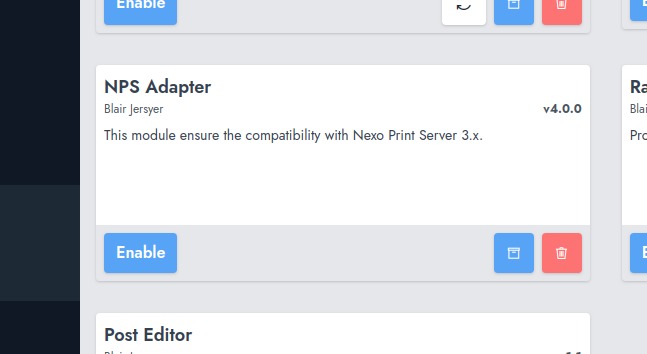
As with any other module on NexoPOS 4.x, the NPS adapter module should be installed from the modules section. Once installed, make sure to enable the module in order to be able to use it.
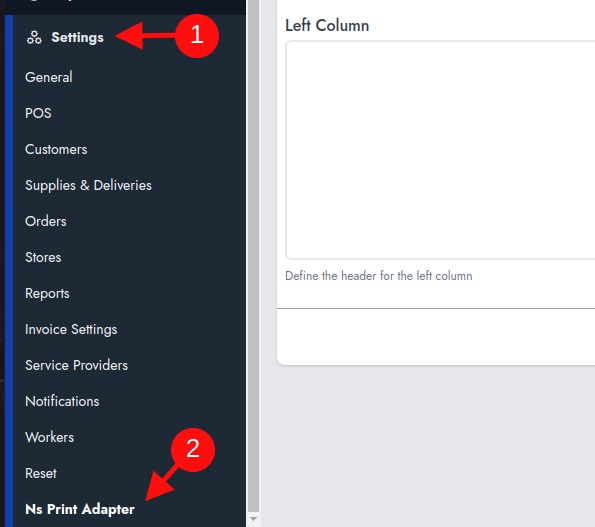
Once the module is installed, you'll be able to configure the setting of the printer. Most of the settings are similar to what was available on NexoPOS 3.x. You'll find as the last menu of the settings a menu named "Ns Print Adapter".
This takes you to a settings page where you can configure the module. By defining :
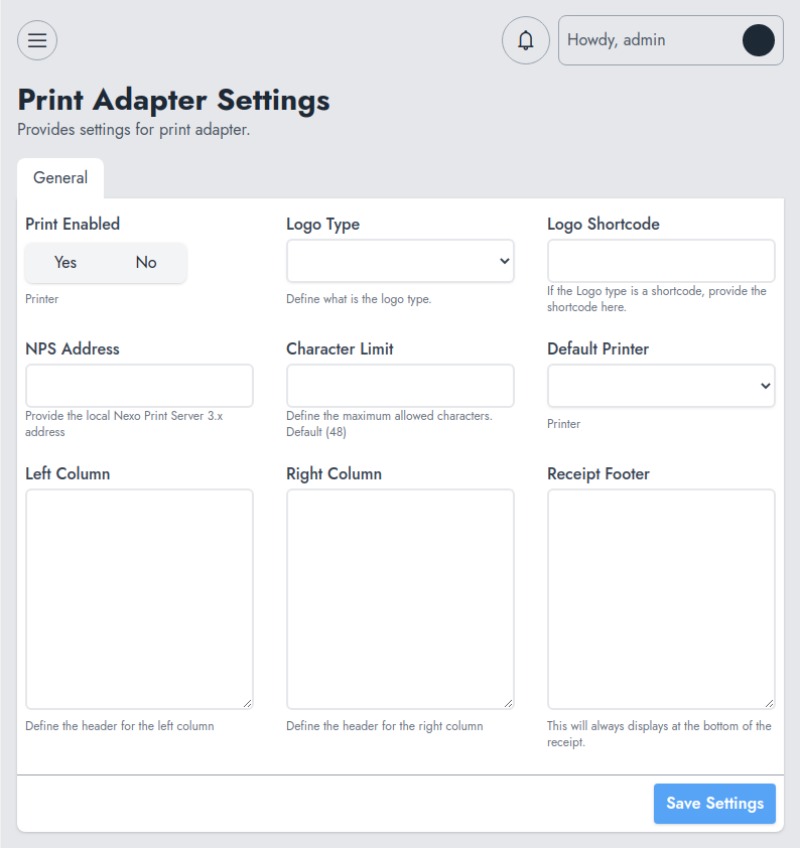
Once you're set, make sure to save your settings.
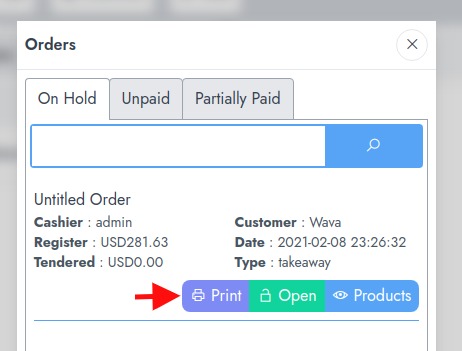
When an order is saved as pending, you can print the order directly from this section.
If you're using this module, you should make sure to disable the printing on the checkout settings.
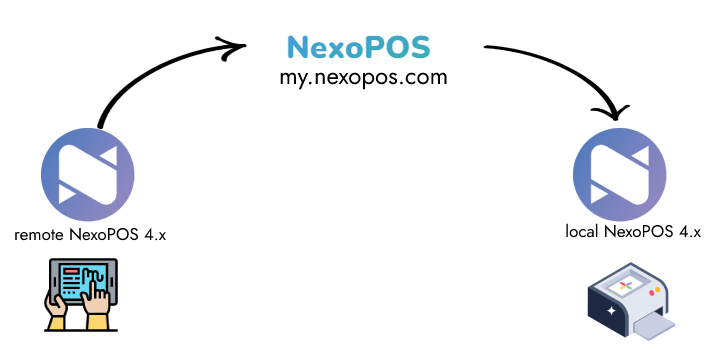
From NPS Adapter 4.7.x, a Cloud Print Service is introduced. That print service ensures print jobs can be sent seamlessly from remote installation to local printers. In order to use this service, you'll need to use it with the "Nexo Cloud Print" module released on the marketplace.
On the Cloud Printing Architecture, this module will work as the service. Print jobs will be sent from the installation where it's located to your local installation. This architecture might be more explicit on how everything is organized.
Before syncing our printers, we need to create them. We'll proceed by showing you how to proceed.
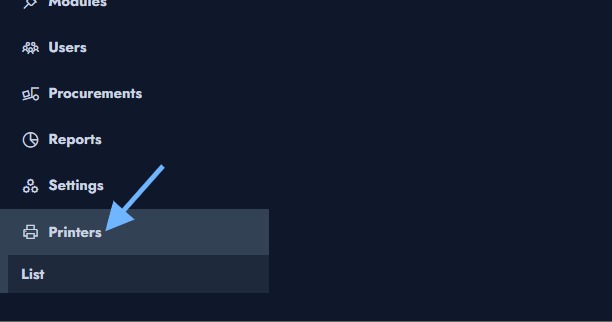
Once the module is enabled, a new "Printers" menu will be added to the dashboard. By clicking on that, you can head to the form that creates printers.
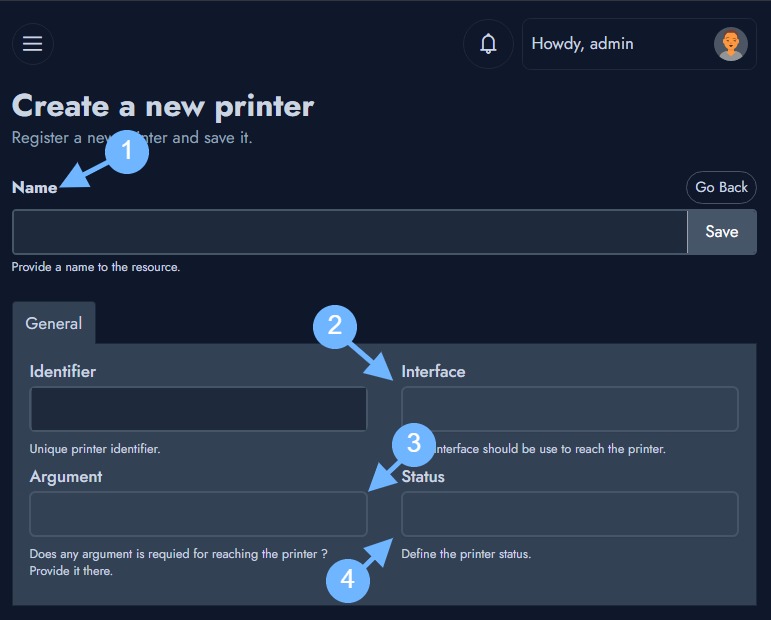
Here we'll define the settings that will help the local printers to be discovered. So the settings to add here are what match your local printers. We'll start with :
Now we need to head to the NPS Settings and enable the cloud printing.
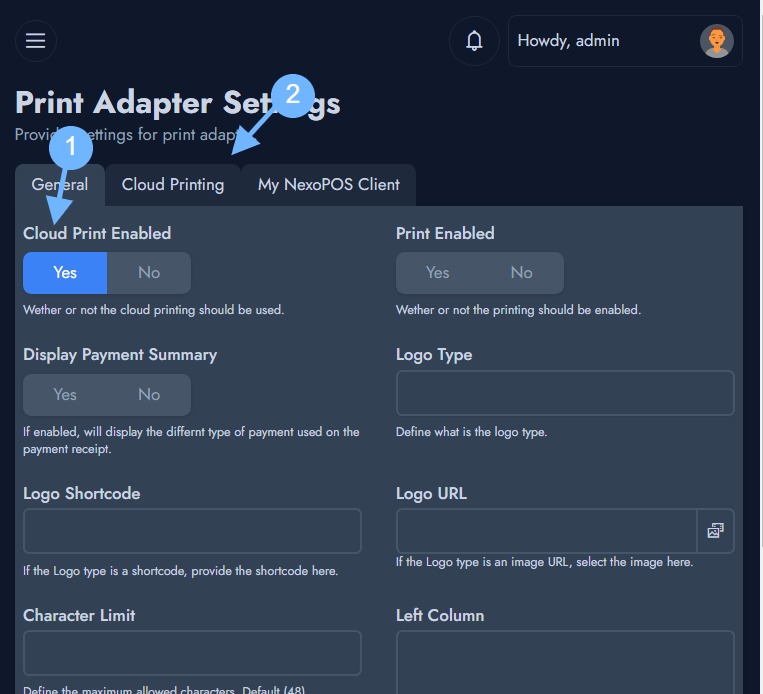
We'll also make sure by the way to configure the cloud print. Once it's done, a new tab "Cloud Printing" will be added (if it's not the case, refresh the page after saving your settings). We'll head there and configure the cloud print.
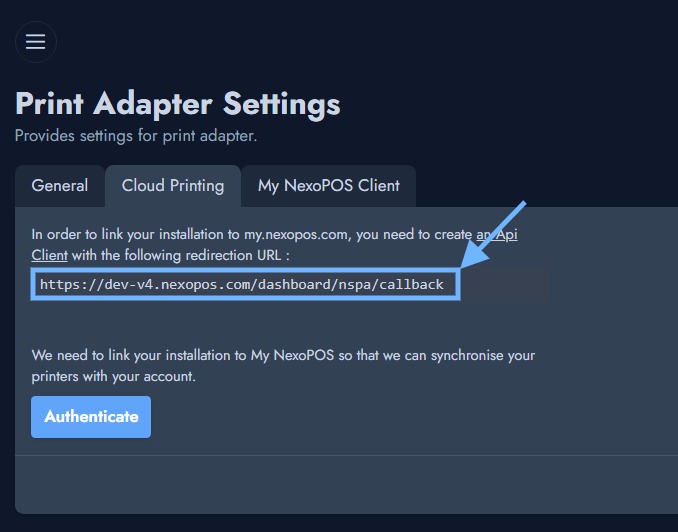
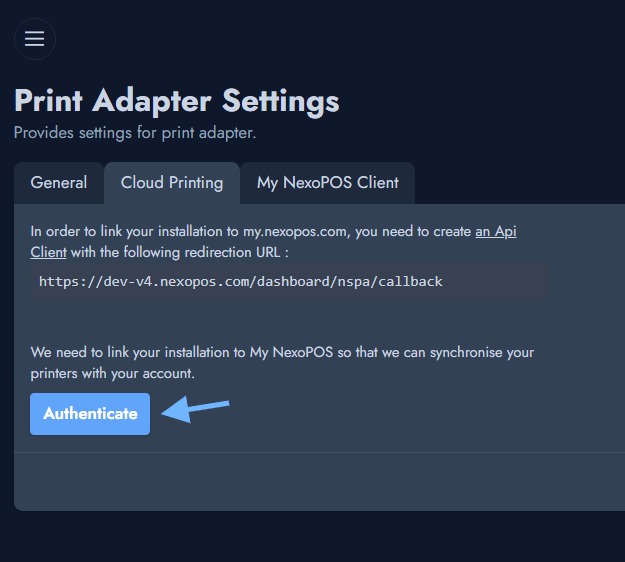
Before authenticating, you need to copy the value that will be displayed on your setting as the "redirection URL", and create an Api Client with.
Click on the tab "My NexoPOS Client", and there you'll provide your Client "app id" and "secret key".
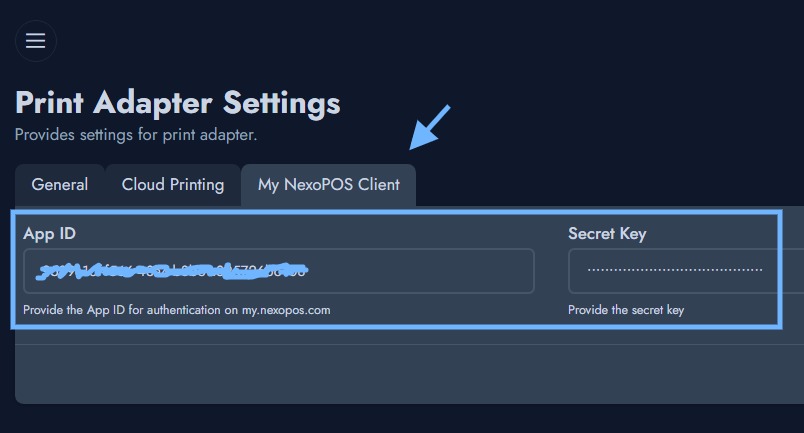
Save your settings and head back to the "Cloud Printing" tab where you'll now click on "Authenticate".
You'll then land on the following authorization page, where you'll allow your API Client to access your printers.
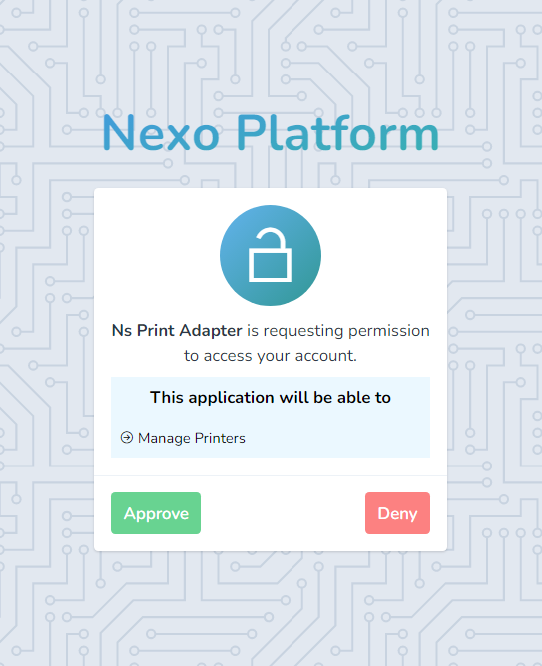
After having approved the authorization request, you'll head back to the "Cloud Printing" tab. From there, you'll choose the setup you've created on "my.nexopos.com" because that's where we'll assign all printers we've created.

Once you've clicked "Save Setup", the page will refresh and you'll have to reopen the "Cloud Printing" tab so that you can sync your printers.
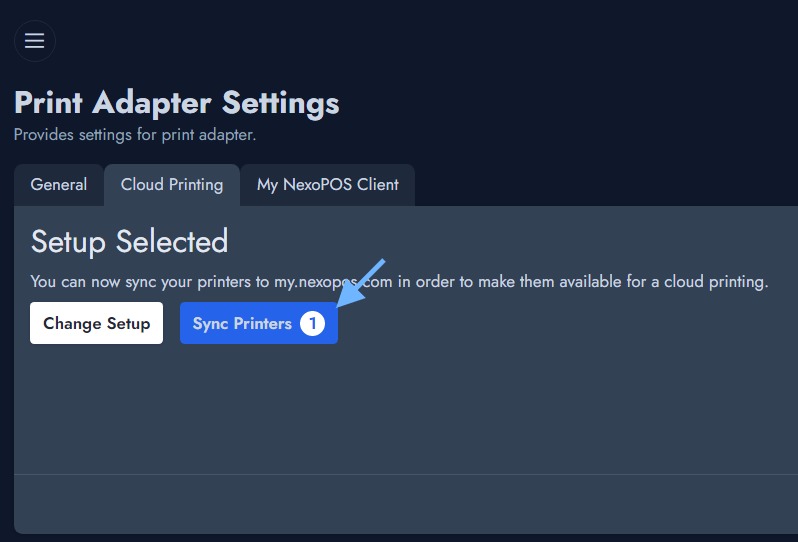
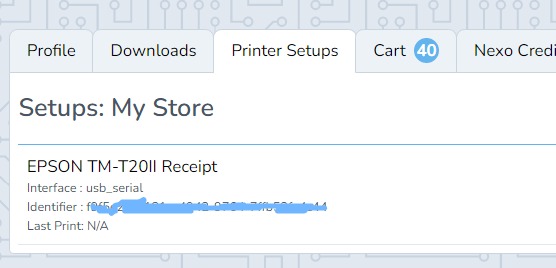
Make sure to check "my.nexopos.com" and see if the printers have been synced on your setup.
On the right side of the settings on the "Cloud Printing" tab, you can define what is the default printer for sales.
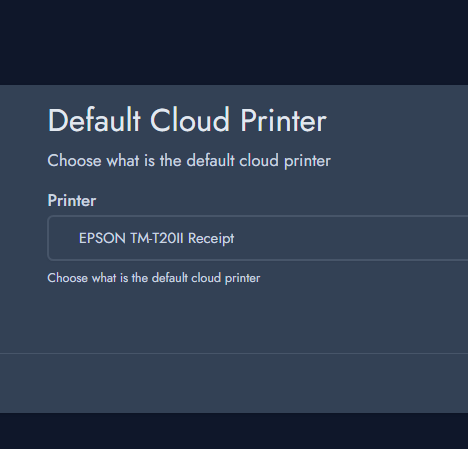
Once you've selected the printer, click on the "Save" button that is located right below the select field (not the "Save Settings" button).
Implement a multi-device printing solution using Nexo Print Server 5x.
If you already have purchased the product, you can download it from your account downloads.