Mail: [email protected]
Phone: +1(424)231-4091
Deploy NexoPOS in 1 minute for free. No credit card required. Deploy Now
Deploy Now
If you already have purchased the product, you can download it from your account downloads.
This is a standalone Windows application for printing on NexoPOS >= v5. This app is different from the one available on CodeCanyon.
The new Nexo Print Server has been crafted to solve most of the common issues encountered on the legacy release (v4.x):
This guide explains therefore how to install and configure Nexo Print Server for NexoPOS 5.x
To use Nexo Print Server you need to have the following requirements met:
When downloaded, Nexo Print Server is provided as a zip file that contains a Windows executable. The installation process is quite straightforward.
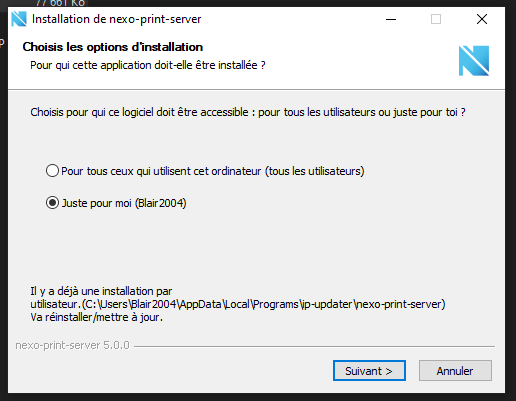
You just have to go through the installation steps and you'll have the app running. Once it's installed, you just have to search "Nexo Print Server" on the Start Menu.
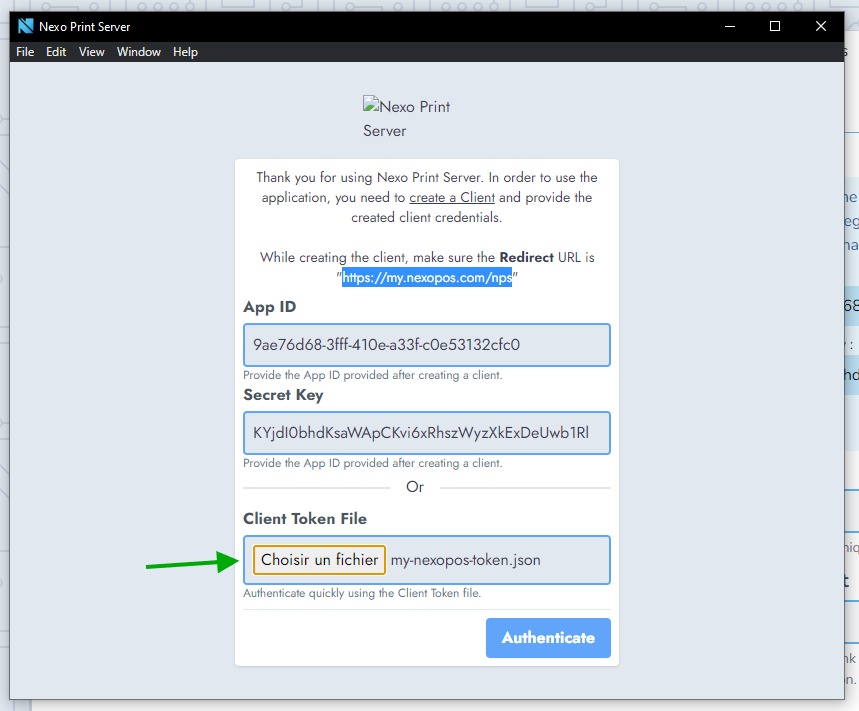
When you run Nexo Print Server for the first time, you'll land on the authentication page that looks like this:
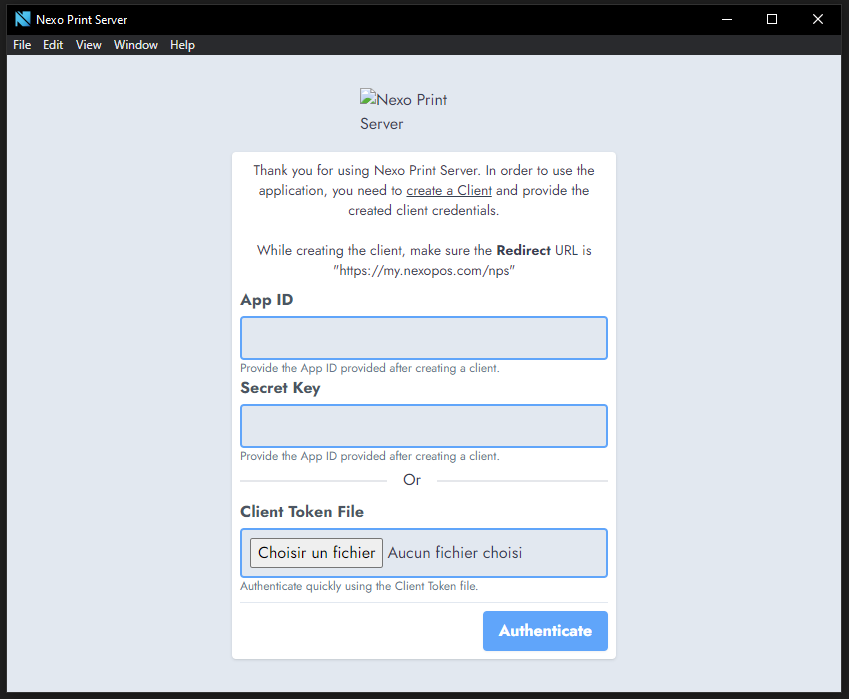
As mentioned in this window, we need to login to our my.nexopos.com, head to the "Clients" and create a client that has as the Redirect the value "https://my.nexopos.com/nps". On the Name field, you can input whatever you want.
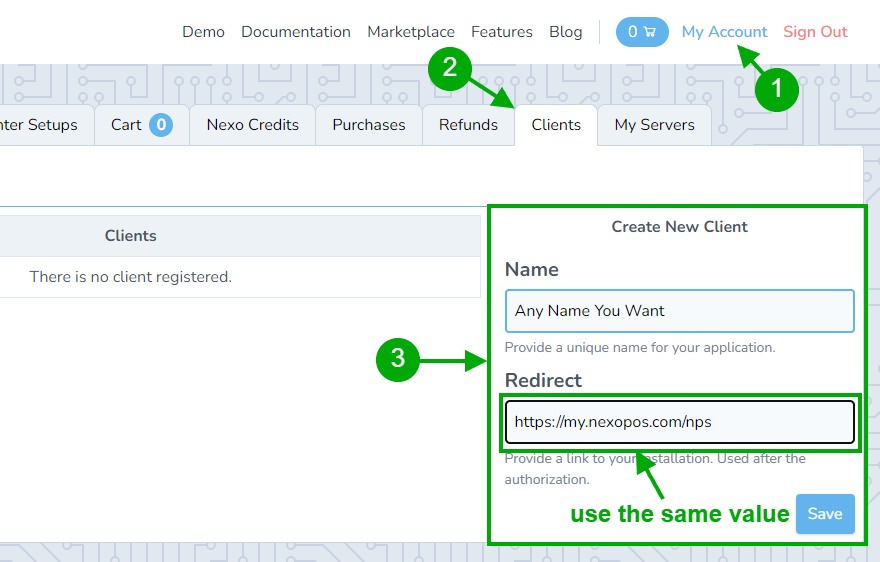
After the creation, you'll see a new form having the credentials of your newly created client.
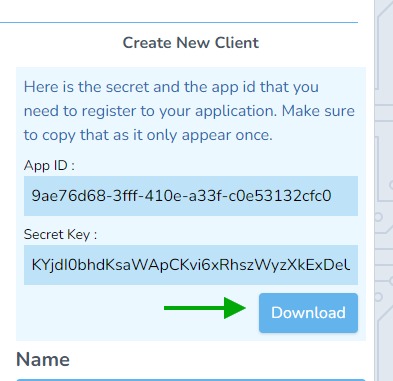
We'll download the token file by clicking on "Download". That file we'll use on Nexo Print Server windows and load in on the field "Client Token File".
Now, click on Authenticate to proceed. Your default browser will be opened and if you're not yet logged in, you'll be invited to log in to my.nexopos.com. Once that's the case, you'll land on a permission page requested by the client you created. It should look like this:
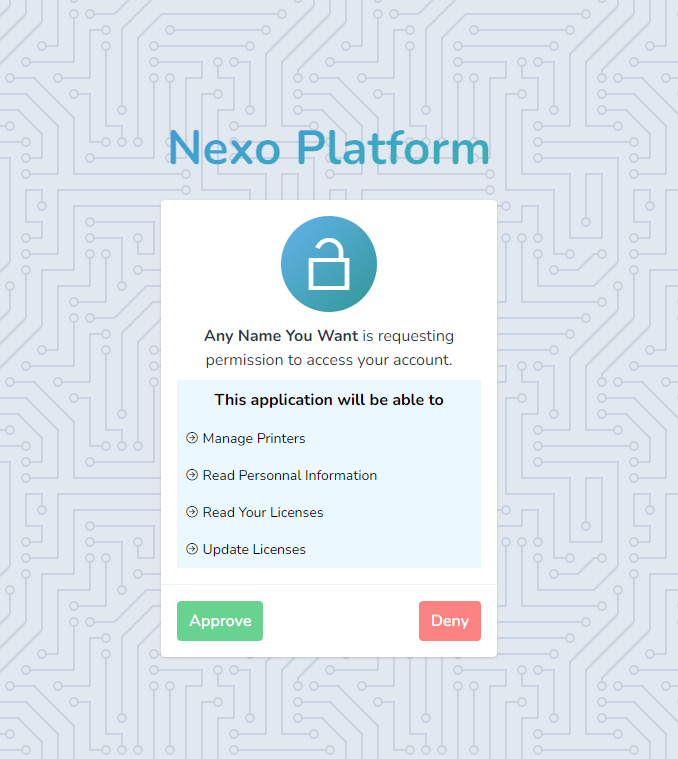
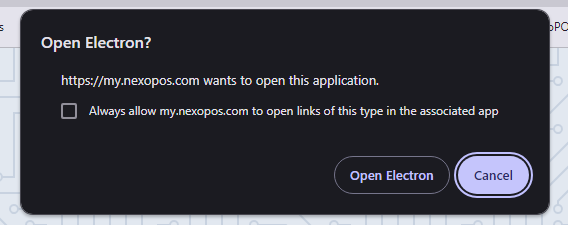
You just have to "Approve" the access and that's all. You might be invited to allow the browser to send a response to Nexo Print Server.
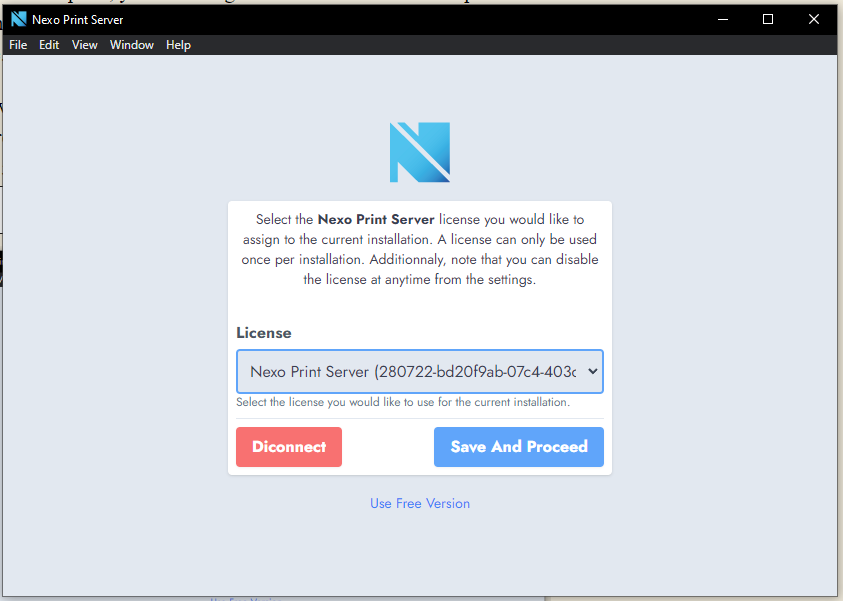
Once everything is done, you'll land on the license page.
When you land on the license page, you're asked to select the license you would like to assign to the current installation. Note that Nexo Print Server has a free tier and you can skip this step if you don't have a license. However, note that you'll use Nexo Print Server with limited features.
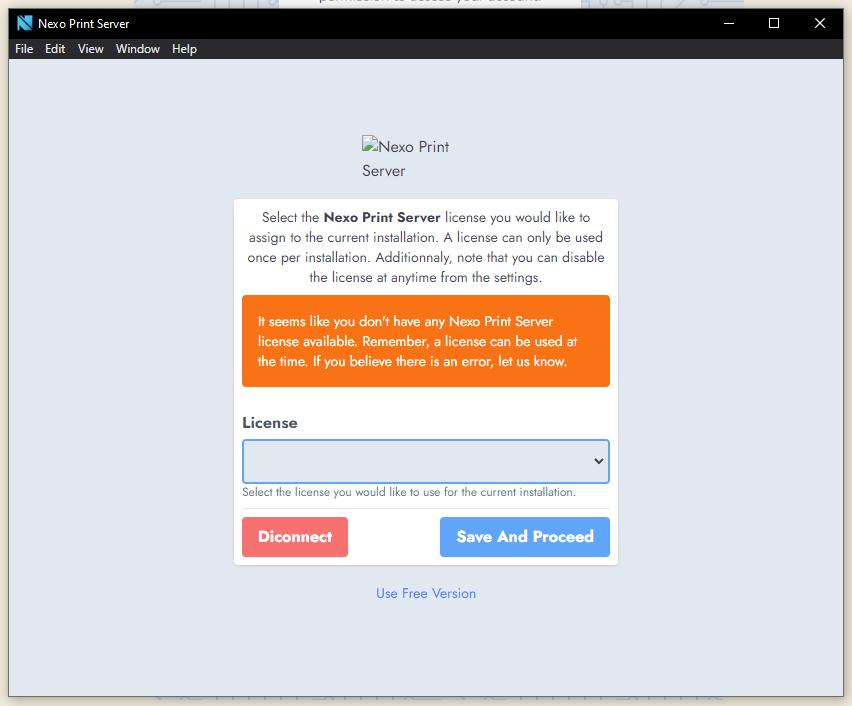
If you want to use the free version, click on "Use Free Version".
However, if you have purchased Nexo Print Server on CodeCanyon, and have added your licenses to your account, you should be able to see the license and select that.
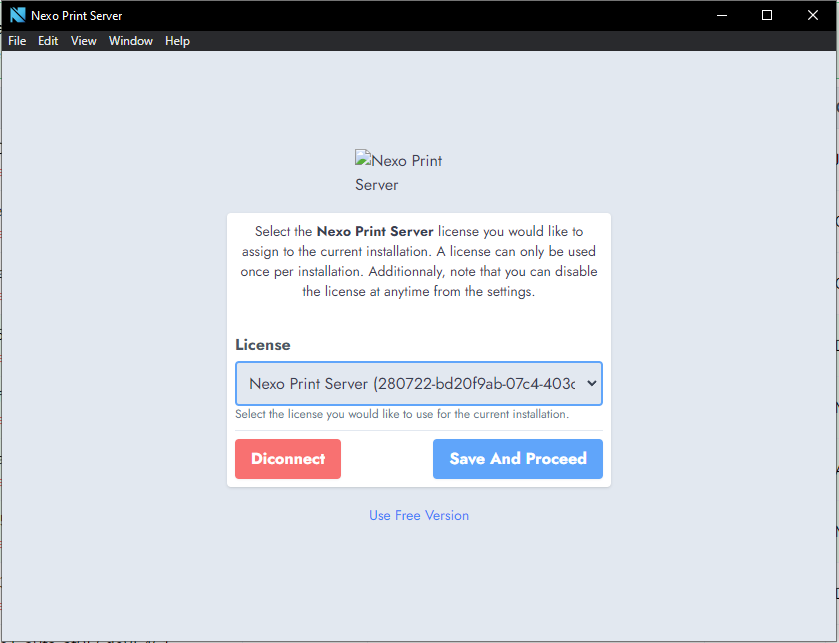
Just click on "Save and Proceed" to head to the dashboard.
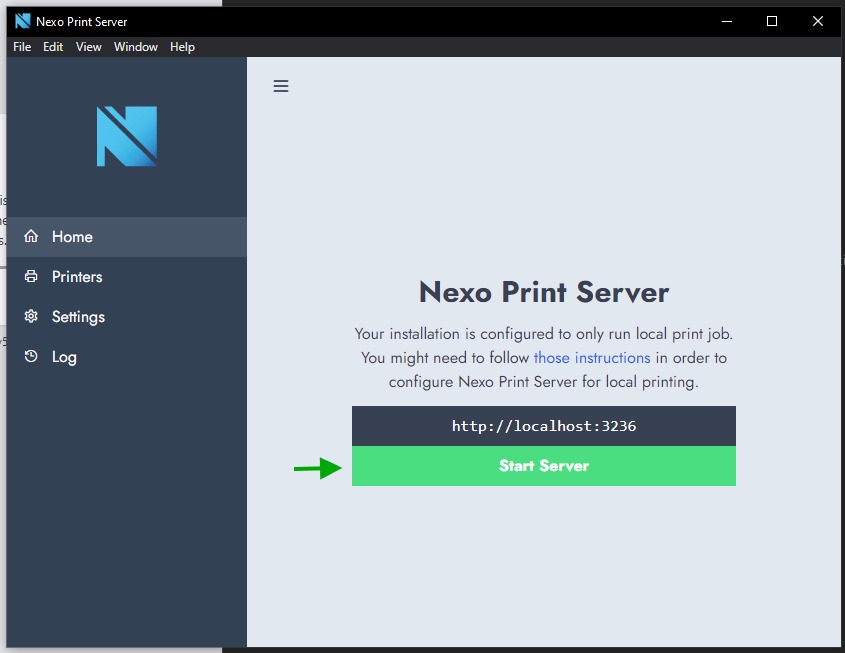
Local print is a configuration where your print job moves from NexoPOS directly to Nexo Print Server, without passing through our server. While this configuration is simple and fast, it's however limited. The Local Print option only works on 1 computer. It can't be used on a local network. It's therefore not a great solution if you would like to print from mobile devices or another PC on the same network.
We have to click on "Start Server" for the server to start. Make sure to double-check your settings (and save them) to ensure the port is correctly configured.
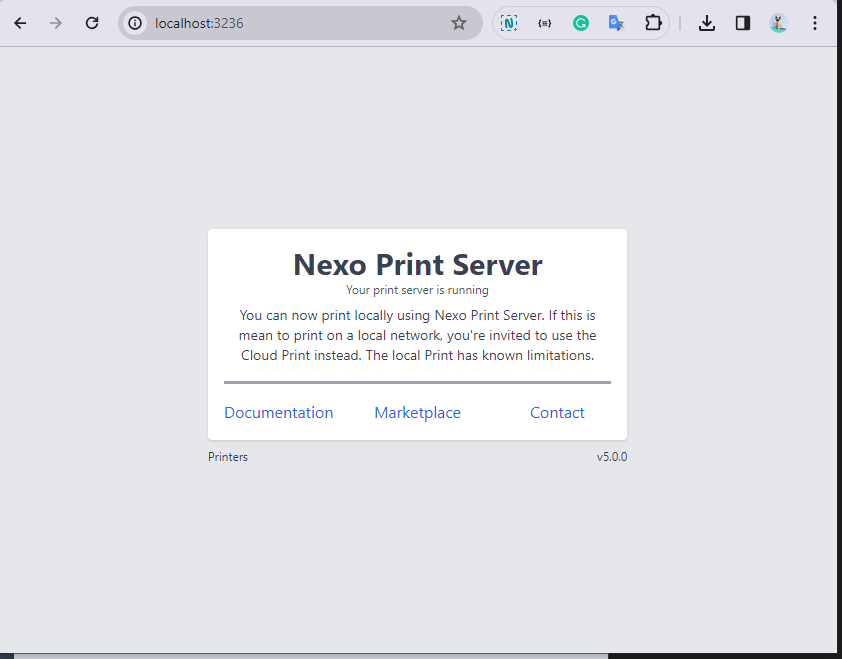
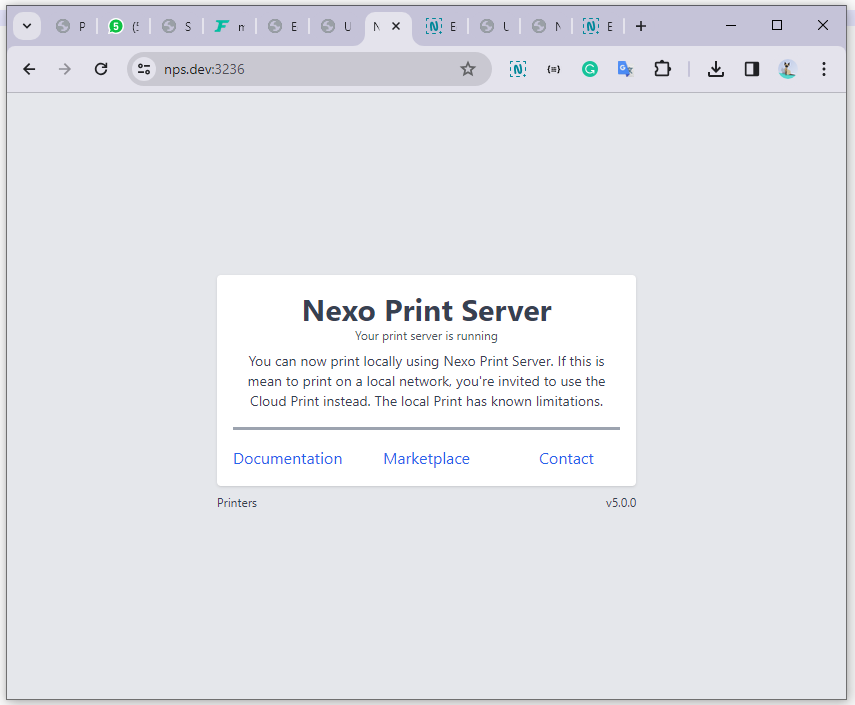
Now, when you open the URL on your browser, you should see the default Nexo Print Server welcome page. This also usually means the server works.
If your installation of NexoPOS is running on a secured protocol (SSL), you'll need Nexo Print Server to do the same as well. If we just enable the SSL on the settings and try to access the browser, we'll land on the following page (assuming our URL is https://localhost:3236):
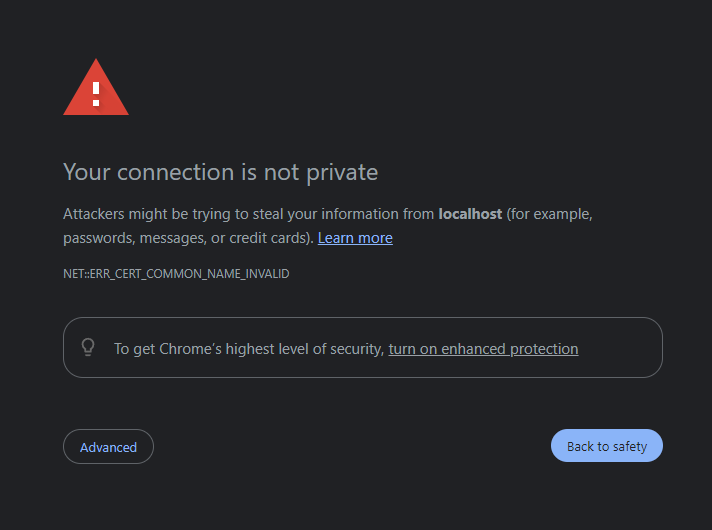
The default certificate is self-signed, but we can bypass it using a fake domain (a.k.a development domain). Since we're only using it locally, this will make any browser recognize Nexo Print Server's self-signed certificate.
The trick here is to save a virtual domain by editing the "hosts" file located at Windows/System32/Drivers/etc. You'll find in that directory a file named "hosts".
You should edit that file using administrator privilege on Windows (you can use Notepad or Notepad++ to edit the file). Then we'll add for example "nps.dev" as a fake domain. It should look like this.

This consists of the localhost IP address (127.0.0.1) followed by a space and then the virtual domain (nps.dev). Note that you can set anything you want, but keep the extension ".dev".
We'll no longer use "localhost:3236", but "nps.dev:3236" and that will work on our NexoPOS installation using a secured protocol.
To print from NexoPOS, we should load all the printers defined on your system. For that, we'll first head to the printer on Nexo Print Server UI. You should have something that looks like this:
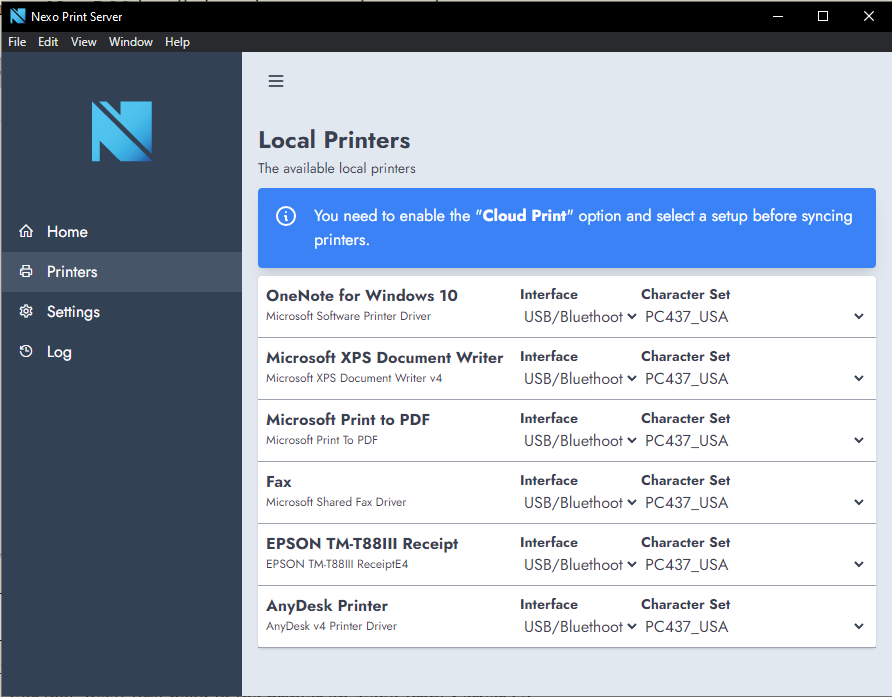
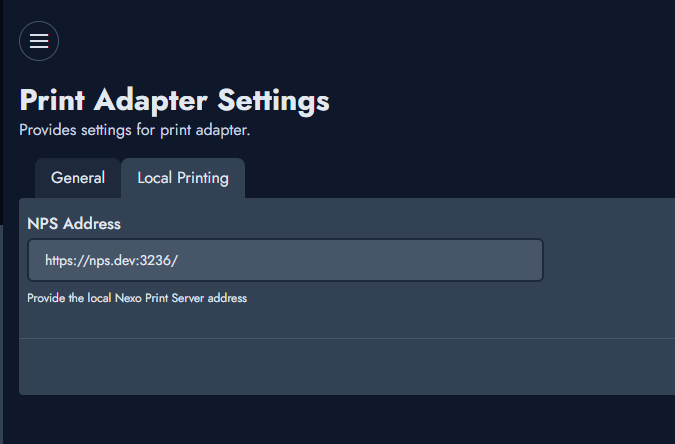
Here you can change the interface and character set. So far, NexoPOS is not aware of how to access the Print Server. For that, we need to provide the custom domain we've created on the print settings. First of all, we'll head to the "General" tab, then make sure the "Cloud Printing" is disabled, and save the settings.
Now refresh the page click on the Local Printing tab and provide the custom domain URL you've created (in my example I used https://nps.dev:3236)
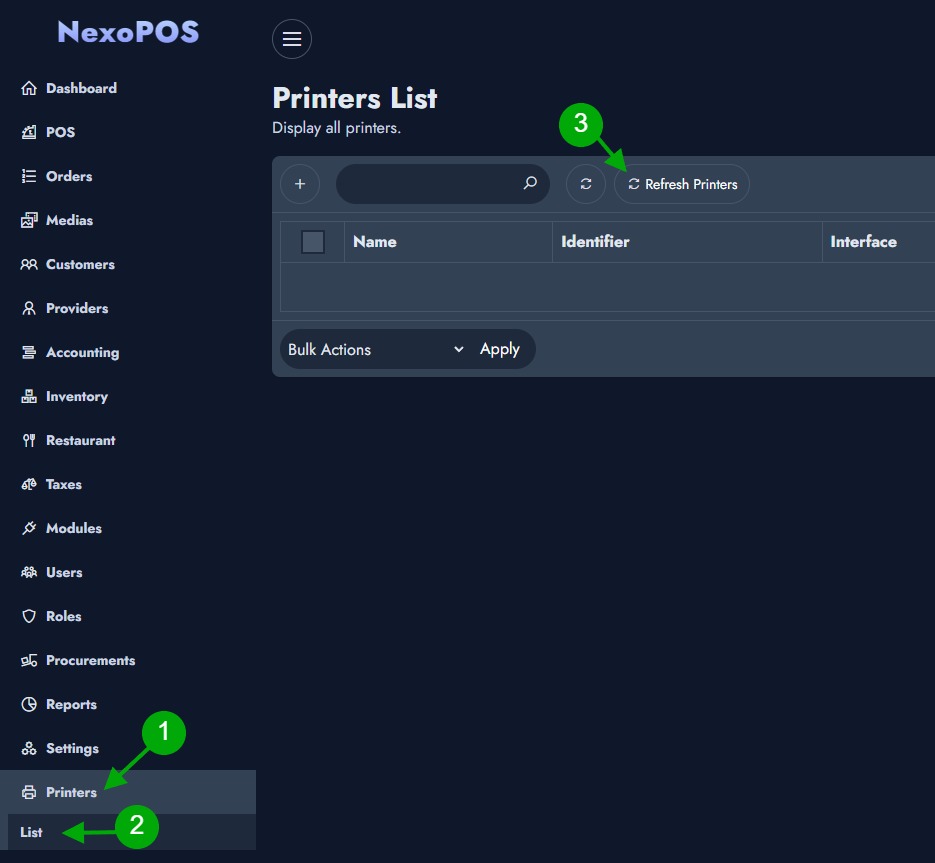
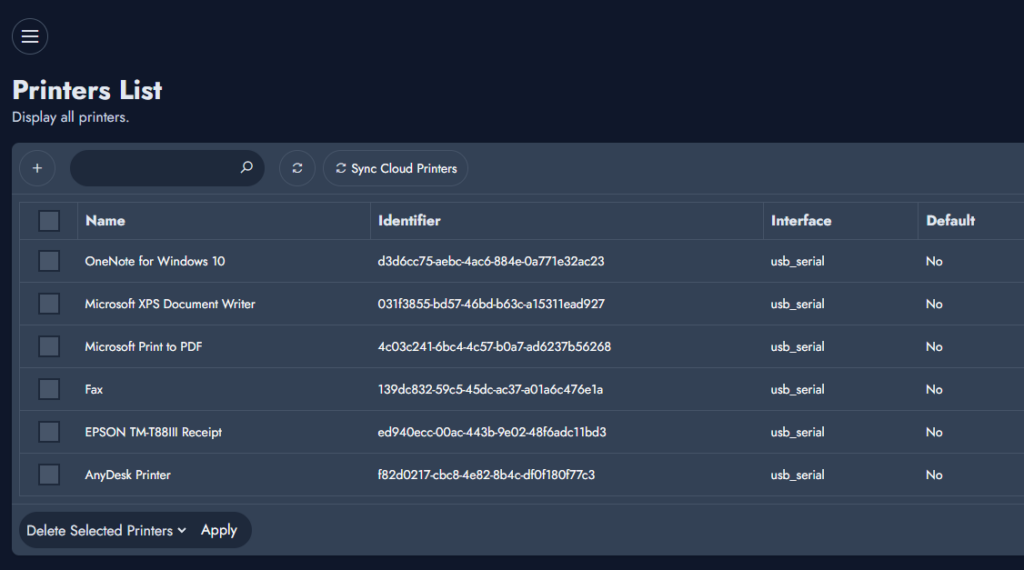
Now make sure to save the settings. Now head to the printers, then list. This will take you to a table that should normally have no entries. On top of the table, you should see a button "Refresh Printers" that is loaded to automatically load your printers.
Now, you should have a table that looks like this:
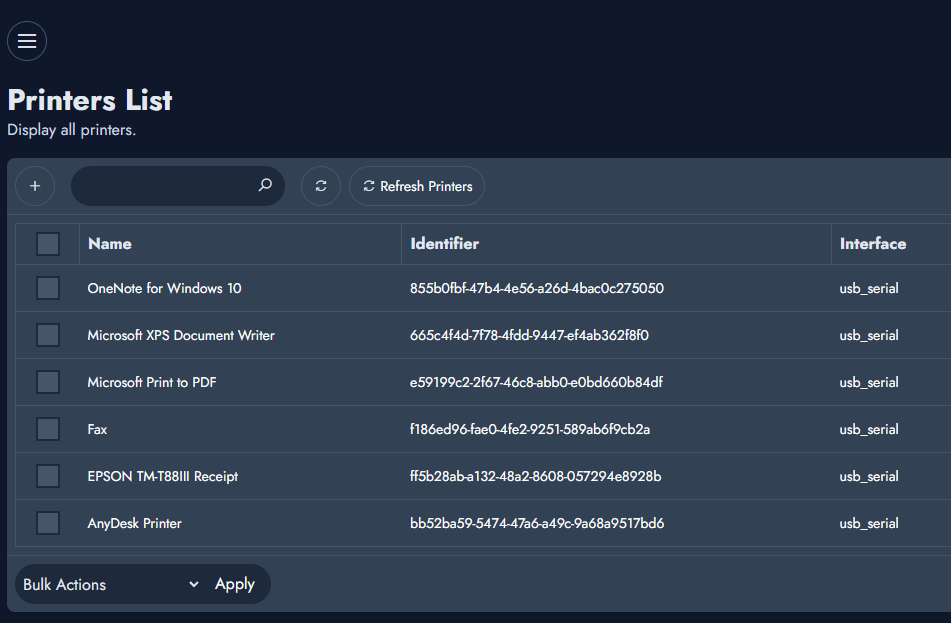
From here, we've successfully loaded the printers.
Printing using the cloud service requires a valid and active license on Nexo Print Server as purchased on CodeCanyon. This means that if your license expires, you'll no longer have access to the cloud print. Note that once purchased, you have 6 months of access to the cloud service.
Here, we'll elaborate on how to print using the Cloud print service. One of the requirements is to have selected your license on Nexo Print Server 5. If you've started with the free version, you can still disconnect and restart by selecting a license.
Now, you'll make sure to select the license and click "Save and Proceed".
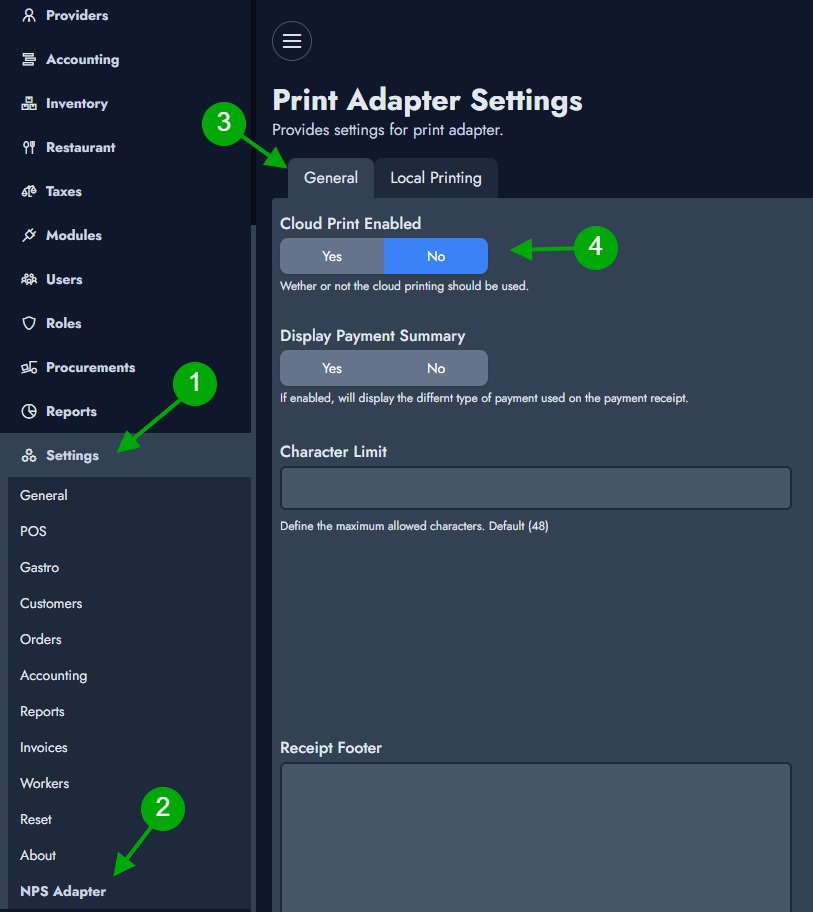
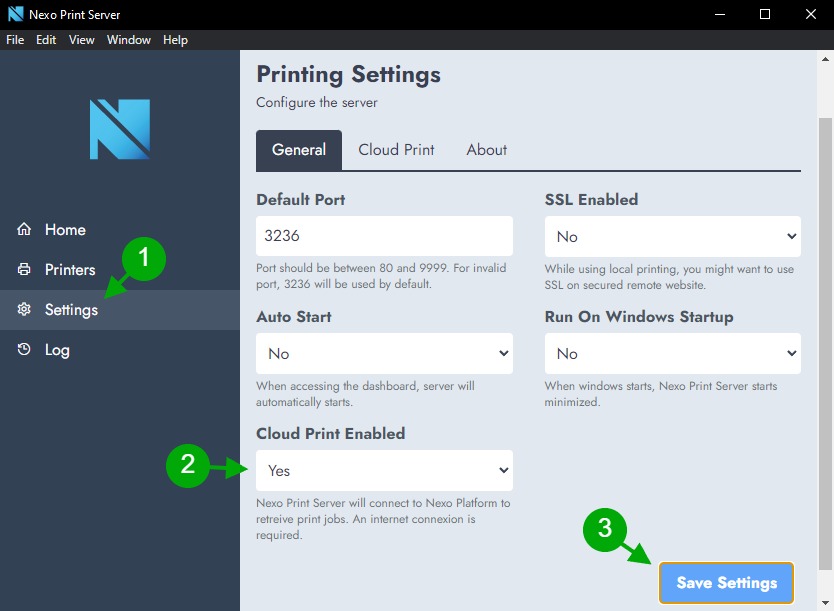
We'll now go to the Settings then on the option "Cloud Print Enabled", we'll set the value to "Yes" and save the settings.
Now that it's saved, we'll click on the "Cloud Print" tab. Here we'll select the Printer Setup we want to use. The Printer Setup consists of categorizing printers. If you haven't created a Printer Setup yet, you can learn how to do that here. Once created, you might need to switch between tabs to reload the available Printer Setup.
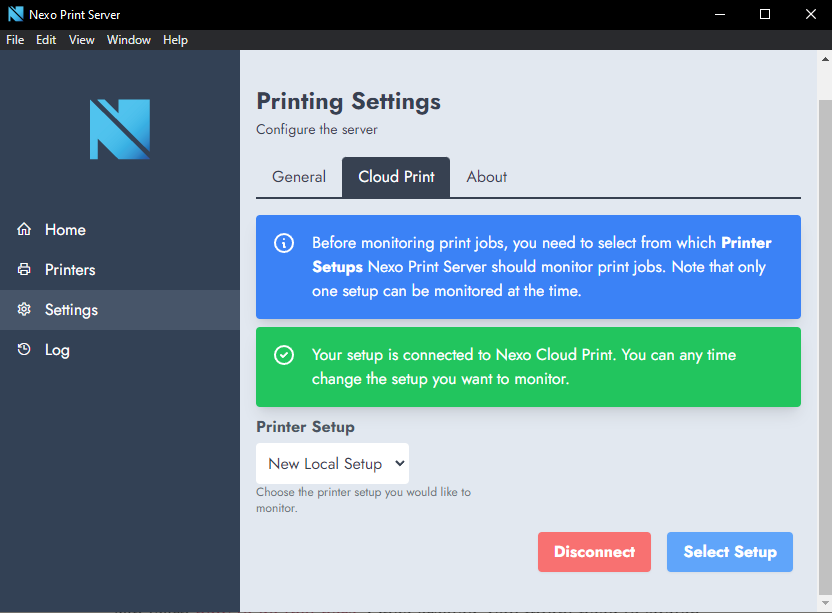
Once selected, make sure to click on "Select Setup". Now, let's head to Home, and we'll see that the dashboard has changed. We can start listening to cloud jobs.

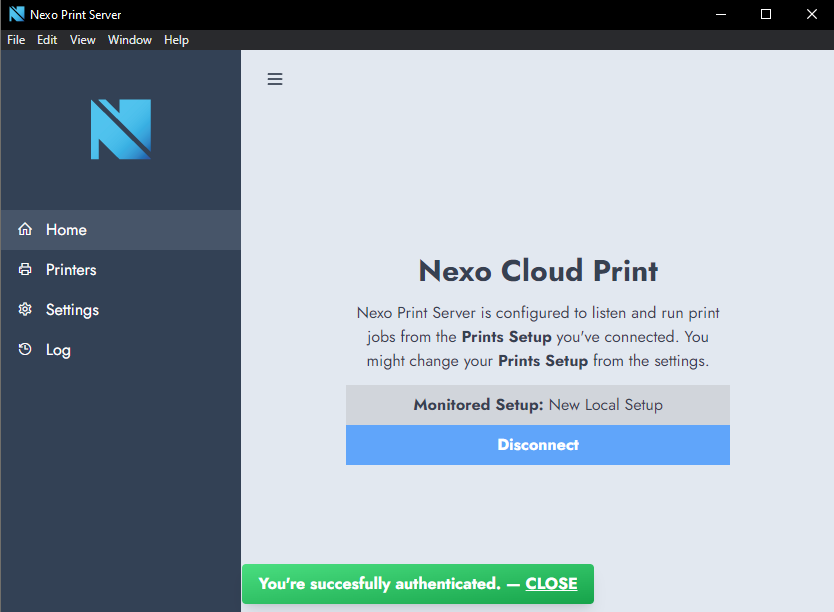
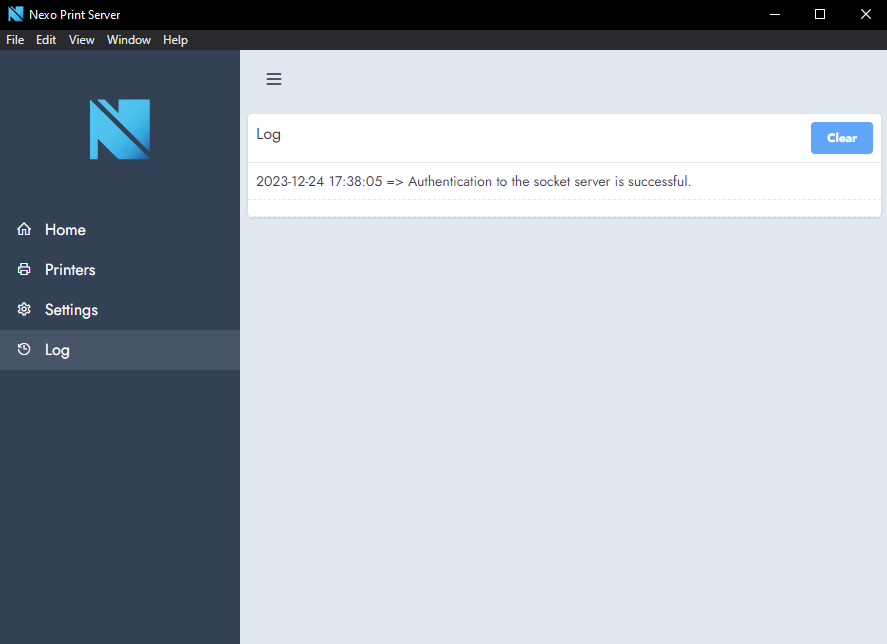
By clicking on "Connect", Nexo Print Server will attempt to connect to the remote server and listen to jobs. A successful response will be like this:
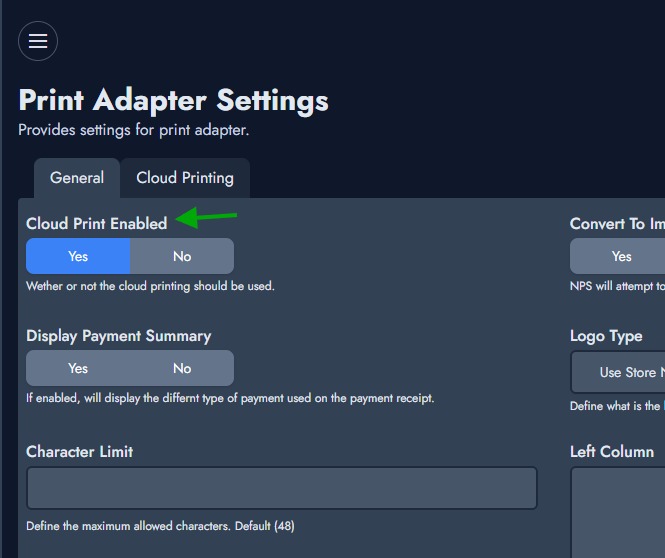
Now that Nexo Print Server (NPS) is connected to the cloud server, we need to load the printers. The first step will be to make sure the Cloud Print is enabled, by heading to "Print Adapter Settings" and do the following change:
Once saved, let's head to the Cloud Printing tab. This will show for now detailed instructions on how to connect NexoPOS to my.nexopos.com:
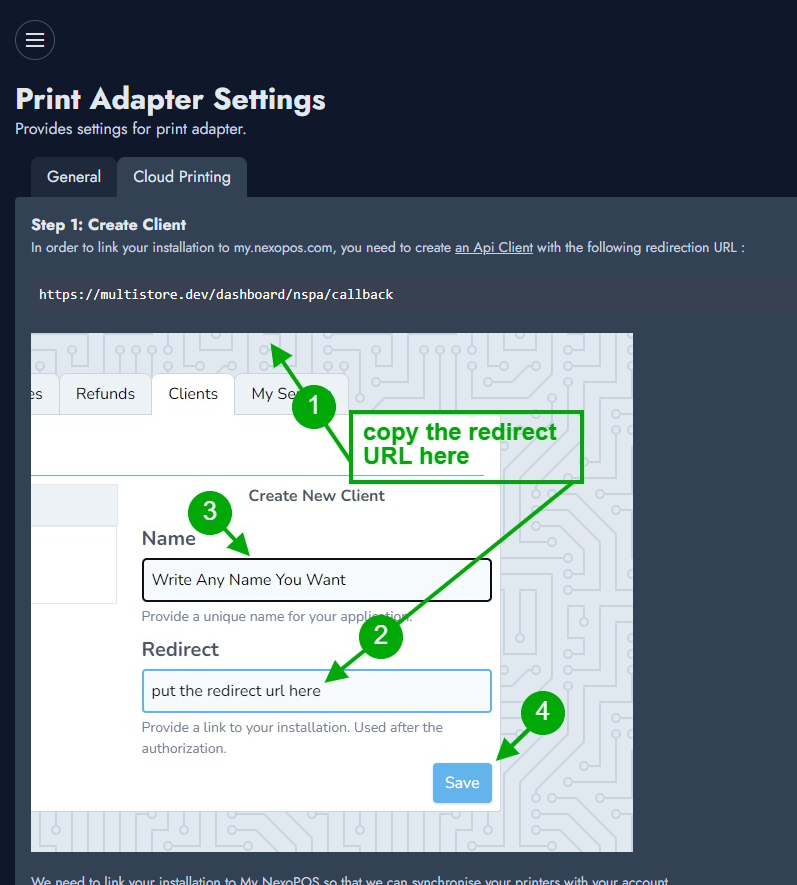
Make sure to follow those instructions. If something is wrong, get in touch with the support.
Now, you'll make sure to select the same Printer Setups as you've selected on Nexo Print Server.
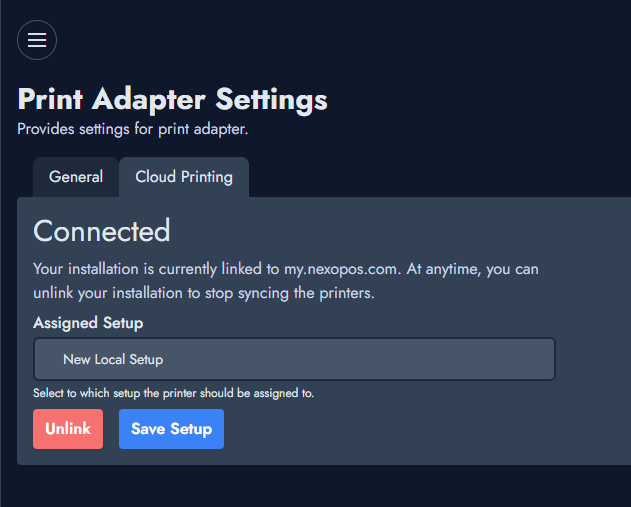
You should now land on the following page:
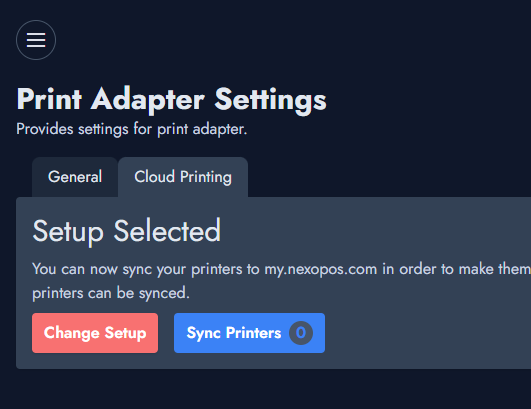
At the moment, no printers are available. So what we need to do, is to sync local printers to my.nexopos.com and load them on NexoPOS. So the first step is to head to Nexo Print Server and go to the "Printers" tab.

Now that the printers are synced, you can head to the "Printers" on NexoPOS and sync printed.
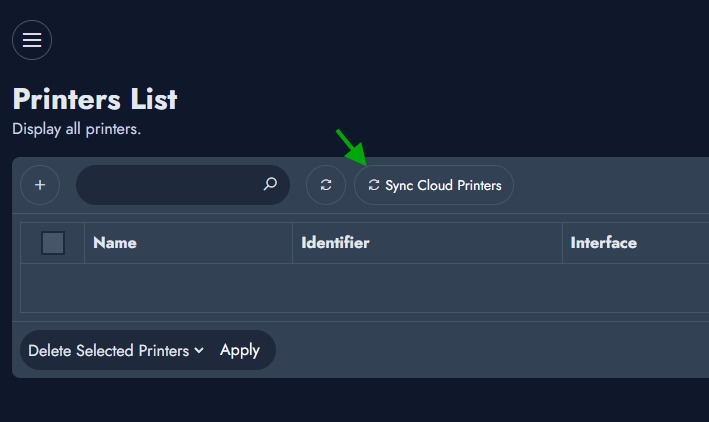
You should have all the printers listed on Nexo Print Server available on NexoPOS.
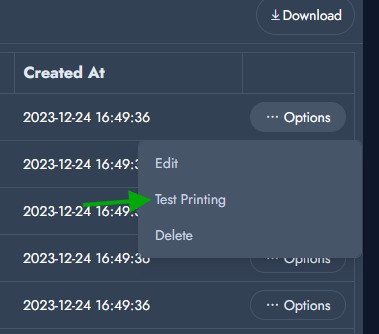
Wether you're using the Local Print or the Cloud Print, you'll be able to test the print from the printer list. Click on the options for the printer you want to test and then "Test Printing".
From Nexo Print Server, you're able to see a log of the print job by clicking on "Log"
This module makes Nexo Print Server be compatible with NexoPOS
If you already have purchased the product, you can download it from your account downloads.