Mail: [email protected]
Phone: +1(424)231-4091
If you already have purchased the product, you can download it from your account downloads.
SMS Utility is a marketing tool that helps you reach your customer through SMS. This module allows you to create SMS Campaigns that can be automatically sent or scheduled.
An SMS Campaigns can be scheduled which means it's created and sent at a specific moment to customers belonging to a specific group or automated. Automated campaigns are sent when a specific event occurs in the store. For example, after a sale or new procurement. Here is the list of supported events :
At the moment the SMS utility supports 3 providers which are :
We've added the notifications for testing purposes.
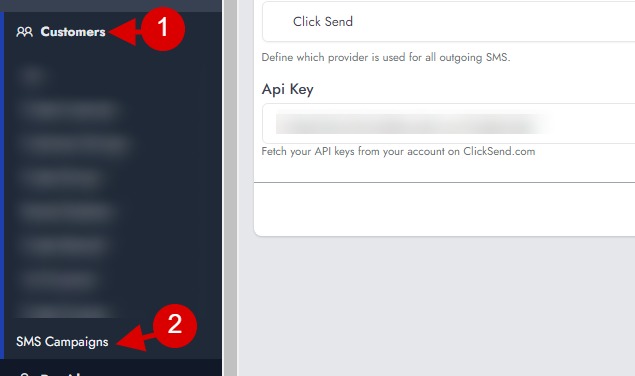
After the installation, you should choose which provider you would like to use first from the settings added on the Settings menu.

Every provider has his own settings. You'll need to get some API details from your selected provider :
Don't forget to fill in the settings accordingly and save them.
To create a campaign, you need to head to the customers > SMS Campaigns.
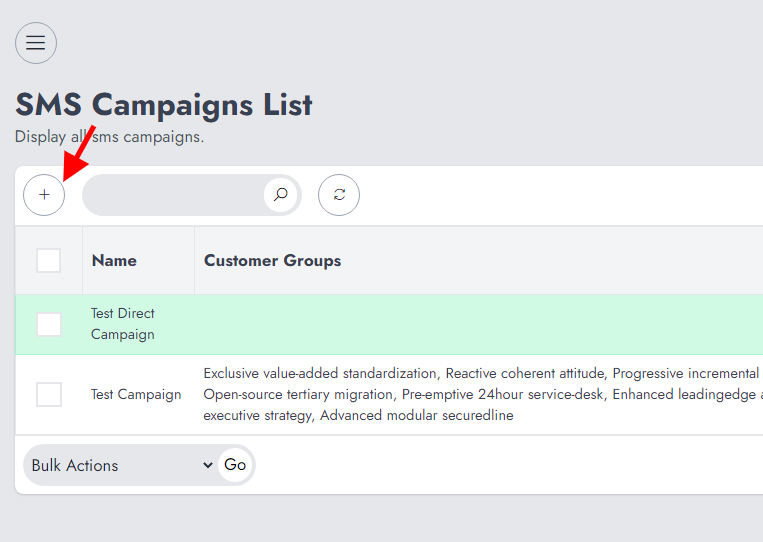
From there, you'll see a list of campaigns that have already been created. Since you're probably creating your first campaign, the table will be empty. Now click on the "+" to create a new campaign.
The campaign creation has 3 sections :
While we don't necessarily need to explain how to use the Title section (as it's just for providing the campaign name), we'll see how to use the Event Manager and the Campaign Details.
This is where you'll set up an automated event that will trigger the campaign. You need to click on the right button to unwrap it.
From there, you'll select the event and the value. Note that some event doesn't need a value, so any value provided for such an event will be ignored. From the list of rule, all rule having "X" will use the value provided on the field below.
For example, if you select the rule "X day(s) before sale due" and set 2 on the field "value". The campaign will trigger "2 days before a sale turn due".
Every rule that doesn't have the mention "X" doesn't support value. For example, if you select the rule "On Sale Complete" that will trigger immediately when a sale is complete.
Here is the list of available rules and how they can be used :
Note that only one rule can be added at a time. Once you're set click on "Add Rule".
The campaign details are where you'll define :
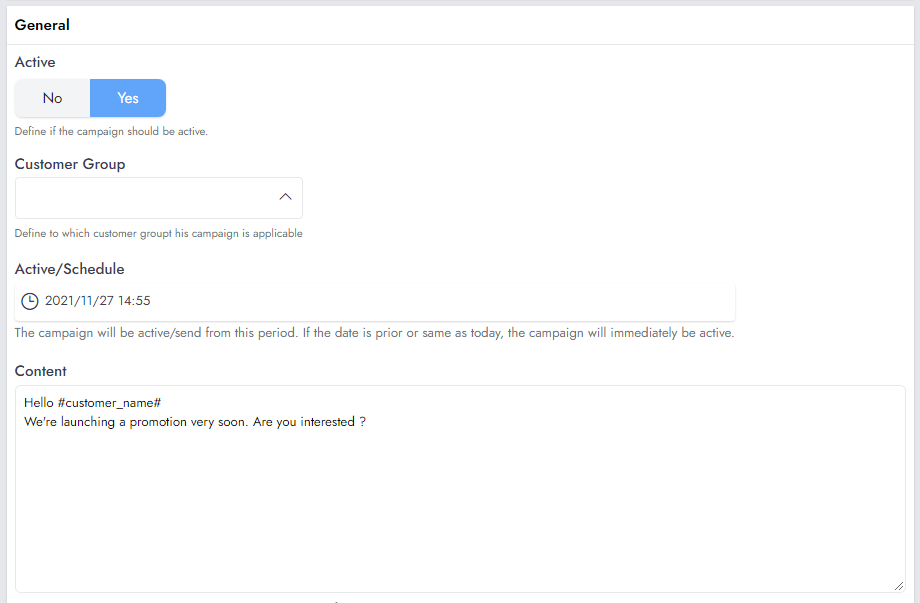
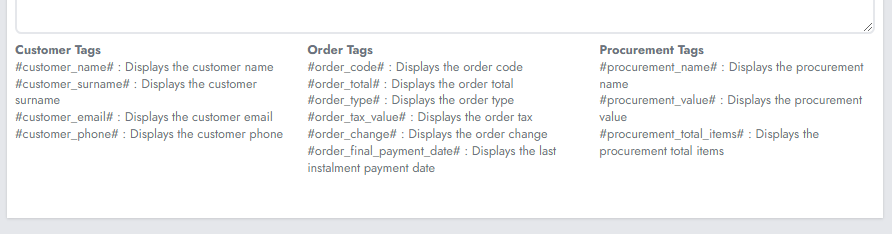
The Campaign Content supports dynamic values. These values are replaced before being sent with the real values. For example #customer_name# will be replaced with the customer name, #order_total# by the order total, etc.
Note that some dynamic values might be available considering the context. Let's say you would like to schedule a birthday wish for your customers. This means that using #order_total# doesn't make any sense as the campaign is not about an order.
All the supported dynamic values are shown below the "Content" textarea.
Let's now answer some of the questions you might ask yourself while using this module.
You just have to edit the campaign and set that as not active.
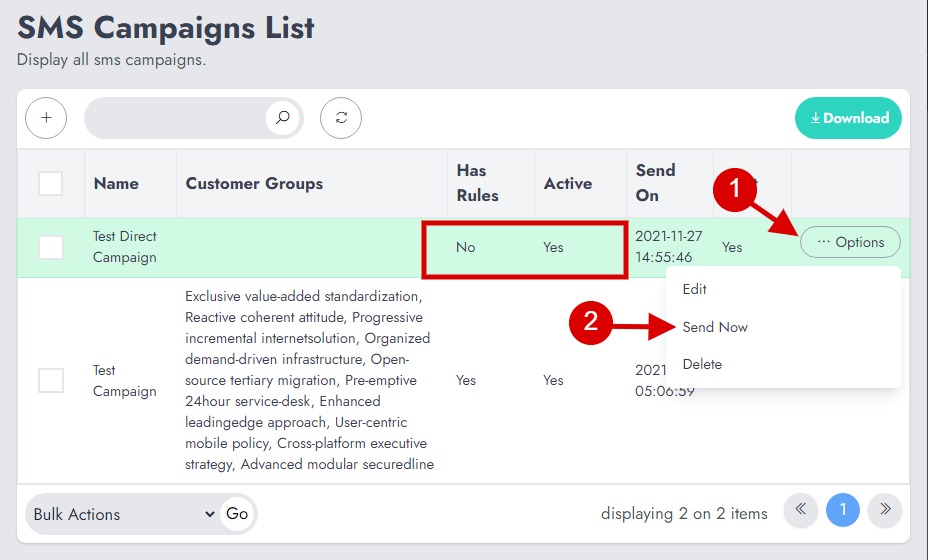
A direct campaign is one that is sent without a schedule. While we rather suggest you use this for testing purposes, you can still use it for your customers. In order to send Direct Campaign, you just need to make sure the schedule is prior to your server date. Make sure to check your timezone on the settings. Alternatively, from the campaign list, on "Direct Campaigns", you'll see a "Send Now" button on the options.
Are you having an issue using this module? Let's us know.
Provides a convenient way of exporting modules settings for an...
WooCommerce Sync For NexoPOS 4.x is a module that ensures...
If you already have purchased the product, you can download it from your account downloads.