Mail: [email protected]
Phone: +1(424)231-4091
Deploy NexoPOS in 1 minute for free. No credit card required. Deploy Now
Deploy Now
If you already have purchased the product, you can download it from your account downloads.
This module has been designed to ease updates for NexoPOS 4.x and his module. This guide will therefore explain how to use this module and update your NexoPOS installation with just one click.
This module only works for NexoPOS 4.x users having a valid and still supported license. This module doesn't work for NexoPOS 3.x. At the moment, this module has only been tested on most versions of NexoPOS starting from 4.5.0. We, therefore, do not recommend anyone using this module on previous versions.
If you rather like to see how to configure this module and learn how to update NexoPOS 4.x, then you can watch this video.
Before using this module, you need to download and install that module on your installation. We've written a tutorial that explains how to install a module on NexoPOS. Once the module is installed, only the administrator will be able to configure it, but this goes after having performed the following tasks :
First of all we need to create a API Client. If you want to learn more how it works, you can read this guide. However, while creating your client, you need to specify a different redirection URL, which should be like : "https://yourwebsite.com/dashboard/mns/callback".
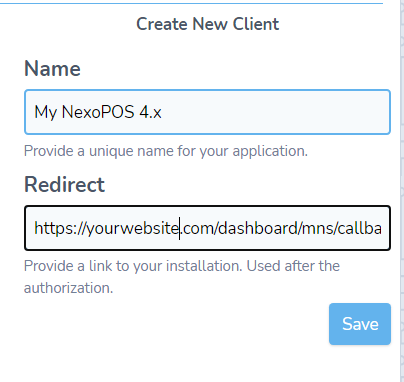
Make sure to replace "yourwebsite.com" with your domain where NexoPOS 4.x is installed. Regarding the "Name", you can writing anythnig that gives sense to you. Once you're set, press "Save".

Once you're done, you'll end-up with something like this. Now you need to grab the App ID and the Secret Key, to save it to the Settings > Update Settings.
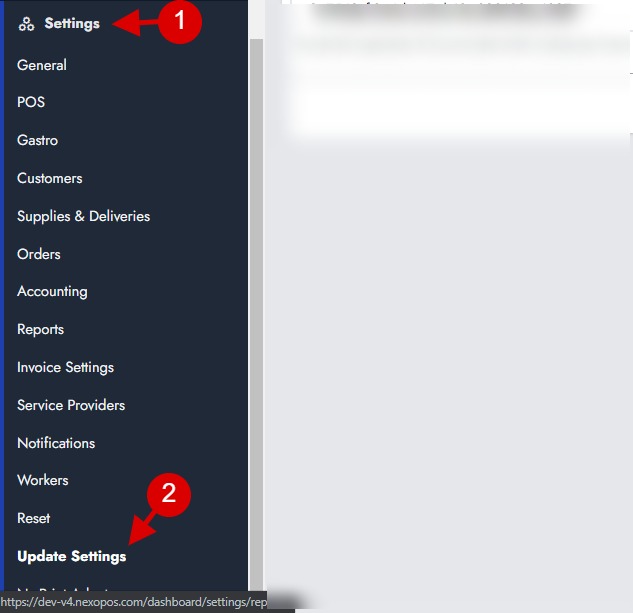
Now, you'll see a settings page with two fields. Put the App Id and Secret key respectively on their fields.
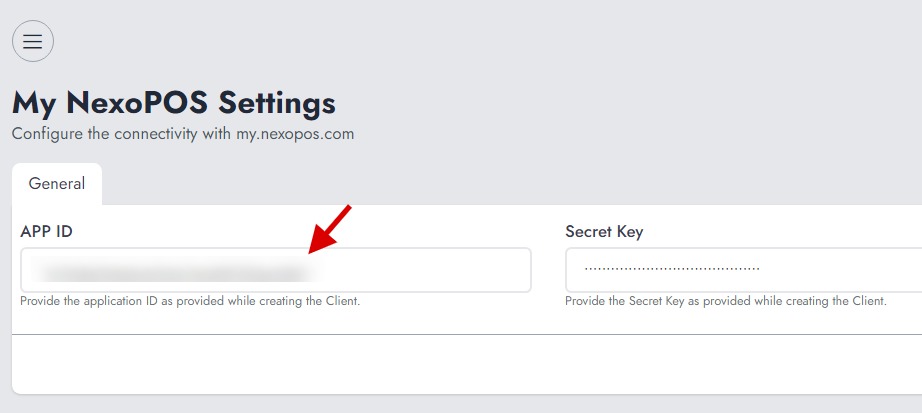
Once you're done, save the settings.
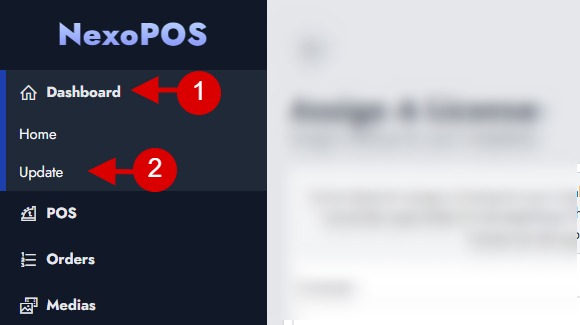
Now, you'll need to create a link with my.nexopos.com. For that, you need to access the menu "Dashboard > Update".
You'll then see the authentication page that request you linking your NexoPOS installation with my.nexopos.com.
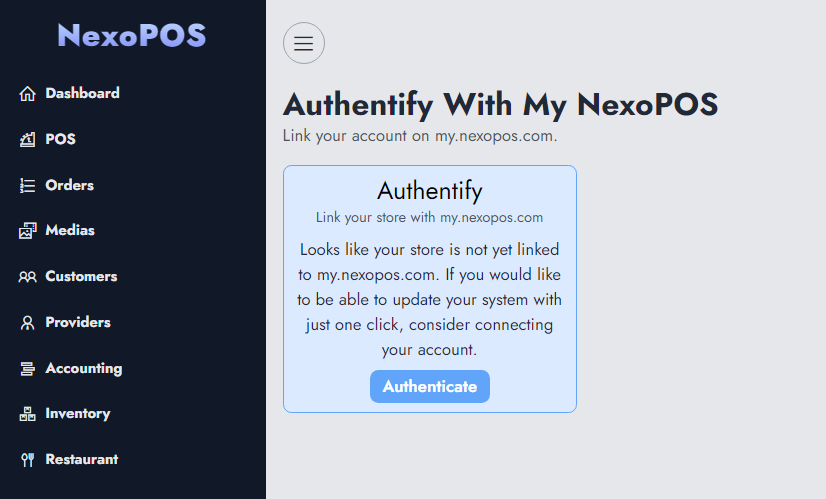
You just have to click on "Authenticate" to launch the authentication process. This will take you to my.nexopos.com and you should see a page like this.
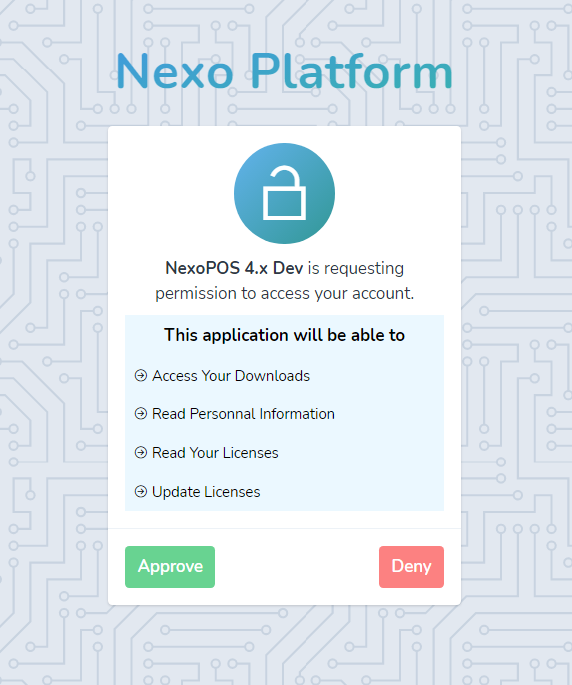
Now you just have to approve the request and you'll be redirected to NexoPOS 4.x. Now you'll need to select to which license you would like to attach your installation. Note also that once a license is attached to that domain until the license is disabled, you won't be able to attach that license elsewhere.
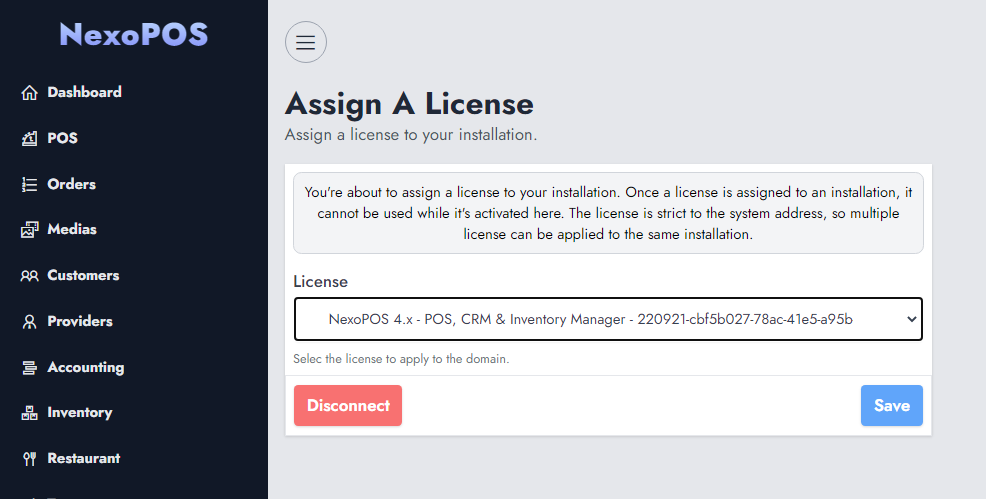
You now have to click on "Save" to proceed and you're done.
Once you have validated your license, while accessing the menu "Dashboard > Update", you'll land on the update center.
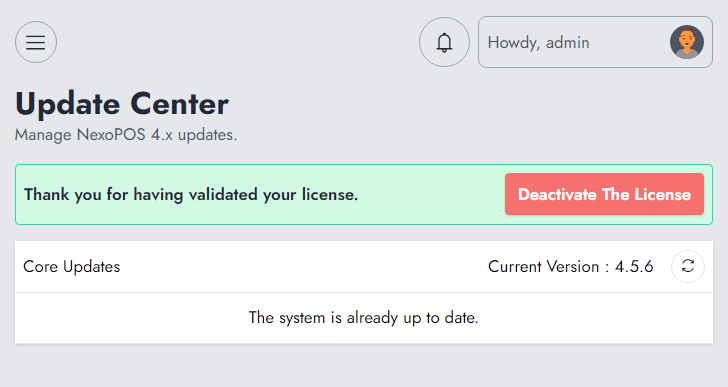
Every time you access this page, NexoPOS checks if there is a new update. In case there is a new update, you'll be able to see that like this.
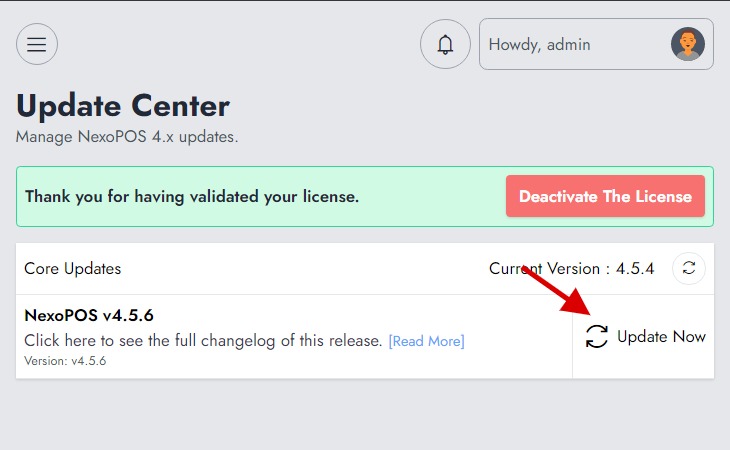
Now, by clicking "Update Now", you'll be able to proceed with the update.
Despite NexoPOS 4.x perform a backup of your database, you still need to keep your database safe.
Sometimes, you might want to attach a license to another domain. In that case, you'll need to click on "Deactivate the license". This will however prevent the current installation from being able to install updates until you assign another license to that installation.

Provide a quick login option for your restaurant or store...
Google Double Factory Authentication or Google 2FA adds an extra...
Google reCAPTCHA secures your login page and registration page against...
If you already have purchased the product, you can download it from your account downloads.