Email Service Driver
If you already have purchased the product, you can download it from your account downloads.
Version v5.3.1
Download 43
Last Update Jun 16, 2025
The ESD, or Email Service Driver, is a module that facilitates the integration of known and recommended Email Services for NexoPOS. Using the default mail function provided on regular PHP applications tends to be inefficient, and emails sent that way either do not arrive or land in the Spam folder.
With the ESP, you can configure services like Mailgun, SendGrid, PostMark, or any SMTP on NexoPOS. Some of these services offer a free tier, allowing you to send emails for free.
Supported Drivers
The main action will be to decide which driver you want to use on NexoPOS. Here is the list of the supported drivers :
- SMTP: here any provider with SMTP credentials is compatible
- Mailgun: it's free tier offers 100 emails per day.
- Postmark: Also offer free 100 emails per day.
- Resend: which has 3000 free emails monthly so around 300 emails per day.
For Mailgun, PostMark, and Resend, you'll need to create an account to receive their respective API keys and tokens. For security purposes, you must own the domain from which you want to send emails.
Sending Information
Before configuring the Email Drivers, we need to configure the sending information. Here we'll define the send email and send name and the reply email and reply name. On the Email settings, you'll go to the "Sender" tab to configure it.

It's a required step as emails might fail to send if you don't configure this.
Mailgun Configuration
Once you've signed for an account on the Mailgun website, we'll create a new sending domain.
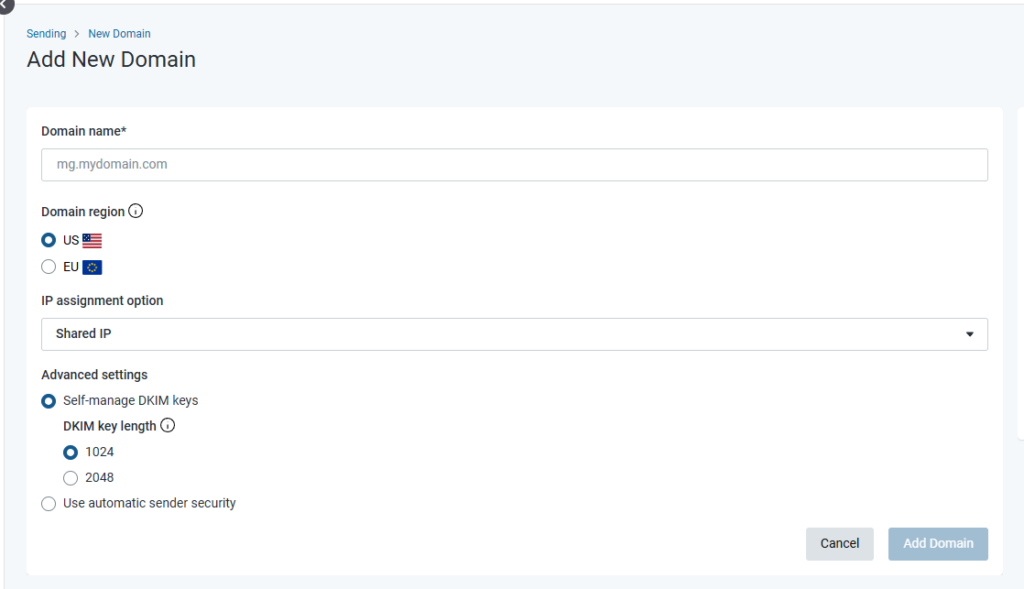
Here, we'll provide the domain (or subdomain) from which we'll send the email. Once created, we'll head to the DNS settings where we'll verify the domain. This is a crucial step for sending mail.
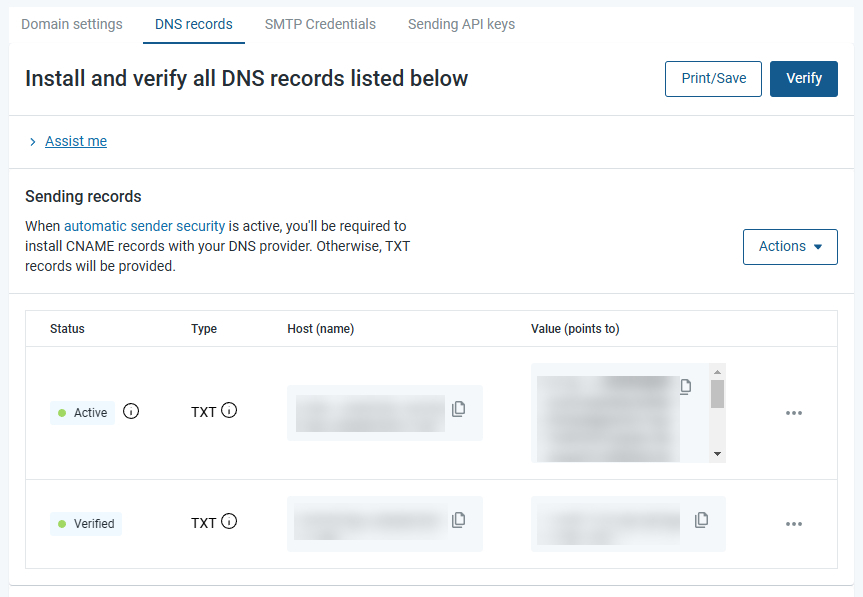
You'll make sure to copy those DNS records and create them on your domain provider. If you're using Cloudflare as a CDN, it's there you'll create those records. Once it's done, click on verify.
Now, we'll head to the API Keys to create an API for NexoPOS. You'll choose the administrator role and provide a name to the API Key.

The provided keys, store it aside as we'll use it on NexoPOS. Now head to NexoPOS on the email settings on the "General" tab and make sure to first select Mailgun as the Email Driver and save the settings. You should now see new fields or Mailgun including:
- Domain: use the sending domain name you've created
- Secret: use the API keys
- Endpoint: api.mailgun.net
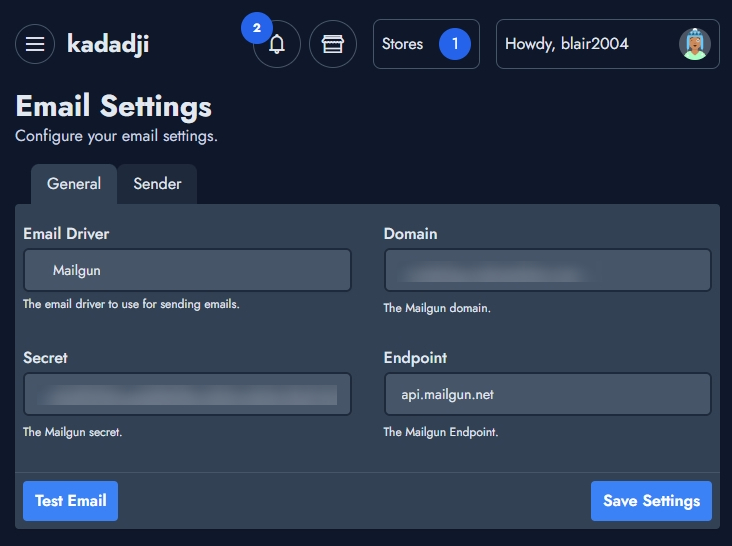
We'll click on "Test Email" which will use our email address to send a test mail. If it works, you should receive an email, if not, there should be an error on the notification center.

A typical good test mail will look like this:
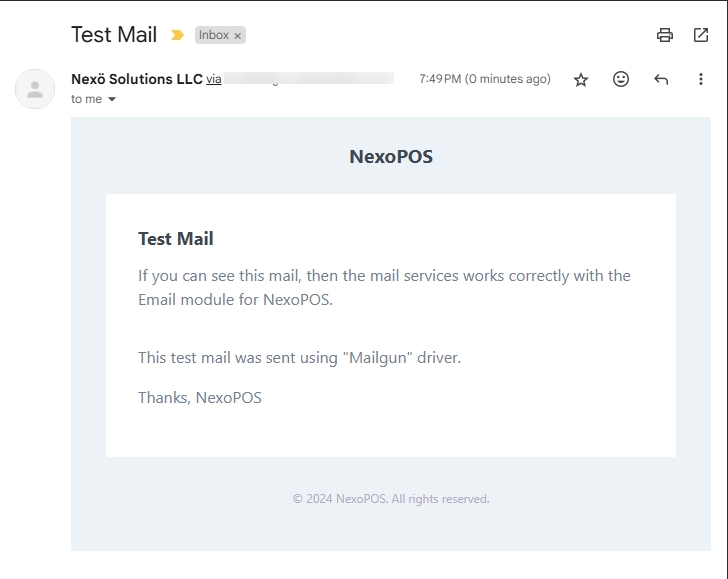
Postmark Configuration
Postmark configuration is as simple as Mailgun. Here you'll create a server by providing just a name.

Once it's done, we'll configure the Sender signature. You'll find a button on the header with that label. You'll choose if you'll send mail from only one email address or multiple. We'll keep it simple and just choose to send from one single address.
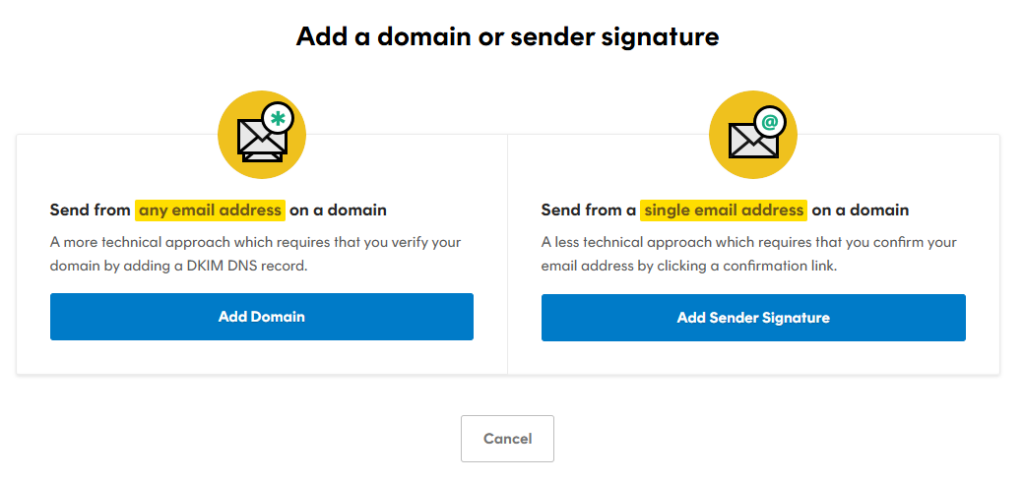
Now, you'll be asked to provide the sender information, which should match the information we've set on NexoPOS.

When you create a new signature, a confirmation mail will be sent to the address you've provided. You should check and click the link provided to verify that address. Now, we'll need to configure the DNS on our domain provider.

The DNS Settings also offers records we need to create. Once it's done, we should make sure to verify the credentials.
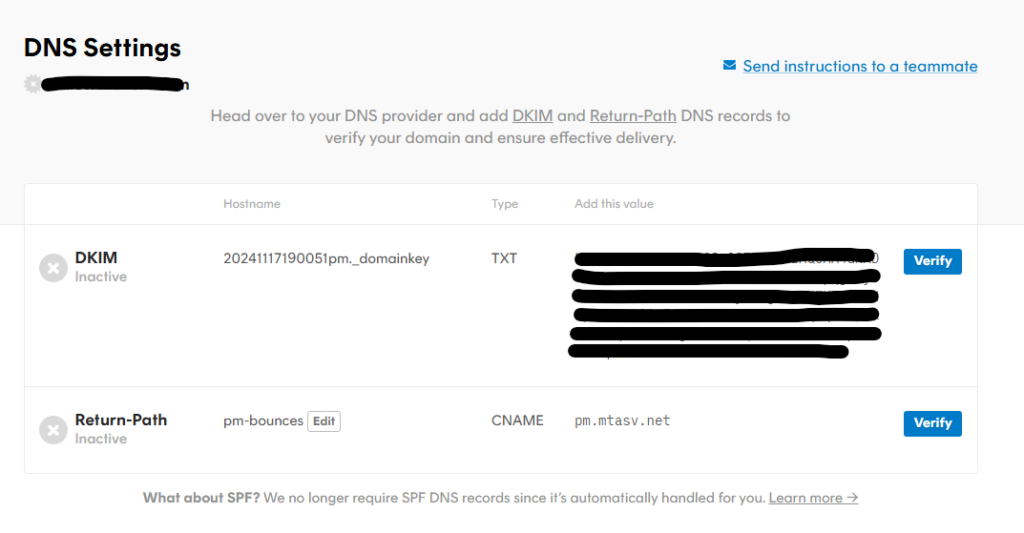
Now we need to copy the API Keys for the server we've created. You'll click on "Servers" and go to the "API keys" tab.
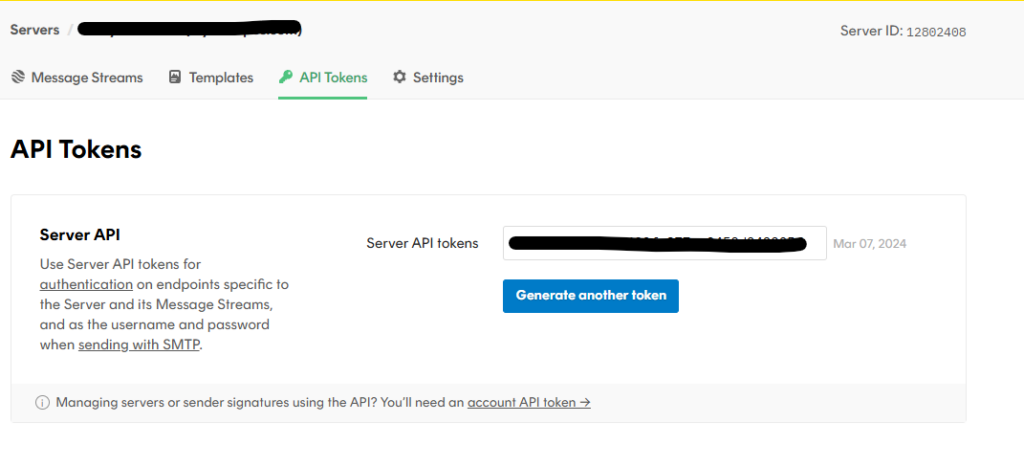
We'll now head to NexoPOS and to the Email settings. Now make sure to select Postmark and save. Once it's done, you'll see a single field for pasting the API key.
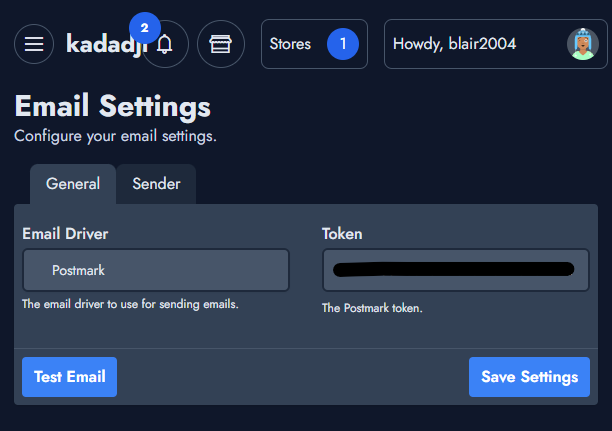
Yet, we'll click on "Test Email" to test the credentials.

You should see a test mail like this on your inbox:

Resend Configuration
After having created an account to Resend, we'll start by creating a new domain. As with previous providers, we'll configure it by providing a domain name. We'll proceed by configuring the DNS settings.

Yet again, you'll need to store all the records you see on your domain manager. In our case, we're using Cloudflare as you can see above. Don't forget to verify the records once you're done.
Now head to the API keys to create new API keys that we'll use on NexoPOS.

Note that, you'll specify to which domain this API has access. When you're done, head back to NexoPOS settings, select Resend as the default Email Driver, and save the settings. You'll then see a new field for the Resend API key.
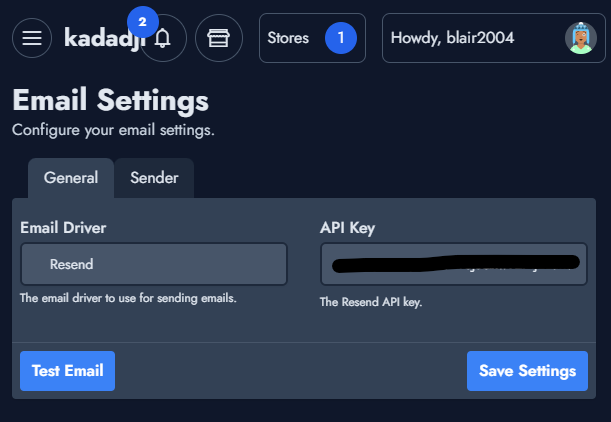
Also, we'll make a test using the "Test Email" button. We'll see an output like what follows:

SMTP Configuration
When you select the SMTP as the Email Driver, you just have to provide the credentials on the fields that appear after you save the settings.

Don't forget to test the Driver once you've provided all the necessary information.
Recommended Modules
$49.00
WooCommerce Sync for NexoPOS
WooCommerce Sync For NexoPOS 4.x is a module that ensures...
- v5.3.1
- Jun 4, 2025
$10.00
Socialite For NexoPOS
Socialite for NexoPOS provides a convenient way for authenticating to...
- v6.0.0
- May 7, 2025
$0.00
Options Export/Import
Provides a convenient way of exporting modules settings for an...
- v6.0.0
- Jun 27, 2025
If you already have purchased the product, you can download it from your account downloads.

