Mail: [email protected]
Phone: +1(424)231-4091
Deploy NexoPOS in 1 minute for free. No credit card required. Deploy Now
Deploy Now
If you already have purchased the product, you can download it from your account downloads.

The bulk Importer module helps to import resources on NexoPOS 4.x? By resources we mean: customers, customer groups, products, categories, etc. This can be made through CSV files that can be edited in real time. At his current status, the Bulk Importer allow you to :
We'll then see how to proceed with these different operations. But first of all, let's talk about how to install that module.
The bulk importer is a NexoPOS 4.x module and therefore should be installed from the modules section. This tutorial explains how you can proceed to the installation.
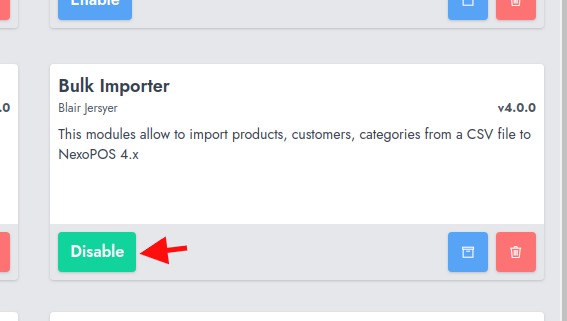
Once the module is installed, make sure to enable the module.
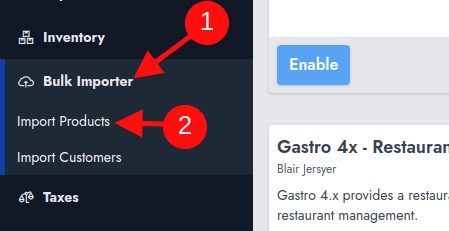
Before being able to import a product, you need to create your CSV, if you don't have a file to get started, you can use this sample file. Now, let's head to the Bulk Import > Import Products.
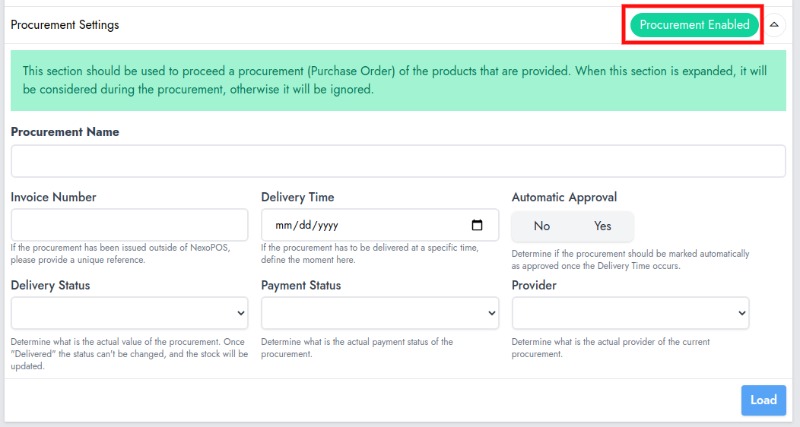
This takes you to a UI where you can either make a procurement and import products. However, in this section, we'll show you how to import products only.
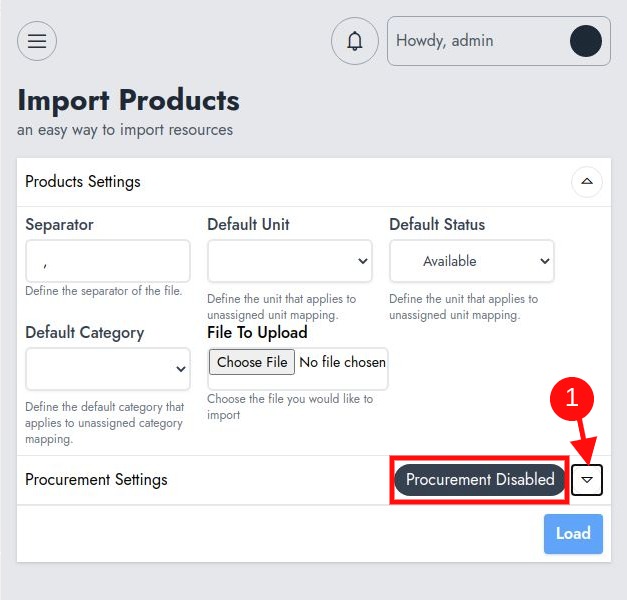
We'll then first make sure to disable the procurement section by clicking on the button close to "Procurement Enable". When the label switch to "Procurement Disabled", that means the procurement has been disabled.
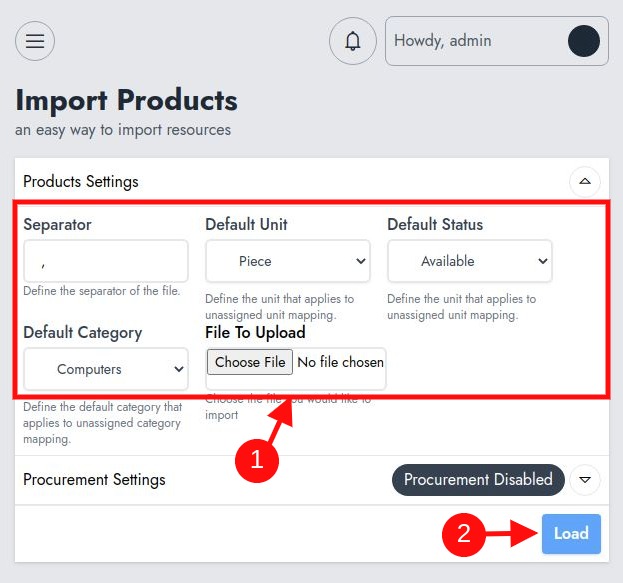
We now need to fill the fields and to provide the CSV on the field "File To Upload", then click on "Load".
If everything is correctly made, you should be able to see a new section at the bottom of the product settings. That section displays the columns detected on the CSV file and you now have to make a mapping with NexoPOS value.
This literally means that your CSV doesn't need to follow a specific structure as during the import you can adjust the mapping.
If you would like to see the value that will be imported, click on the "Show" Button.
Once you're done, you just have to click on "Import" and the process will start.
In the case of the duplicated column: which means you have assigned a column more than once to the CSV column, you'll have to make sure to only assign one.
Duplicate Value: If you're importing products, some column might have a unique value (if it's assigned to SKU or barcode). Use the "Show" button to see the duplicated values and edit that directly.
The Bulk Importer module can also be used for processing a procurement. This can be an ideal solution if using the default UI looks long or if you already have a CSV file of products that you would like to procure. Here, In order to make a procurement during the import, we need to click on "Enable Procurement" (this is enabled by default).
Now, the form available includes most of the information we already have on the procurement section. You'll then have to provide:
Once you're done with that, you just need to click on "Load". Same as the import, if there is an issue during the process, you'll be notified.
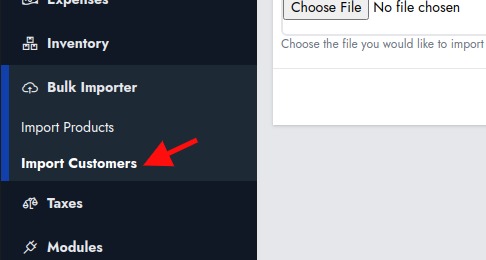
If you have a list of customers, you probably want to import them on NexoPOS 4.x. This feature allows you to use a CSV file to import your customer. To get started, head to Bulk Importer > Import Customers.
The form available there looks similar to what is available on the product importation. However here, there are fewer options to fill. To get started, you need to define the default options the default Customer Group and the default Reward system applicable to the customers.
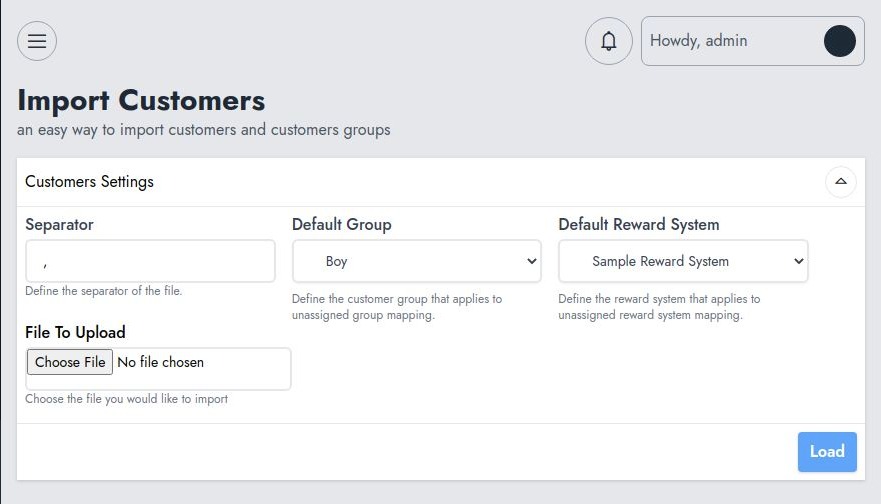
Here is a sample CSV file you can use for testing the upload feature. Regarding the default options, if there is not group mapping or the group value is empty, the default group will be used. The same applies to the Reward System.
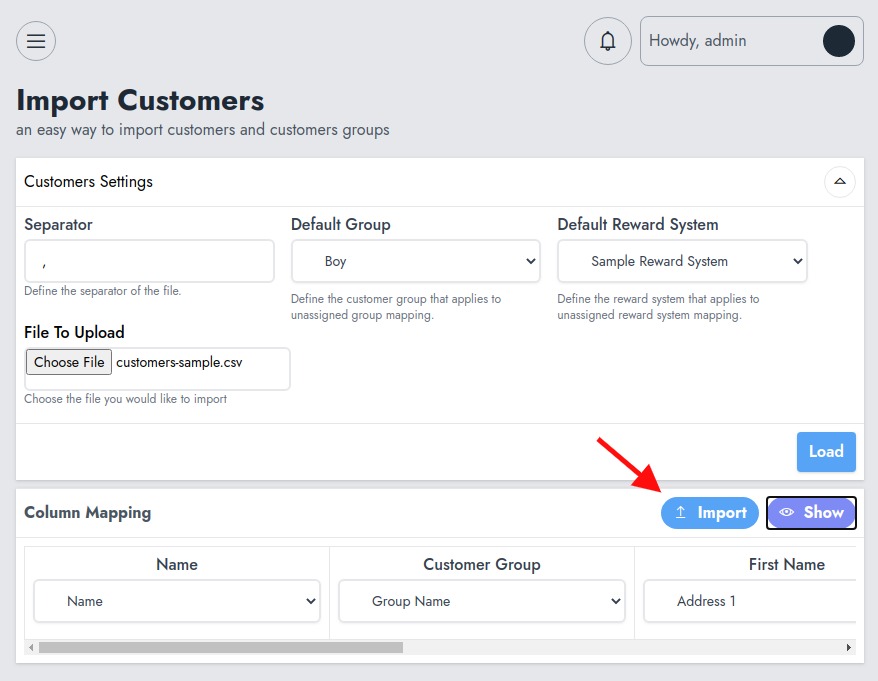
While doing the mapping you can also preview the CSV and apply changes before uploading. You must at least provide a name for your customer. It's also recommended to provide a unique email address for each customer.
Nexo MultiStore Module adds a capacity to create various instances...
If you already have purchased the product, you can download it from your account downloads.