Documentation
Everything you need to know about NexoPOS.

Module's Generation
Creating a module is the first step to extending NexoPOS by adding or modifying existing features. This guide will show you how to create a module using Laravel CLI and NexoPOS commands.
How To Generate A Module
While a module can be created manually, the easiest way to create a module is by generating it using a specific command that will create your module's folders and files. You'll be asked to provide some information (name, version, author) and that's all. The requirement to create an installation is to have access to the CLI of your NexoPOS installation. From the CLI, you need to type the following command :
php artisan make:moduleThen will follow a set of instructions that will request the following information:
Module Namespace
The module namespace is a unique identifier for the module. It will be used as your module folder name, and within the namespace of the module. Therefore, this namespace should not contain any special characters (éèçà...) or any space. Since it's used as a PHP namespace, it shouldn't start with a number either. Note that all NexoPOS modules namespace are led with "Ns". For example for Gastro, the namespace is "NsGastro", for the multistore module it's "NsMultiStore". In that case, "Ns" is a reserved leading keyword for namespaces.

Module Name
the module name is a name that will be read by the human. This name should remain unique to avoid any confusion with the existing modules' names. Here, you can use special characters (éàçà..) and even space. The name can even start with a leading number.

Author Name
This is the place where you'll mention your name as the author of the module. Same as the module name, you can use special characters and spaces. We'll however advise to avoid too long names.

Short Description
The short description should explain how the module is helpful for the users. It shouldn't be used to provide instruction on how to use the module, therefore this section shouldn't have that many words. The more you're accurate on the description, the better.

Confirming The Information
Once you're done providing all the requested details, you'll be asked to confirm your module information. NexoPOS will display on a table a summary of your module, which will look like this :

You'll then have to create "Yes" or "No" if you believe something wrong. Once the module has been created, the folder will be added to the "modules" directory.

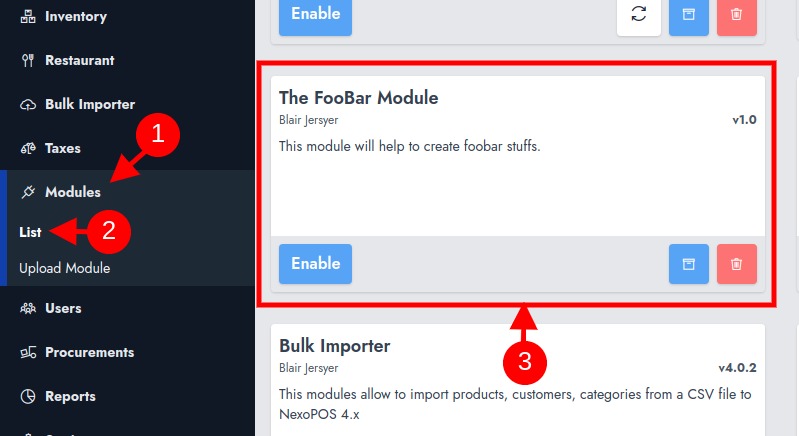
This is how your module will look like. While logging to NexoPOS 4.x and accessing the module, you should see your module is available but not enabled.

You've successfully created a module on NexoPOS, Here are other topics you can explore :
