
Oxen connects a NexoPOS store to Codex through the Model Context Protocol (MCP). After the connection is configured, Codex can use the NexoPOS tools allowed by the Oxen token—for example, to find products, review low-stock items, summarize sales, look up orders, and, when permitted, create records.
This guide covers the local ChatGPT desktop app (Codex), Codex CLI, and Codex IDE extension. These clients share the MCP configuration on the same Codex host. ChatGPT on the web does not read a computer's local Codex configuration; web users need an installed plugin that provides the remote MCP connection.
What the connection does
The data path is:
Your request in Codex → Oxen MCP server → your authorized NexoPOS store
Oxen supplies the tools and trusted store context. Codex decides which tool to call from your request, Oxen checks the token's permissions, and NexoPOS returns the permitted result. The token determines which store and capabilities are available, so a store identifier should never be added manually to a prompt or tool call.
The Oxen endpoint used in this guide is:
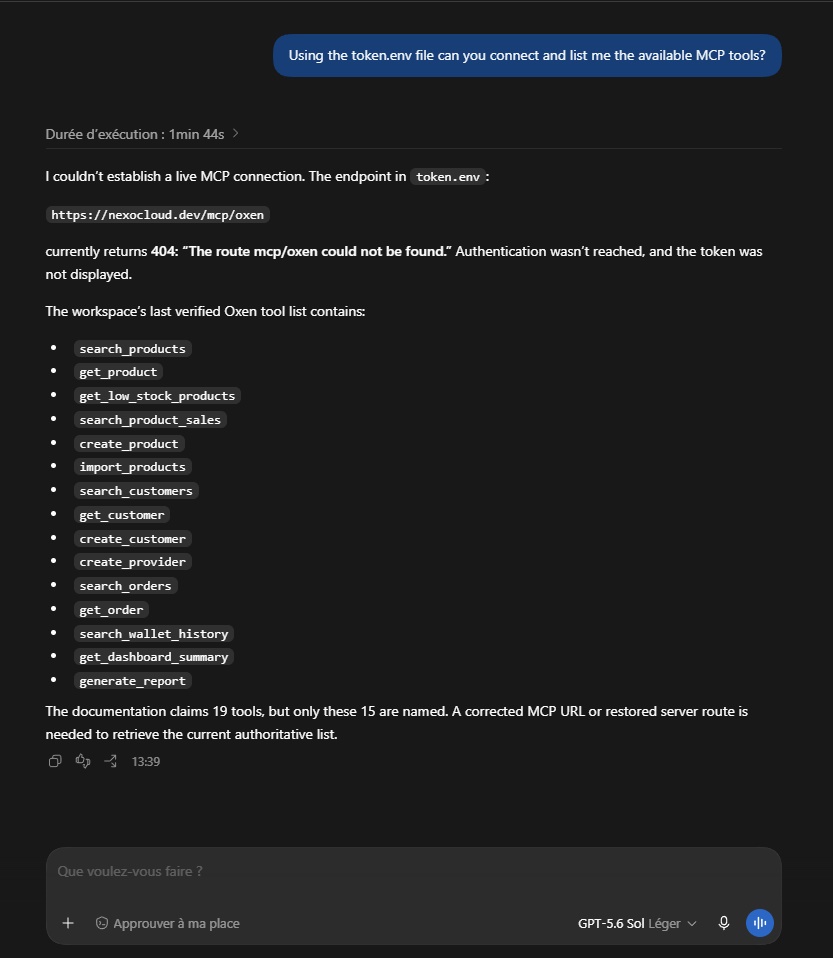
https://nexocloud.dev/mcp/oxenOxen uses Streamable HTTP and bearer-token authentication. During verification for this guide, the endpoint completed an MCP handshake as Oxen 2.0.0 using protocol version 2025-06-18.
Requirements
Before starting, make sure you have:
- A working NexoPOS installation connected to Nexo Cloud/Oxen.
- An Oxen access token with the permissions needed for the intended tasks.
- The ChatGPT desktop app with Codex, Codex CLI, or the Codex IDE extension.
- A trusted local project if you want the configuration to apply only to one project.
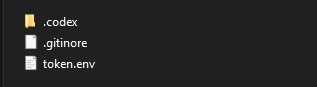
The examples below assume the project contains a private token.env file with this structure:
TOKEN="replace-with-your-oxen-token"
URL="https://example.com/mcp/oxen"
Do not paste the real token into documentation, prompts, screenshots, commits, or config.toml.
Protect the token first
Add token.env to the project's .gitignore before committing any project files:
token.env
If the token has already been committed or shared, removing the file from the latest commit is not enough because it may remain in Git history. Revoke the exposed token in NexoPOS/Nexo Cloud, issue a replacement, and then update token.env.
Use the narrowest token permissions that cover the user's work. A reporting workflow normally needs only read tools; it should not automatically receive customer, supplier, or product creation permissions.
Option 1: Connect with an environment variable
This is the simplest setup for Codex CLI or for an IDE launched from the same terminal session.
1. Load token.env in PowerShell
Open PowerShell in the project directory and run:
$oxenSettings = Get-Content -LiteralPath .\token.env | ConvertFrom-StringData
$env:OXEN_TOKEN = $oxenSettings.TOKEN.Trim('"')
This sets OXEN_TOKEN only for the current PowerShell process and programs launched from it. Closing the terminal clears it.
2. Add the MCP configuration
Create or update .codex/config.toml in the project:
[mcp_servers.oxen]
url = "https://example.com/mcp/oxen"
bearer_token_env_var = "OXEN_TOKEN"
enabled = true
required = true
startup_timeout_sec = 20
tool_timeout_sec = 60
default_tools_approval_mode = "writes"
Project-scoped MCP configuration is loaded only for trusted projects. To make the server available in every local project, put the same table in the user configuration at ~/.codex/config.toml instead.
default_tools_approval_mode = "writes" lets read-only tools run normally while asking for approval before tools that are not marked read-only. Keep this setting unless your organization's policy requires every call to be approved.
3. Start Codex from the same terminal
Launch the client from the PowerShell session that contains OXEN_TOKEN. For Codex CLI:
codex
If an IDE is launched from a different shortcut or an already-running process, it may not inherit the temporary environment variable. Restart it from the prepared terminal or use Option 2.
Option 2: Let Codex read token.env through a header helper
This option is convenient for the ChatGPT desktop app because it does not depend on the app inheriting a temporary terminal variable. Codex supports a local http_headers_helper command for Streamable HTTP servers. The command must print a JSON object containing the request headers.
1. Create a local header-helper script
Create tools/Get-OxenHeaders.ps1 with the following content:
$ErrorActionPreference = 'Stop'

$projectRoot = Split-Path -Parent $PSScriptRoot
$tokenFile = Join-Path $projectRoot 'token.env'

if (-not (Test-Path -LiteralPath $tokenFile)) {
    throw "Oxen token file not found: $tokenFile"
}

$settings = Get-Content -LiteralPath $tokenFile | ConvertFrom-StringData
$token = $settings.TOKEN.Trim('"')

if ([string]::IsNullOrWhiteSpace($token)) {
    throw 'TOKEN is missing from token.env'
}

@{ Authorization = "Bearer $token" } | ConvertTo-Json -Compress
The script prints only the header JSON that Codex needs. Do not add diagnostic output because extra text would make the helper response invalid.
2. Configure the Oxen server
Add this to .codex/config.toml, replacing the path with the absolute path to the helper script:
[mcp_servers.oxen]
url = "https://example.com/mcp/oxen"
http_headers_helper = "powershell.exe -NoProfile -NonInteractive -ExecutionPolicy Bypass -File 'C:\\path\\to\\project\\tools\\Get-OxenHeaders.ps1'"
enabled = true
required = true
startup_timeout_sec = 20
tool_timeout_sec = 60
default_tools_approval_mode = "writes"
Use only one authorization method. Remove bearer_token_env_var when using http_headers_helper; an explicit bearer-token source takes precedence over a helper-provided Authorization header.
3. Trust and restart
Open the project in the ChatGPT desktop app and trust it when prompted. Then restart Codex so it reloads the MCP configuration. In the desktop app, the equivalent UI path is Settings → MCP servers. The official setup flow is to add a server, choose Streamable HTTP, provide its URL, save, and restart.
Verify the connection
In the ChatGPT desktop app or Codex terminal UI, enter:
/mcp
Confirm that oxen is enabled and connected. In a terminal outside the Codex TUI, you can also run:
codex mcp listImage placeholder: A screenshot of the /mcp panel showing Oxen as enabled and connected. Crop out unrelated servers and account information.
Then start with a harmless, read-only request:
Use Oxen to show me five products. Return only each product's name, SKU, and current stock.
Other useful verification prompts include:
Use Oxen to list the products that are at or below their low-stock threshold.

Use Oxen to summarize paid, unpaid, partially paid, tax, and income totals for this month. Do not create or modify anything.

Use Oxen to search for order NS-1001, then show its line items. Do not make changes.
Codex should show an Oxen tool call and return store data. If it answers from general knowledge without calling Oxen, explicitly say “Use the Oxen MCP server” and check /mcp again.
Available Oxen capabilities
The exact list depends on the token's permissions. The verified server exposed these tools:
Products and inventory
- search_products: find products by name, SKU, or barcode.
- get_product: retrieve one product by its numeric identifier.
- get_low_stock_products: find alert-enabled stock at or below its threshold, with shortage information.
- search_product_sales: return bounded aggregate product sales ranked by value.
- create_product: create one simple materialized or dematerialized product using existing category and unit identifiers.
- import_products: atomically import between 1 and 50 simple products, with category and unit resolution.
Customers and suppliers
- search_customers: search by name, email, or phone.
- get_customer: retrieve a customer and account totals.
- create_customer: create a customer and optional billing or shipping addresses.
- create_provider: create a supplier/provider from allowlisted contact fields.
Orders, finance, and reporting
- search_orders: search by order code, date range, or payment status.
- get_order: retrieve an order and its line items.
- search_wallet_history: retrieve bounded customer wallet statement entries.
- get_dashboard_summary: return paid, unpaid, partially paid, tax, and income totals for a date range.
- generate_report: create a branded PDF/HTML-preview report or CSV export from bounded report sections.
Oxen also exposed safe reference resources for the current store configuration, payment types, product categories, and tax groups. Codex can use those resources to choose valid identifiers and format results for the connected store.
Image placeholder: A Codex conversation showing a read-only low-stock request, the Oxen tool call, and a short redacted result table.
Read actions versus write actions
Searches, lookups, summaries, and reference-resource reads do not modify NexoPOS. Creation and import tools do.
Before approving a write call, review every field shown by Codex. In particular:
- Check names, prices, barcodes, SKUs, category IDs, unit groups, and tax settings.
- Use a unique idempotency_key for each intended write. If a request must be retried, reuse the same key so a network retry does not create a duplicate.
- Confirm customer and provider contact details before transmitting them.
- Test write permissions with a clearly named temporary record only when your store policy allows it, and remove it later from NexoPOS if appropriate.
- Remember that import_products is atomic: the whole batch rolls back when any row fails.
A safe two-step prompt is:
Prepare the Oxen arguments for a new product named “House Blend 250 g” at 12.50. First read the available product categories and units. Show me the proposed values, but do not call create_product until I approve them.Image placeholder: A screenshot of Codex displaying a proposed create_product action and waiting for approval, with store-specific identifiers redacted.
Practical requests after setup
Once the read-only checks work, Codex can handle multi-step questions such as:
Use Oxen to find low-stock products, rank them by shortage, and explain which five need attention first. Do not modify inventory.

Use Oxen to compare this month's dashboard totals with last month's. Show the absolute and percentage changes and flag any unpaid balance.

Use Oxen to find the top 10 products by sales value, then generate a branded PDF report with KPI cards and a bar chart. Show me the planned report sections before creating the file.

Read this CSV, validate each product against the available NexoPOS categories and units, report all problems, and wait for my approval before calling import_products.
Troubleshooting
Oxen does not appear in /mcp
- Confirm that the configuration file is named exactly .codex/config.toml for a project-scoped setup or config.toml under ~/.codex for a user-scoped setup.
- Make sure the project is trusted.
- Restart the ChatGPT desktop app or IDE extension after changing MCP settings.
- Run codex mcp list and codex mcp --help from a terminal.
- Validate the TOML syntax, especially Windows backslashes and quotes in http_headers_helper.
The server returns 401 Unauthorized
- Check that TOKEN exists in token.env and has no accidental spaces.
- If using bearer_token_env_var, confirm that OXEN_TOKEN is defined in the environment that launched Codex.
- If using the helper, run it directly and confirm it produces one compact JSON object. Do not display or share the output because it contains the bearer token.
- Reissue the token if it was revoked, expired, or exposed.
The server returns 403 Forbidden
The token is recognized but does not have permission for the requested capability, or the store policy blocks it. Ask the NexoPOS administrator to grant only the required scope. Do not work around the permission boundary by placing store identifiers or credentials in the prompt.
Read tools work but create tools are missing
This is normally a permission issue, not a connection failure. Oxen exposes permission-scoped tools, so a read-only token may intentionally omit create_product, create_customer, create_provider, or import_products.
The desktop app connects but ChatGPT web does not
This is expected. Local Codex clients share the host's MCP configuration, but ChatGPT web does not read local .codex/config.toml. ChatGPT web requires an installed plugin that bundles or connects to the remote MCP server and may also be controlled by workspace administrators.
The connection times out
- Confirm that https://nexocloud.dev/mcp/oxen is reachable from the computer.
- Check proxy, firewall, and DNS rules.
- Increase startup_timeout_sec if the connection is slow.
- Keep tool_timeout_sec high enough for report generation, which may take longer than a simple search.
Security checklist
- Keep token.env out of Git and backups intended for sharing.
- Never paste a token into a Codex prompt.
- Never put the token directly in config.toml.
- Use HTTPS and the exact Oxen endpoint.
- Grant the narrowest possible tool permissions.
- Keep write-tool approvals enabled.
- Review proposed writes before approving them.
- Revoke and replace any token that may have been exposed.
- Use separate tokens for production and testing stores.
- Remove or disable the MCP entry when access is no longer needed.
Disconnect Oxen
To disable the server without deleting its settings:
[mcp_servers.oxen]
enabled = false
Alternatively, remove the [mcp_servers.oxen] section and restart Codex. Clear the current shell variable with:
Remove-Item Env:OXEN_TOKENIf the computer or repository is changing owners, revoke the token as well.