

Multistore For NexoPOS
The Nexo MultiStore module enables you to manage multiple stores within a single NexoPOS installation, all powered by one shared database. Each store benefits from nearly all the features available in single-store mode, while remaining fully isolated—ensuring that data, operations, and configurations do not overlap between stores.
Installation
This is a NexoPOS module and therefore should be installed from the dashboard. Once installed, make sure to enable the module.
Dashboard
Once the MultiStore Module is enabled, the layout of the dashboard will change, showing a new main dashboard, plus new controls.
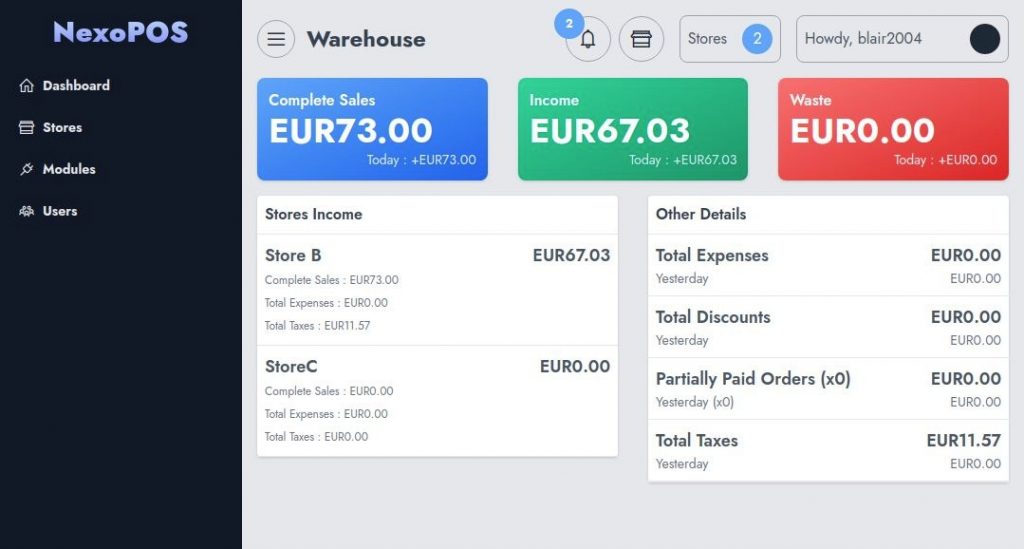
As mentioned before, every store has its own components that include:
- Products,
- Products Categories
- Customers, Customers Groups
- Unit & Unit Groups
- Providers, Procurements
- Settings,
- Orders
- Expenses Category & Expenses
- Notifications
How To Create A Sub Store
While on the dashboard, you can click either on the store shortcut pop-up or on the stores menu on the sidebar.
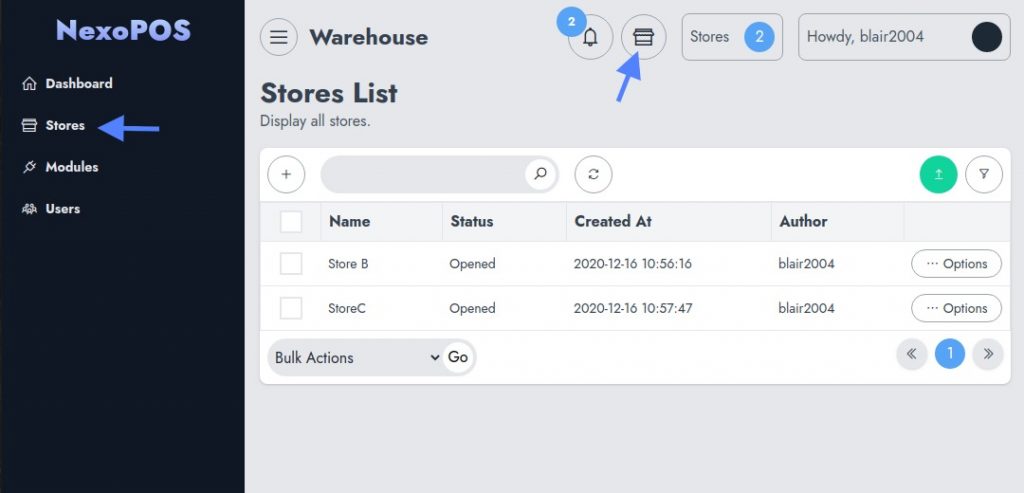
This will take you to the store list where you can create, manage, or delete stores. Click on the "+" button of the table to create a new store.
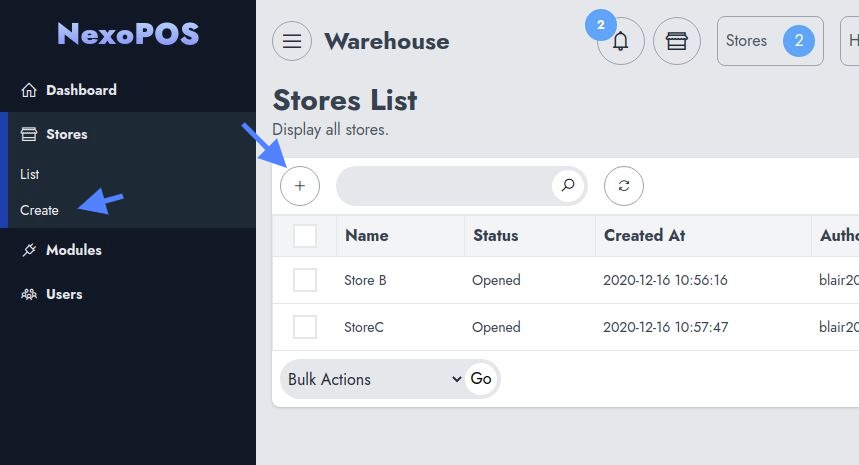
This takes you to a new screen where you can fill in the store information, such as :
- Store Name
- Status (while creating the status is always "building")
- Store Image
- Description
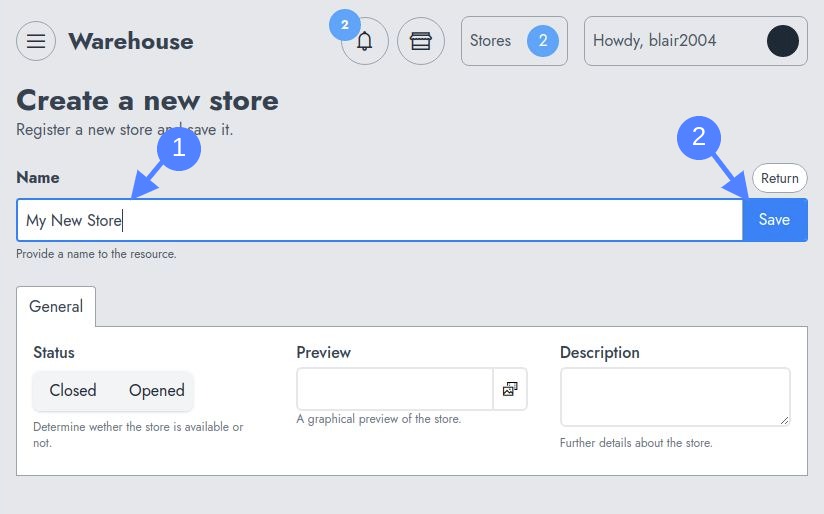
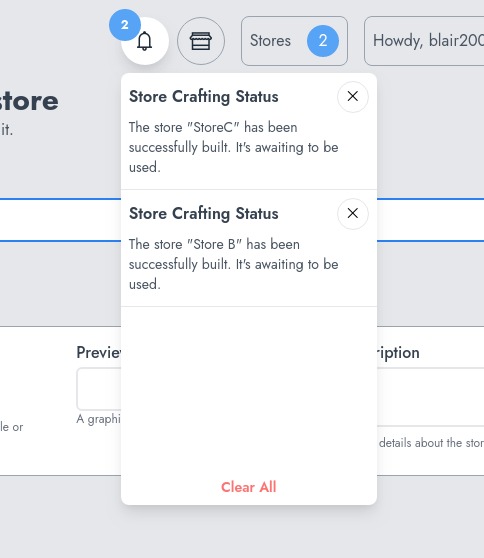
When you click on "Save", you're redirected to the store list and the sub store is being created behind the screen when the "Workers" (Or Queues) are correctly configured. After the creation, you should receive a notification that indicate the store is ready to be used.
Accessing a Store
When a store is opened, it can be accessed. In order to access a store, you need to open the "Stores" popup by clicking on the "Stores" button on the top of every page (when the multistore is enabled).
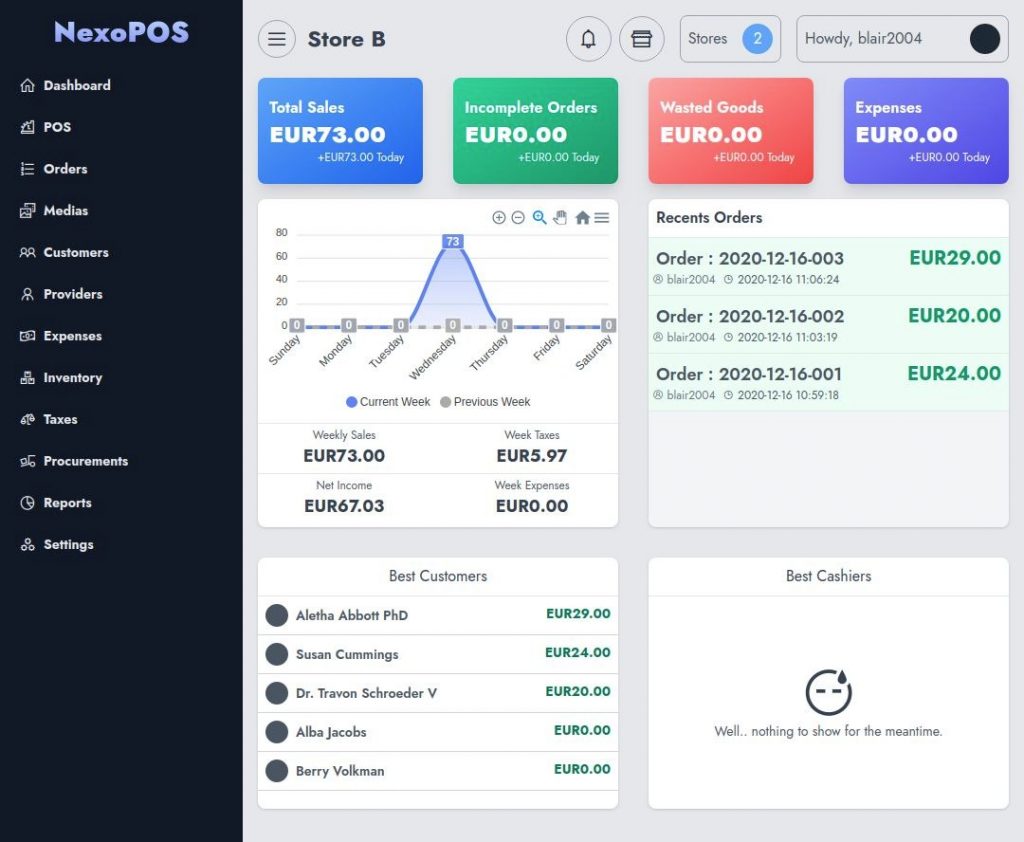
When you access a sub store it looks like a single store as it looks and works like a single store. You might even try the store by resetting that store.
How To Restrict Access To Certain Roles
Nexo Multi-Store Modules come with new permissions that grant the capacity to create, update, delete, and access a store. These permissions are to be used with the permission manager included on NexoPOS.
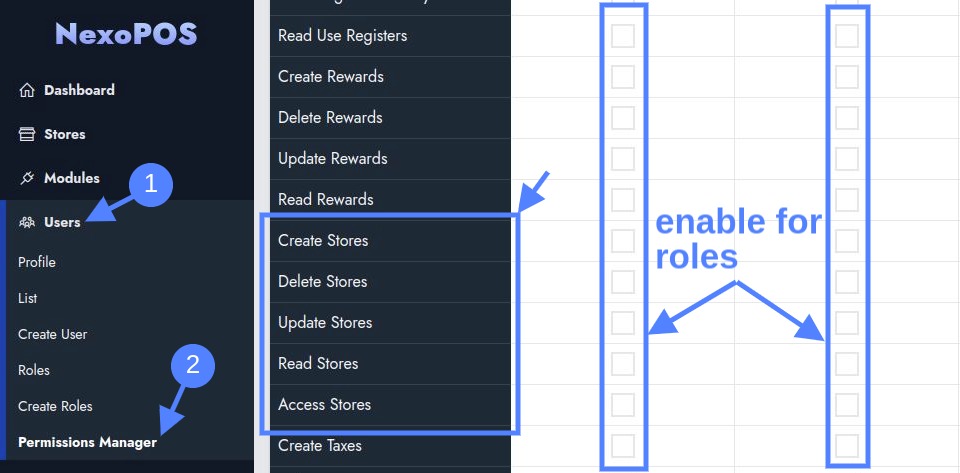
By default, the Master account and the Store Manager has access to sub-stores. In order to activate that access for other roles (even custom roles), you need to explicitly allow access.
Wildcard Domains Support
From version 4.6.0, the multistore module supports wildcard domains. This means that you can create as many subdomains and have a unique URL pointing to each sub-stores. Every store will then have a unique login page and you'll be able to restrict access to these stores. For example, if your main domain is "mypos.com", you can have for subsites the following URLs :
https://store-a.mypos.comhttps://another-store.mypos.com...
Every store is isolated and therefore isn't sharing the same resources (products, orders, customers, etc).
Let's see how to configure the wildcard domains.
Disclaimer: This feature doesn't work on localhost. You're then invited not to follow these steps or activate this feature if NexoPOS is hosted locally. Only if you have a valid domain and can configure the DNS of your domain, you'll be able to use this feature.
Enabling Wildcard Domains on NexoPOS
The first configuration is to configure NexoPOS to use wildcard domains. You'll need to add this "key" to the .env file.
NS_WILDCARD_ENABLED=trueCopy
While defining this, you must make sure your APP_URL is pointing at your actual main domain. Assuming your main domain is "mypos.com", your "APP_URL" should then either be "https://mypos.com" or "http://mypos.com" (if you're using the SSL or not).
Configuring the DNS for Wildcard Support
According to your manager, you'll need to head to your DNS configuration and create wildcard domains. In our example, we're using Cloudflare, but the configuration should work with any other provider.
We'll then head to the DNS and create a new record for our domain.
Configuring Apache to Support WildCard Domains
If you were previously using a fixed domain to NexoPOS 4.x, you'll need to edit the apache configuration for enabling wildcard support. We'll here edit the configuration file that points to our NexoPOS 4.x installation.
<VirtualHost *:80> ServerName *.nexopos.com ServerAlias *.nexopos.com DocumentRoot /var/www/html/v4.nexopos.com/public <Directory /var/www/html/v4.nexopos.com/public> Options -Indexes +FollowSymLinks +MultiViews AllowOverride All Require all granted </Directory> <FilesMatch \.php$> # 2.4.10+ can proxy to unix socket SetHandler "proxy:unix:/var/run/php/php7.4-fpm.sock|fcgi://localhost" </FilesMatch></VirtualHost>Copy
With this, when we create a store with the slug "store-a", we'll be able to access that store using "https://store-a.nexopos.com" etc.
Don't forget to restart apache once you're done with your configuration.
Declaring Stores For Sanctum
Sanctum is a library that handles authentication on NexoPOS 4.x. Every authentication should be made from a declared domain. Domains are declared (separated with a comma) on the key "SANCTUM_STATFUL_DOMAINS" from the .env file. In our example, here is how the key is defined :
SANCTUM_STATEFUL_DOMAINS=nexopos.comCopy
But if we've created let's say 3 stores with various slugs, we'll need to register the address to those stores to ensure users can log in using those domains. So here is how this key should now look like if we need to save these domains: store-a, store-b, store-c
SANCTUM_STATEFUL_DOMAINS=nexopos.com, store-a.nexopos.com, store-b.nexopos.com, store-c.nexopos.comCopy
Every time a store is created (in the meantime), you'll have to declare that new store on the .env file.